Peppers are sun-worshippers: slow to start, but once summer heat arrives they turn into some of the most productive plants in the garden. Whether you crave sweet bells for salads, thick-walled Corno di Toro for roasting, or hot jalapeños and habaneros for salsa, how to grow peppers is the same basic process, just with a little more patience and a lot more warmth than tomatoes demand.
My first pepper year, I treated them like tomatoes — same planting date, same depth, same feeding — and wondered why they sat there, pale and stunted, dropping blossoms like confetti. The lesson was humbling: peppers are tropical perennials we grow as annuals. They want heat from roots to leaf tips, from germination to harvest, and they sulk when nights dip below 55°F in a way tomatoes merely shrug at.
Once I gave them that warmth — black plastic to heat soil, a week later transplant than tomatoes, a sheltered sunny wall — they repaid me. By late July my ‘California Wonder’ bells were glossy and heavy, my ‘Jimmy Nardello’ sweets were frying peppers by the handful, and even the single ‘Habanero’ I grew for a neighbor produced enough to make a winter’s worth of hot sauce.
This guide walks you through peppers from seed to harvest, warmly and practically, so you get steady fruit from midsummer until frost without the early stumbles I had.
Quick Answer: Start pepper seeds indoors 8 to 10 weeks before the last spring frost, keeping seed-starting mix at 70 to 80°F (21-27°C) until they sprout in 7 to 14 days. Transplant after all frost danger passes and soil is at least 60°F at 2 inches — usually 1 to 3 weeks after tomatoes — spacing plants 18 to 24 inches apart in full sun with pH 6.0 to 6.8. Water 1 inch per week at the base, mulch after soil warms, feed lightly with low-nitrogen fertilizer after first fruits set, and harvest 60 to 90 days from transplant, picking green or leaving to fully ripen for sweetest flavor.
At a Glance
| Fact | Details |
|---|---|
| Sun | 6 to 8 hours direct sun daily; light afternoon shade okay above 95°F |
| Soil | Well-drained, fertile loam with 2 inches compost |
| Soil pH | 6.0 to 6.8 |
| Water | ~1 inch per week, evenly, at base before 10 a.m. |
| Spacing | 18 to 24 inches apart; rows 24 to 36 inches |
| Planting depth | Same depth as pot — do NOT bury stem like tomatoes |
| Time to harvest | 60 to 90 days from transplant (green to full color) |
| Difficulty | Easy once established; needs warmth early |
Sweet vs. Hot — Choose What You’ll Actually Eat
All peppers are the same species, split by capsaicin — the compound that creates heat. Sweet peppers — bell, banana, pimiento, Corno di Toro — contain none. Hot peppers — jalapeño, serrano, cayenne, habanero — contain it in varying amounts, and heat rises as fruit ripens from green to red.
Grow a mix, but plant at least one bell. They cost the most at the store and produce most on the vine when given sun. If you love heat, grow one moderate (jalapeño) and one hot (cayenne or serrano) — you need fewer plants than you think; a single jalapeño gives 30 to 50 fruits.
For beginners, thick-walled sweets and jalapeños are most forgiving; super-hots need longer seasons and more heat to reach full potency. Do you want to pickle, roast, stuff, or dry? That answer picks your varieties better than any catalog photo.
See how to start a vegetable garden for beginners if you’re mapping your first bed, and vegetable garden layout planning for spacing with tomatoes and companions.
Heat Is the Story — Why Peppers Want Warmth From Day One
Peppers are tropical plants, and they want warmth from germination to harvest. Seeds need soil temperatures of 70 to 80°F (21-27°C) to germinate reliably (Source: Cornell Vegetables). Outdoors, transplants need daytime temps above 60°F and nighttime above 55°F. Cold soil below 55°F stalls peppers for weeks, turning leaves yellowish and dropping blossoms even when you did everything else right.
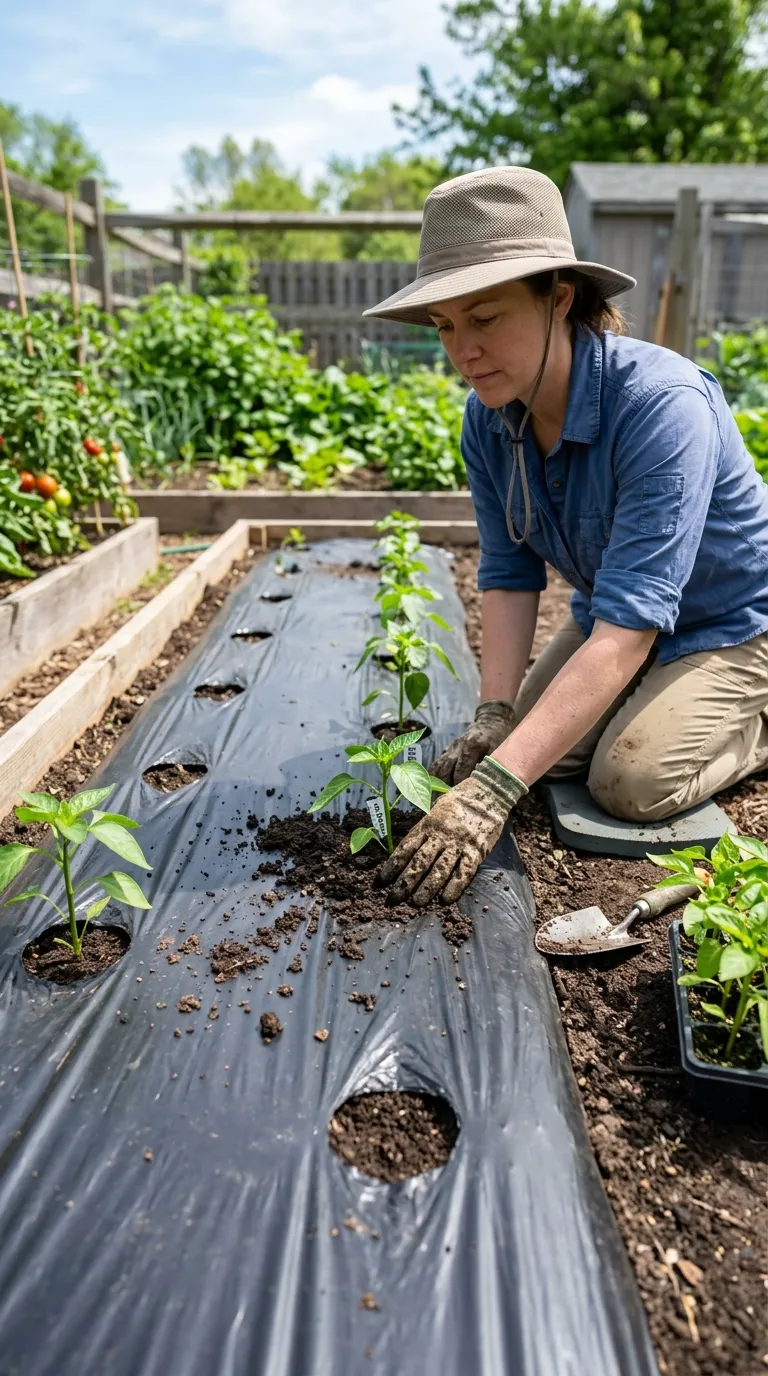
Wait for warm soil rather than an early date. In cool climates, black plastic mulch or a low tunnel warms soil and speeds early growth by 7 to 10 days — the cheapest yield bump you can buy. I now plant peppers 7 to 10 days after my tomatoes, when soil at 2 inches reads 65°F for three mornings in a row. That week of patience pays in vigor all season.
Starting Peppers from Seed — Slow and Steady Indoors
When to Sow
Peppers are slow to mature, so start seeds indoors 8 to 10 weeks before your last spring frost. A February or early-March sowing is typical in most regions. See starting seeds indoors for the full setup, including lights and watering.
How to Sow and Germinate
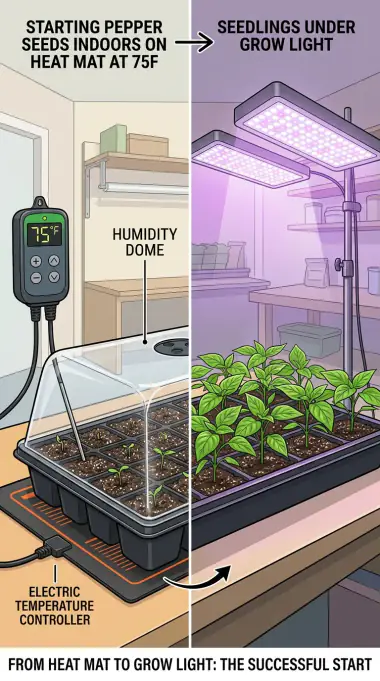
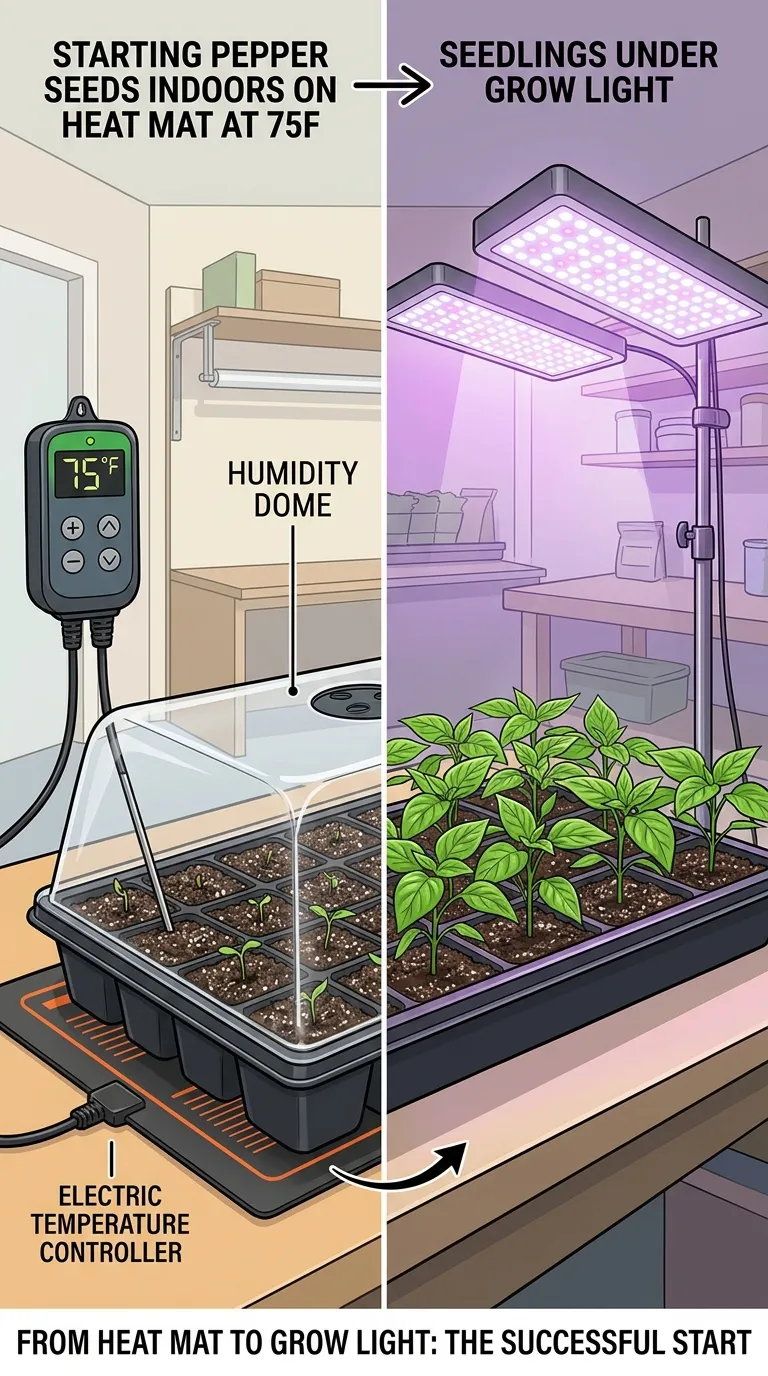
Sow seeds about 1/4 inch deep in seed-starting mix, one seed per cell or two and thin later. Keep the mix at 70 to 80°F (21-27°C), using a heat mat if your house runs cool; seedlings usually emerge in 7 to 14 days, sometimes 21 for hot types. Provide bright light within 24 hours of sprouting — 14 to 16 hours under a shop light 2 inches above — and keep them growing steadily; stocky, dark-green plants with stems as thick as a pencil transplant best.
Healthy nursery transplants work just as well if you skip the seed stage. Choose stocky, deep-green plants, not leggy or yellow.
Hardening Off — Not Optional
About a week before transplanting, move seedlings outdoors a few hours daily, increasing time gradually. This hardening-off period prevents transplant shock and sunburn, and it is essential if you started plants under lights. I carry trays to a sheltered shady spot day one, then morning sun day three.
Transplanting Peppers — Same Depth, Warm Soil, Sunny Wall
Set peppers out after all frost danger has passed and soil has warmed to at least 60°F, usually 1 to 3 weeks after your last frost date. Check your regional timing in when to plant vegetables. Unlike tomatoes, peppers go in at the same depth they grew in the pot; burying the stem invites rot and stunting.
Space plants 18 to 24 inches apart in rows 24 to 36 inches apart, water them in well, and add a floating row cover for the first week if a cold snap threatens. Use how to prepare soil for planting to get the bed ready at pH 6.0 to 6.8 with 2 inches compost worked into top 6 inches.
Mulch 2 to 3 inches with straw or shredded leaves after soil warms — not before — and keep mulch a finger’s width from stems. Peppers love that warm, even root zone.
Watering Peppers — Steady and Even, Not Soggy
Peppers like steady, even moisture: about 1 inch of water per week, and more in heat or containers. Mulch around plants with straw to keep soil moisture even and suppress weeds. Inconsistent watering causes blossom end rot on fruit and bitter taste, so water deeply and on a schedule rather than a sprinkle every day.
Soaker hose or drip at the base before 10 a.m. keeps foliage dry and puts water where feeder roots actually drink — top 6 to 8 inches. For containers, water daily until it drains freely; in heat above 90°F, check again by late afternoon. Our how often to water vegetables covers the details, and best soil for tomatoes principles apply to peppers for loam and drainage.
Finger test: push 2 inches down near stem. Cool and moist? Wait. Dry and crumbly? Water deeply today.
Feeding Peppers — Light Touch, Low Nitrogen After Fruit Sets
Peppers are light feeders compared to tomatoes, and too much nitrogen is the classic mistake: high-nitrogen fertilizer produces big green bushes with few flowers. At planting, work compost into soil and add a balanced fertilizer such as 5-10-10 or a low-nitrogen organic blend per label. Side-dress when the first fruit is about the size of a quarter, and again about 6 weeks later.
Our vegetable garden fertilizer explains the numbers on bags, and best fertilizer for tomatoes timeline adapts directly — just use lighter rates for peppers.
Avoid feeding dry soil; water first, then side-dress 6 inches from stem at drip line, then water again.
From Bloom to Fruit — Blossom Drop, Pollination, and Heat
It is frustrating when flowers fall off without setting fruit, but peppers drop blossoms when daytime temps exceed 90°F or nights stay above 75°F (Source: NC State Extension). There is no spray; it is a natural stress response as pollen becomes less viable.
Keep plants mulched and watered, provide light afternoon shade if you can with 30% shade cloth slipped over tops for hottest three days, and wait; plants almost always resume fruiting when heat breaks.
Peppers are self-pollinating, but shaking helps. On calm, humid days, gently tap flower stems at midday or use an electric toothbrush 2 seconds per truss to vibrate pollen — same technique as tomatoes in why tomato plants not producing fruit.
And plant a few companions: basil and borage near peppers bring pollinators and predatory wasps that keep aphids down.
Supporting Peppers — Small Stakes, Big Difference
Peppers rarely need tall tomato cages, but they do appreciate support. A 24 to 36-inch stake or small tomato cage prevents branches from snapping under a heavy fruit load or summer storm. Tie loosely with soft twine every 8 inches.
In containers, a single central stake keeps the plant upright and airy. I stake at planting time so I don’t stab roots later.
Common Pests and Diseases — Fewer Than Tomatoes, But Still Watch
Peppers have fewer pest problems than tomatoes, but scout weekly.
Aphids cluster on new growth and can spread viruses; knock them off with water or use insecticidal soap (see get rid of aphids naturally). Cutworms bite through stems at soil level in spring; a cardboard collar around each stem stops them. Blossom end rot — a dark sunken spot on fruit — is a watering problem, not a disease; even moisture fixes it. Bacterial leaf spot spreads in wet weather, so water at base and rotate crops. For the full lineup, see vegetable garden pests and vegetable garden diseases.
Keep at least 18 inches spacing and mulch to prevent soil splash — same airflow logic as how to prune tomato plants though peppers need far less pruning.
Harvesting Peppers — Green vs. Ripe, How to Pick
Green vs. Fully Ripe
Every pepper is edible green, and most gardeners pick bells at green stage because plants keep producing. But every variety turns a final color — red, orange, yellow, or brown — and fully ripe fruit is sweeter, richer, and has more vitamin C. Leave some fruit on the plant to ripen; you lose a little yield but gain flavor (Source: Iowa State University Extension). Hot peppers are usually left until fully ripe for maximum heat and complexity.
Ripe peppers also store better and roast with deeper sweetness.
How to Pick Without Breaking Branches
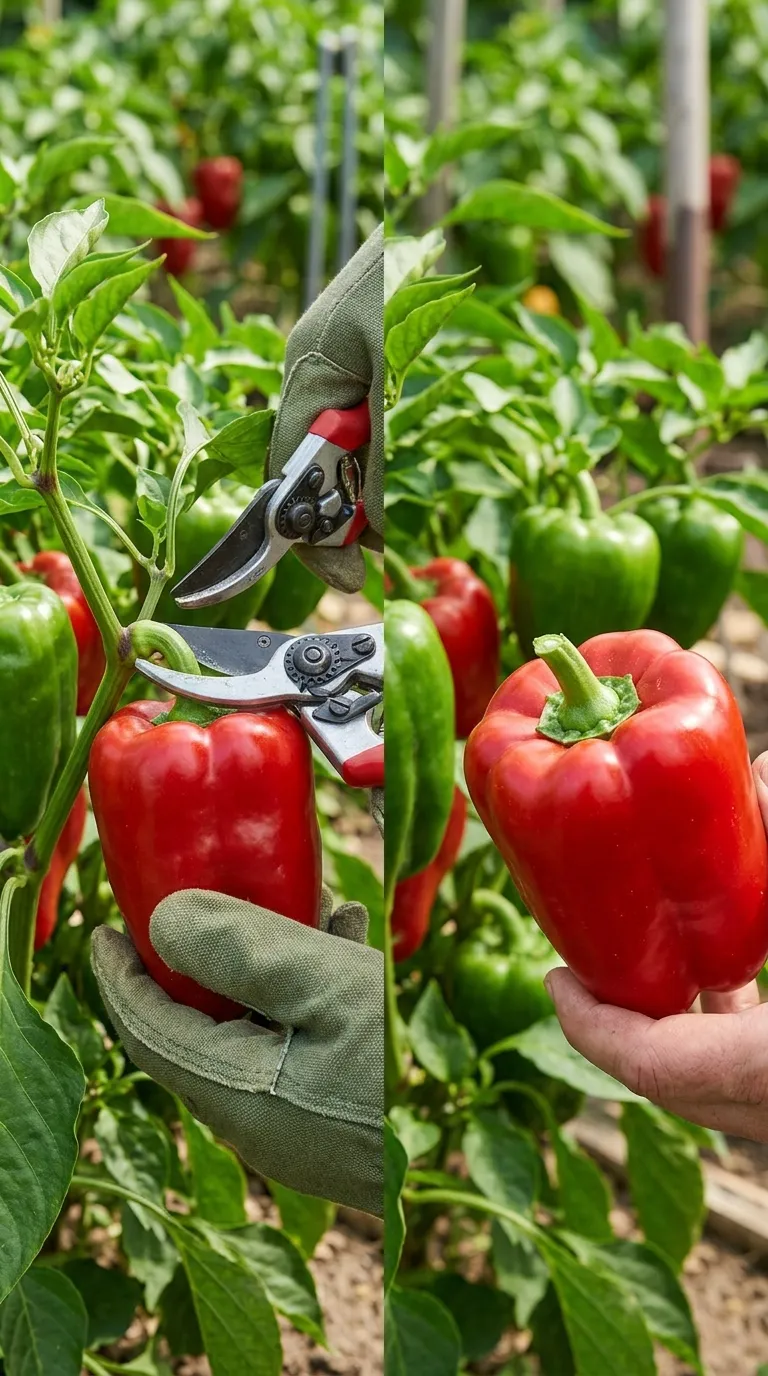
Peppers snap off easily, but cut them with pruners to avoid tearing the branch and losing future yield. Cut just above the cap, leaving a short stem. Harvest regularly; picking encourages more fruit. At season’s end, pull the whole plant and hang it in a warm, dry place to ripen remaining fruit. For storage, see harvesting and storing vegetables.
Handling Hot Peppers Safely
Wear gloves when handling hot varieties, especially habaneros. Avoid touching eyes or face, and wash hands and cutting boards with soap after. Capsaicin lingers in oils on skin for hours.
Overwintering Peppers — Briefly, for the Dedicated
Peppers are perennials in warm climates, and many gardeners overwinter a favorite plant. Before first frost, dig the plant, trim it back by about half, and pot it in fresh potting mix. Keep it in a bright, cool room at 50 to 60°F (10-16°C) and water sparingly. It will look sad all winter, but it pushes new growth in spring and can produce fruit weeks ahead of seedlings. It is worth the effort for a specialty hot pepper, but most gardeners just start fresh.
Common Mistakes — And How to Sidestep Them This Year
-
Sowing seeds too late. Peppers need 8 to 10 weeks indoors; late sowing means green fruit until frost. Start seeds in early spring and keep them warm at 70-80°F.
-
Planting out too early into cold soil. Cold stalls peppers for weeks. Wait until soil is warm and all frost danger has passed.
-
Planting peppers deep like tomatoes. Buried pepper stems rot. Plant at same depth as pot.
-
Overfertilizing with nitrogen. You get huge bushes and few fruits. Use low-nitrogen, balanced fertilizer and side-dress only after fruit sets.
-
Picking only green bells. Ripe fruit tastes dramatically better. Leave at least a few fruit on each plant to full color.
-
Letting plants dry out. Blossom end rot and bitter fruit follow. Water deeply and mulch 2 to 3 inches.
-
Panicking about blossom drop. Heat causes it, and it reverses itself. Keep watering consistent and wait for cooler nights.
Seasonal Calendar — Peppers Through the Year
-
February to Early March (8-10 weeks before last frost): Sow indoors at 70-80°F with heat mat, 1/4 inch deep, under lights.
-
April: Pot up seedlings when 3 inches tall, harden off gradually over 7 days before planting week.
-
May (soil 60-65°F, frost past): Transplant at same depth, 18-24 inches apart, stake lightly, mulch after soil warms, row cover if cold snap.
-
June: Even water 1 inch weekly, first light side-dress when quarter-sized fruits appear. Scout for aphids.
-
July to August: Peak harvest for sweets, steady for hots. Shake flowers at midday in humid still weather, provide shade cloth in heat domes.
-
September to Frost: Keep picking. Green fruits ripen indoors on counter. Before frost, harvest all or cover with row cover overnight.
Keep this on the fridge; it turns anxiety into rhythm.
Troubleshooting — Quick Fixes by Symptom
-
Stunted, yellowish early growth? Soil too cold. Cover with row fabric, wait for warmth, ensure 6+ hours sun. See pepper leaves turning yellow for diagnostics.
-
Flowers drop without fruit? Heat above 90°F/75°F nights or still air. Shade lightly, shake at midday, wait for cool nights.
-
Fruits with black leathery bottoms? Blossom end rot from irregular water. Even out moisture, mulch, don’t chase calcium unless pH is low.
-
Small, bitter fruits? Underwatering or overcrowding. Deep water, ensure full sun, space 18-24 inches.
-
Leaves pale and plant tall but no peppers? Too much nitrogen. Pause feed, switch to low-nitrogen after first fruits.
-
Whole plant wilts even though soil wet? Roots suffocating or disease. Check drainage, pull mulch back a day, ensure not waterlogged.
Variety Ideas — A Starter Trio I Recommend
If you’re growing your first peppers, try this trio:
-
One reliable bell: ‘California Wonder’ or ‘Bell Boy’ — thick walls, productive, good green or red.
-
One sweet frying type: ‘Jimmy Nardello’ or ‘Corno di Toro’ — long, sweet when red, amazing roasted.
-
One heat: ‘Jalapeño’ for moderate, or ‘Cayenne’ for drying — prolific and forgiving.
That mix gives you fresh eating, cooking, and heat from three plants without overwhelming a small bed.
Next year, add your heart’s desire — habanero, poblano, shishito — once you know your heat and space.
A Deeper Seasonal Lens — What Changes When You Watch Closely
I keep a waterproof notebook in my apron pocket. One line a week, no more. Date, weather, what I did, what leaves looked like.
That tiny log taught me more than any book. Because the garden repeats itself, softly. The same bed that yellowed after a four-day rain last July yellows the same week this July — unless I mulch higher and prune lower before the rain.
Try it this season. Just one line every Sunday. You will have a personal almanac by September.
Notes From My Notebook — Three Years That Shaped This Guide
Year one: I overwatered with love. Flag in bed: “DO NOT WATER UNTIL FINGER 2 INCHES.” Yield doubled.
Year two: pH 7.4 after liming for beans. No fertilizer greened top leaves until sulfur in fall.
Year three: Cold nights at 45°F. Peppers stalled until July. Tomatoes beside them merely slowed. Waiting an extra week after tomatoes for peppers became permanent rule.
Those three lines are why this guide insists on finger tests, pH kits, and patience.
Troubleshooting Appendix — More Real Dialogues
“My soil looks great but fruits still have green shoulders.” Often potassium-light or too much shade on tops. Ensure second-half feed has good K (last number) and thin lightly for light.
“I mulched and still got blight.” Mulch helps but doesn’t erase wind-borne spores. Prune lower leaves for airflow, water at base, rotate next year 2 to 3 years without nightshades in that bed.
“Can I use garden lime to stop blossom end rot?” Only if soil test shows low pH. Otherwise even water is the fix. Lime without need raises pH and locks iron.
“Do I need to buy bees?” Lovely for ecology, not required for tomatoes or peppers which self-pollinate. Wind and your midday shake are the engine. Wild bees are a bonus that companion herbs invite.
“What if I only have a balcony?” Containers are honest. They dry fast and leach fast. Choose 7 to 10 gallon fabric bags, quality potting mix, morning sun, and check lift test daily. You can grow a surprising harvest in two bags and a bucket of basil.
The Quiet Math of Even Moisture — Why Mulch Beats More Water
Bare soil at 90°F loses nearly half an inch of water a day to evaporation. Straw mulch cuts that by roughly half. So 3 inches of straw is effectively like getting an extra watering without turning on the hose.
It also keeps soil splash from reaching lower leaves. That splash carries blight, septoria, and bacterial spot spores that overwinter in soil. Mulch is a clean sheet between soil and leaf. I lay it after soil passes 60°F, keeping a 2-inch collar open at stems so crowns breathe.
Have you measured how fast your bare bed dries vs. mulched? Try two fingers, two spots, same day. You’ll see why mulch is the first line, not the last.
Container, Raised Bed, and In-Ground — How the Same Plant Tells Different Stories
Containers tell you quickly. They yellow fast when wet or dry, and they forgive fast when corrected. Check lift plus finger daily in July. Half-strength liquid feed weekly during heavy fruiting plus monthly granular side-dress keeps them green without burn.
Raised beds tell you in mid-summer. They leach nitrogen after heavy rain, so lower leaves fade uniformly. A light side-dress perks them back in days.
In-ground clay tells you slowly. It holds water longest, so overwatering yellowing lingers. If trowel shines with smeared clay two days after rain, wait despite calendar. Annual fall compost turns clay to crumbs over seasons.
Name your setup. The yellowing pattern narrows to two likely causes instead of eight.
Final Encouragement — The Gardener Learns Slower Than the Plant
The plant responds in days. The gardener learns in seasons. Be patient with yourself.
If you fix water this year and pH next year and pruning the year after, you will still harvest beautifully each year — just more beautifully as you go. I wish someone had told me that good gardening is cumulative, not perfect on the first try.
Pick one habit from this guide to practice this week. Just one. Water at base before 10 a.m., or shake flowers at midday, or lay that straw mulch. Do it for seven days. Look at new growth. That is your feedback loop, truer than any forum.
Frequently Asked Questions
Q: How do you grow peppers from seed to harvest?
A: Start seeds indoors 8 to 10 weeks before last frost at 70 to 80°F, keeping mix consistently warm with a heat mat until sprouts emerge in 7 to 14 days. Harden off for a week outdoors, then transplant after warm soil at 60°F 18 to 24 inches apart in full sun with pH 6.0 to 6.8, planting at the same depth as the pot. Water 1 inch weekly at the base, mulch 2 to 3 inches after soil warms, feed low-nitrogen after fruit set, and harvest 60 to 90 days later. Peppers reward warmth more than early planting — waiting that extra week after tomatoes for soil to truly warm often adds weeks of vigorous growth later.
Q: Do peppers need full sun?
A: Yes, peppers need 6 to 8 hours of direct sun daily for maximum fruit. In extreme heat above 95°F light afternoon shade with a 30% shade cloth prevents sunscald on fruits — those pale, papery patches where sun bleaches exposed shoulders — while still producing heavily. Morning sun is ideal; it dries dew quickly and fuels flowering. In partly shaded yards, use containers you can move to chase sun, or prune nearby branches that cast moving shade. Less than 6 hours gives you leafy plants with few peppers, no matter how well you feed.
Q: Why are my peppers not producing fruit?
A: Peppers drop blossoms when nights are below 60°F or above 75°F, when nitrogen is too high, or when still air prevents pollination. Cold soil below 60°F also stalls roots so they can’t take up nutrients even if present. Keep soil warm with black plastic early, avoid high-nitrogen lawn fertilizer, shake flower stems gently at midday to vibrate pollen, and wait for stable warm nights to restore fruit set. Plants almost always resume once a cooler spell follows a heat wave. Consistency in water and a little midday shake do more than any blossom spray.
Q: How often should you water pepper plants?
A: Water peppers 1 inch per week in 1 to 2 deep sessions at the base before 10 a.m., letting the top inch dry between. Mulch 2 to 3 inches after soil warms to keep that moisture even and suppress weeds. Soggy roots cause yellow lower leaves and blossom end rot, so ensure containers drain freely and in-ground beds aren’t in a puddled low spot. In heat above 90°F, check daily — containers may need water every day, raised beds every 2 to 3 days. Even, deep moisture beats daily sips every time.
Related Articles
- How to Grow Tomatoes
- Tomato Leaves Turning Yellow
- Vegetable Garden Fertilizer
- Best Soil for Tomatoes
- How Often to Water Tomato Plants
- Vegetable Garden Layout
Sources & References
- Cornell Vegetables — https://www.vegetables.cornell.edu/crops/peppers/
- Iowa State University Extension — https://hortnews.extension.iastate.edu/growing-peppers
- NC State Extension — https://content.ces.ncsu.edu/growing-peppers
- University of California IPM — https://ipm.ucanr.edu/PMG/GARDEN/VEGES/peppers.html
- University of Minnesota Extension — https://extension.umn.edu/yard-and-garden/vegetables/growing-peppers
