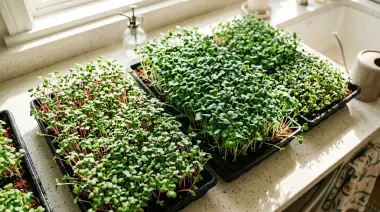
Learning how to grow microgreens is the fastest win in gardening: seed to fresh greens in 7 to 10 days on a counter, with no garden bed. Growing microgreens at home suits beginners and apartment growers.
One 10-by-20-inch tray costs about $3 in seed and yields 8 to 12 ounces of greens.
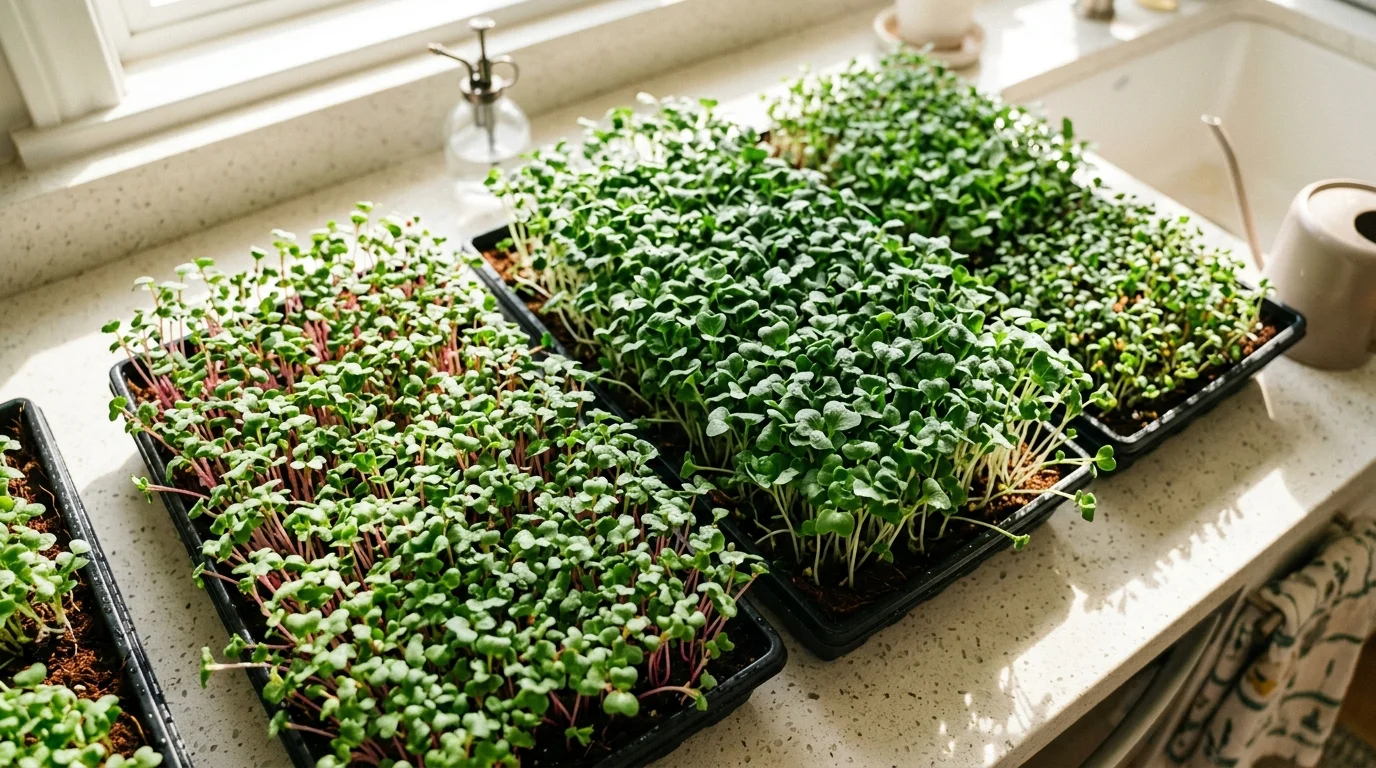
Quick Answer: Fill a 1020 tray with holes with 1 to 1.5 inches of moist seed-starting mix or coir, sow densely, press in, mist, and cover with a second tray for a 3 to 5 day blackout. Then give 12 to 16 hours of daily light, bottom-water, and harvest at 2 to 4 inches when cotyledons open and first true leaves appear.
At a Glance
| Fact | Detail |
|---|---|
| What they are | Seedlings cut at cotyledon plus first true leaf, 2 to 4 inches tall |
| Time to harvest | 7 to 10 days for radish and broccoli; 10 to 14 for sunflower and peas; 14 to 21 for basil |
| Best conditions | 65 to 75°F, south window or LED 12 to 16 hours per day |
| Setup | 1020 tray with holes in solid catch tray, 1 to 1.5 inches of medium |
| Watering | Mist until sprouted, then bottom-water; never leave standing water |
| Seed safety | Untreated food-grade seed only; never tomato, pepper, potato, or eggplant |
| Yield | 8 to 12 ounces per 10x20 tray |
| Storage | Dry and unwashed in fridge, 5 to 7 days |
What Are Microgreens Exactly?
Microgreens are seedlings cut after the seed leaves (cotyledons) open and the first true leaves appear, at 2 to 4 inches tall. Roots stay behind; only tops are eaten. That early stage concentrates flavor: radish is peppery, sunflower nutty-lemony, pea shoots sweet.
Sprouts differ in a key way: they grow in water with no medium and are eaten whole after 2 to 5 days. Microgreens grow on soil or coir in light with airflow, and only cut tops are eaten [1] (Source: North Carolina State University Extension).
| Feature | Sprouts | Microgreens |
|---|---|---|
| Medium | Water only, no medium | Soil, coir, or mat |
| Light | None needed | Bright light after sprouting |
| Days to harvest | 2 to 5 | 7 to 21 |
| Part eaten | Whole plant plus root | Cut tops only, roots left |
The rhythm matches starting seeds indoors - same light and timing basics.
Why Grow Microgreens at Home?
Speed first: most finish in 7 to 10 days versus 45 to 60 for lettuce. No garden is needed - two trays fit on a shelf with one shop light, a fit for indoor vegetable gardening and other fast-growing vegetables.
They are cheap: a pound of broccoli seed ($15 to $25) sows 15 to 20 trays worth $8 to $12 each. USDA researchers found many microgreens hold higher vitamin C, E, K, and carotenoid concentrations per gram than mature leaves [2] (Source: U.S. Department of Agriculture) - a supplement to, not a replacement for, full servings.
Best Seeds for Microgreens for Beginners
Buy seed labeled for microgreens or sprouting, or untreated garden seed - never treated seed with pink or green coating. Start with broccoli, radish, kale, arugula, and mustard: no soaking, 7 to 10 days. Add sunflower and pea shoots next (soak 8 to 12 hours, 10 to 14 days). Save basil and cilantro for later; they want 70 to 75°F and up to 3 weeks.
Never grow nightshade microgreens: tomato, pepper, potato, and eggplant leaves can contain solanine and related glycoalkaloids that cause nausea [3] (Source: Penn State Extension).
| Variety | Seed per 10x20 tray | Days |
|---|---|---|
| Radish | 1 to 1.5 oz / 3 to 4 Tbsp | 7 to 8 |
| Broccoli | 1 oz / 3 Tbsp | 8 to 10 |
| Kale | 1 oz / 3 Tbsp | 8 to 10 |
| Arugula | 0.75 oz / 2.5 Tbsp | 7 to 9 |
| Mustard | 1 oz / 3 Tbsp | 8 to 10 |
| Sunflower | 4 to 5 oz / 3/4 to 1 cup | 10 to 14 |
| Pea shoots | 8 to 10 oz / 1.5 cups | 10 to 12 |
| Basil | 0.5 oz / 2 Tbsp | 14 to 21 |
Sow thin - overcrowding causes mold.
What You Need
| Item | Spec |
|---|---|
| 1020 trays | Slotted tray nested in solid catch tray; get 4 slotted + 2 solid |
| Medium | Seed-starting mix or coir, 1 to 1.5 inches deep (4 to 6 quarts) |
| Seed | Untreated food-grade seed; a $20 to $30 sampler sows 12 to 16 trays |
| Mister | Spray bottle for the first 3 days |
| Cover | Humidity dome or inverted tray for blackout |
| Light | 5000K to 6500K LED shop light, 20 to 40 watts per two trays |
| Fan + scissors | Small fan for airflow; sharp scissors for harvest |
Shallow trays with drainage plus bottom-watering give the most consistent home results [3] (Source: Penn State Extension).
Step-by-Step: Growing Microgreens at Home
Active time is about 20 minutes spread over a week.
1. Soak large seeds only. Small seeds get no soak; wet broccoli or radish seed clumps and rots.
| Seed type | Soak | Notes |
|---|---|---|
| Broccoli, radish, kale, arugula, mustard | None | Sow dry, press in |
| Basil, chia, flax | None | Gel coat; do not bury |
| Sunflower, buckwheat | 8 to 12 hours | Rinse; discard floaters |
| Peas, fava beans | 8 to 12 hours | Rinse; pick out split seeds |
| Cilantro, beet, chard | 6 to 12 hours | Optional; helps slow seeds |
2. Fill and level. Moisten medium to a wrung-out sponge feel, fill 1 to 1.5 inches, level.
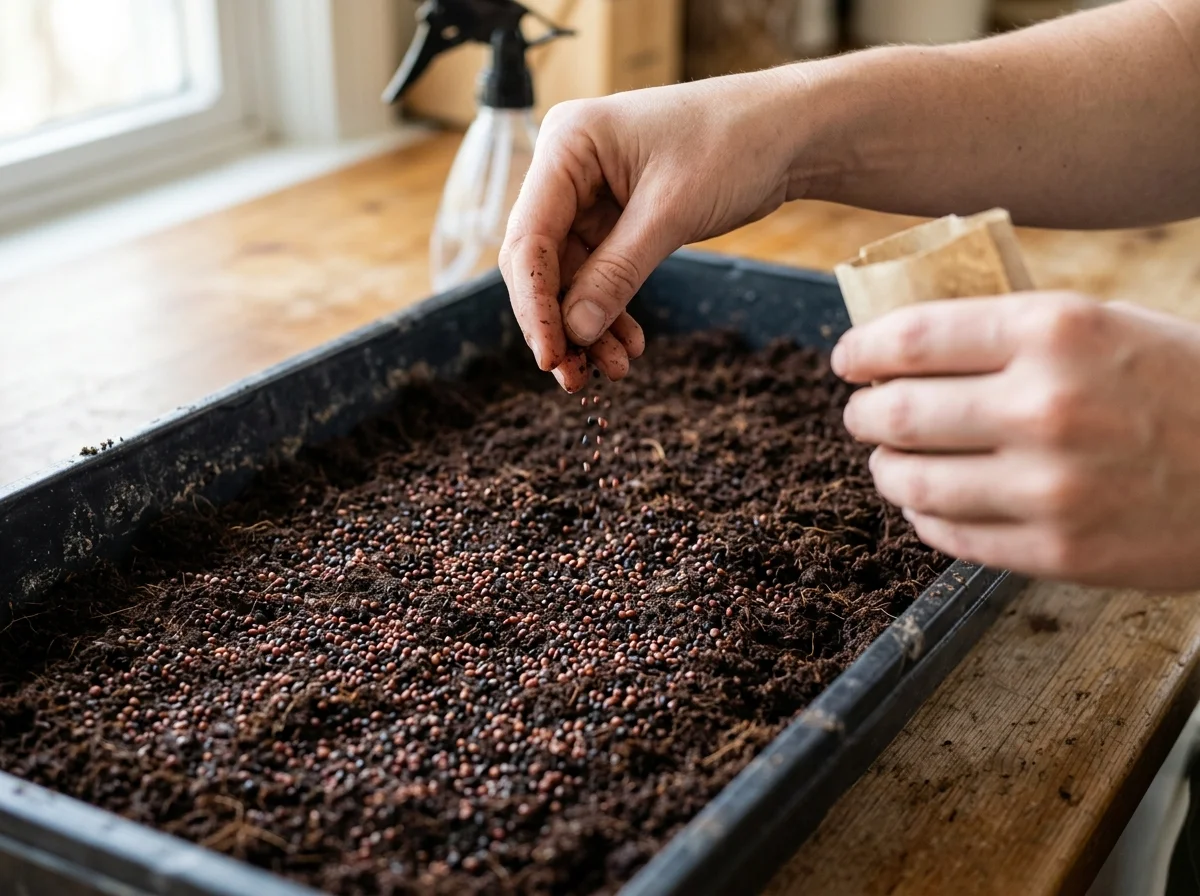
3. Sow in one layer. Cover 80 to 90 percent of the surface, seeds touching but not stacked - about 3 tablespoons broccoli or 1.5 cups soaked peas per tray. Press gently.
4. Mist well. Spray until the top 0.5 inch is damp. Do not flood.
5. Weight and blackout 3 to 5 days. Set an empty tray on seeds, add 2 to 4 pounds, cover to block light. Mist if dry. Brassicas sprout in 2 to 3 days, sunflower and peas in 3 to 4.
6. Uncover into light. At 1 to 1.5 inches, move to light; greens color up in 24 hours.
7. Bottom-water only. Pour 1 to 2 cups into the catch tray, wick 10 to 15 minutes, then drain. Stop misting after day 4.
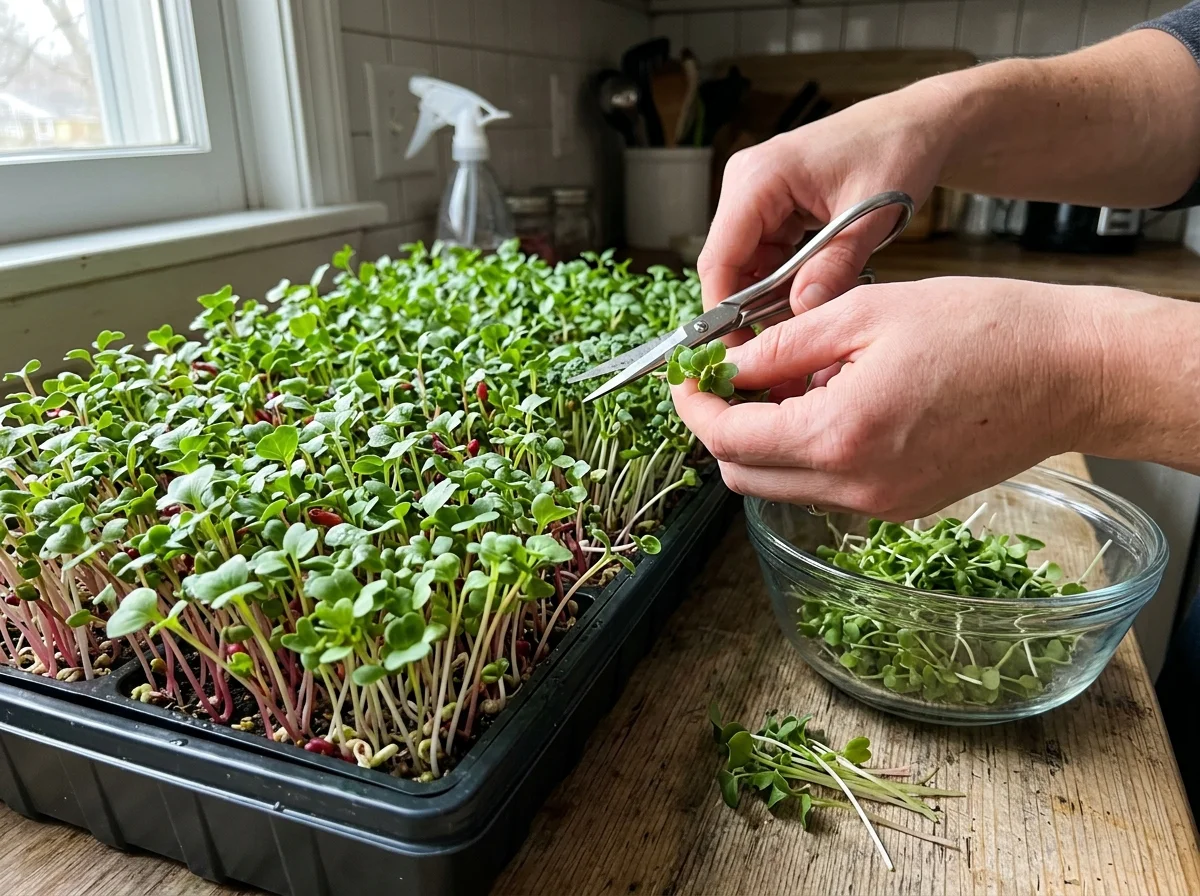
8. Harvest at 2 to 4 inches. Cut with sharp scissors when cotyledons open and true leaves appear - day 7 to 10 for radish and broccoli. Cut 0.5 inch above the medium, leaving roots.
Light: Windowsill vs Grow Light
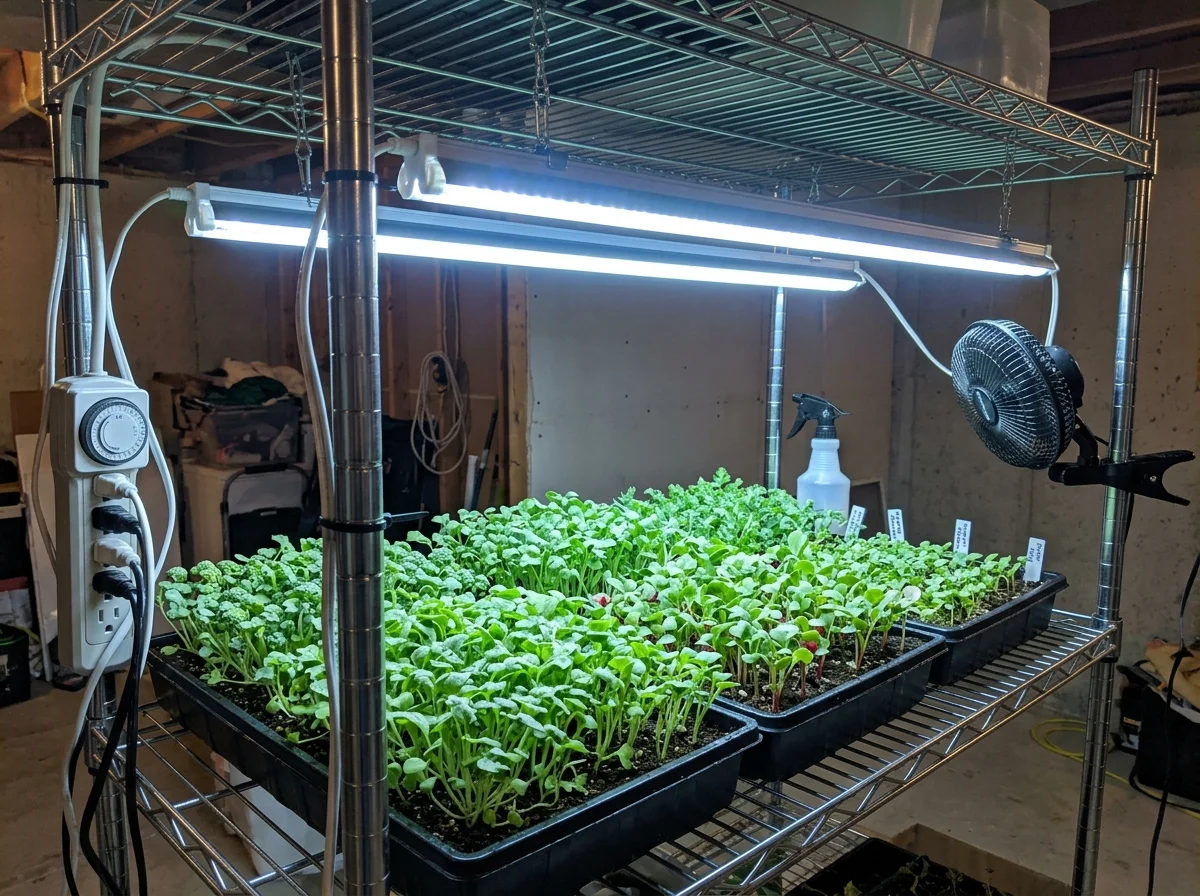
Light decides between stocky greens and pale spaghetti. A south window with 4 to 6 hours of sun works March to October; rotate daily. In winter, run an LED 12 to 16 hours daily 2 to 4 inches above leaves. If stems stretch, add two hours first. Like the best low-maintenance indoor plants, microgreens want bright light plus airflow.
Watering and Preventing Mold
Mold loves warm, damp, still air. Prevent it with fresh mix or coir, correct density, bottom watering, and a small fan nearby. Remove domes at sprouting and let the surface dry slightly between waterings at 65 to 75°F.
Fine white fuzz with droplets on radish stems is usually normal root hairs; gray webbing between seedlings with a musty smell is mold. For light mold, spray once with 1 part 3 percent hydrogen peroxide to 10 parts water in the morning [4] (Source: University of Minnesota Extension). Compost heavily molded trays.
Harvesting and Storing
Cut at 2 to 4 inches when cotyledons open and first true leaves show, in the morning after leaves dry, 0.5 inch above the medium. Do not wash before storing.
Line a container with a dry paper towel, layer greens loosely, top with another towel, and refrigerate at 35 to 40°F. Most keep 5 to 7 days; wash just before eating. Pair garnishes with how to grow lettuce.
Continuous Supply and Scaling Up
One tray is a trial; three in rotation is a supply. Windows last 2 to 3 days, so sow every 3 to 5 days (Monday, Thursday, Sunday) and label variety and date.
Two adults eating a large handful daily need 2 to 3 trays per week. A family of four needs 4 to 6 trays under two fixtures, yielding 2 to 3 pounds weekly for $8 to $12. Store seed at 50 to 60°F; most stays viable 2 to 3 years.
Are Microgreens Really More Nutritious?
They are nutritious but still garnishes. Red cabbage microgreens tested at about 6 times the vitamin C of mature heads per gram [2] (Source: U.S. Department of Agriculture) - yet a garnish is 0.5 to 1 ounce versus a 3 to 4 ounce salad. The real benefit is habit: growers eat more fresh vegetables because they cut only what they need.
Variety Guide: Taste and Uses
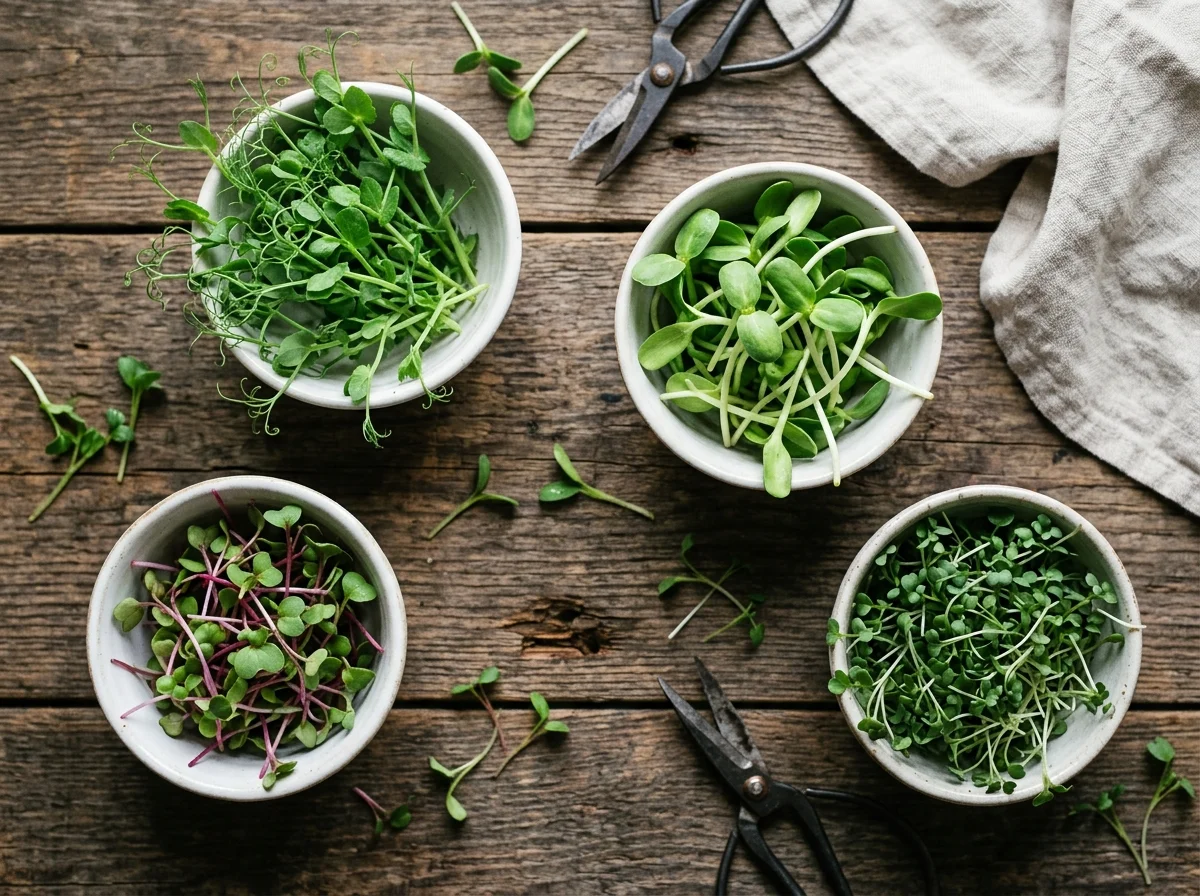
| Variety | Flavor | Uses | Days |
|---|---|---|---|
| Broccoli | Mild, peppery | Eggs, sandwiches | 8 to 10 |
| Radish | Sharp, peppery | Tacos, ramen | 7 to 8 |
| Sunflower | Nutty, lemony | Salads, wraps | 10 to 14 |
| Pea shoots | Sweet | Stir-fry, soups | 10 to 12 |
| Kale | Earthy, mild | Bowls, pasta | 8 to 10 |
| Arugula | Peppery, nutty | Pizza, salads | 7 to 9 |
| Mustard | Hot, wasabi-like | Rice bowls, fish | 8 to 10 |
| Basil | Sweet anise | Tomatoes, pasta | 14 to 21 |
Common Mistakes
- Sowing too thick. Fix: single layer with small gaps; halve the rate if mold repeats.
- Skipping blackout. Fix: stack a tray plus 2 to 4 pounds for 3 to 5 days.
- Covers on too long. Fix: move to light at 1 to 1.5 inches tall.
- Top-watering after sprouting. Fix: bottom-water 10 to 15 minutes, then drain.
- Weak light. Fix: 12 to 16 hours of LED, 2 to 4 inches above leaves.
- Nightshade greens. Fix: never sow tomato, pepper, potato, or eggplant.
- Dull scissors, pre-washing. Fix: cut sharp 0.5 inch above medium; store dry.
Troubleshooting
- Fuzzy mold: too dense and wet; thin patch, bottom-water only, run fan, spray diluted peroxide once.
- Leggy and falling: too little light; raise to 14 to 16 hours, lower light to 2 to 4 inches.
- Uneven germination: old seed or uneven moisture; press seeds in, use seed within 3 years.
- Sour smell: overwatered; dump standing water, confirm drainage holes are open.
- Hulls stuck: too dry at uncovering; mist once, wait 24 hours, brush gently.
- Bitter and tough: cut late; harvest brassicas by day 10 at 2 to 3 inches.
- Gnats: surface always wet; let tops dry between waterings.
Frequently Asked Questions
Q: What is the difference between microgreens and sprouts?
A: Microgreens grow in soil or coconut coir and are harvested at the cotyledon plus first true leaf stage, usually 7 to 21 days after sowing. Sprouts grow in water with no medium and are eaten whole, roots and seed hulls included, after 2 to 5 days.
Q: What are the easiest microgreens for beginners?
A: Start with radish, broccoli, kale, arugula, and mustard for harvests in 7 to 10 days with no soaking. Add sunflower and pea shoots next for crunchy, sweet harvests in 10 to 14 days. Avoid tomato and pepper seeds because nightshade greens can contain toxins.
Q: How long do microgreens take to grow?
A: Most beginner microgreens are ready in 7 to 10 days from sowing. Sunflower and cilantro take 10 to 14 days, pea shoots take 10 to 12 days, and basil takes 14 to 21 days. Harvest when seedlings are 2 to 4 inches tall with fully opened cotyledons.
Q: Can you grow microgreens without soil?
A: Yes, you can grow microgreens on coconut coir, hemp mats, or unbleached paper towels instead of potting mix. Use 1 to 1.5 inches of moistened coir in a 1020 tray and water from the bottom. True sprouts are the only type grown in water alone with no medium.
Q: Why are my microgreens leggy and falling over?
A: Leggy, pale, falling stems almost always mean too little light. Move trays to a sunny south window or run an LED shop light 12 to 16 hours per day, positioned 2 to 4 inches above the canopy. Add a small fan for airflow to build stronger stems.
Q: How do you prevent mold on microgreens?
A: Sow at the recommended density, use fresh seed-starting mix or coir, water from the bottom, and run a small fan for airflow. Remove the humidity dome as soon as seeds sprout. For fuzzy white mold, spray once with 1 part 3 percent hydrogen peroxide to 10 parts water and improve ventilation.
Q: Do microgreens regrow after cutting?
A: No, most microgreens do not regrow after harvest because you cut above the growing point and leave the roots behind. Pea shoots are the main exception and often give a light second cut. For steady supply, sow a new tray every 3 to 5 days instead of waiting for regrowth.
Q: Are tomato and pepper microgreens safe to eat?
A: No, do not grow tomato, pepper, potato, or eggplant as microgreens. These nightshade family leaves can contain solanine and other glycoalkaloids that irritate digestion. Stick to brassicas, radish, sunflower, peas, lettuce, herbs, and grains grown from untreated, food-grade seed.
Related Articles
- Indoor Vegetable Gardening
- Fast Growing Vegetables
- Starting Seeds Indoors
- How to Grow Lettuce
- Best Low-Maintenance Indoor Plants
- Easiest Vegetables to Grow
- Start a Vegetable Garden for Beginners
