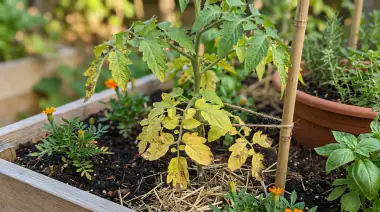
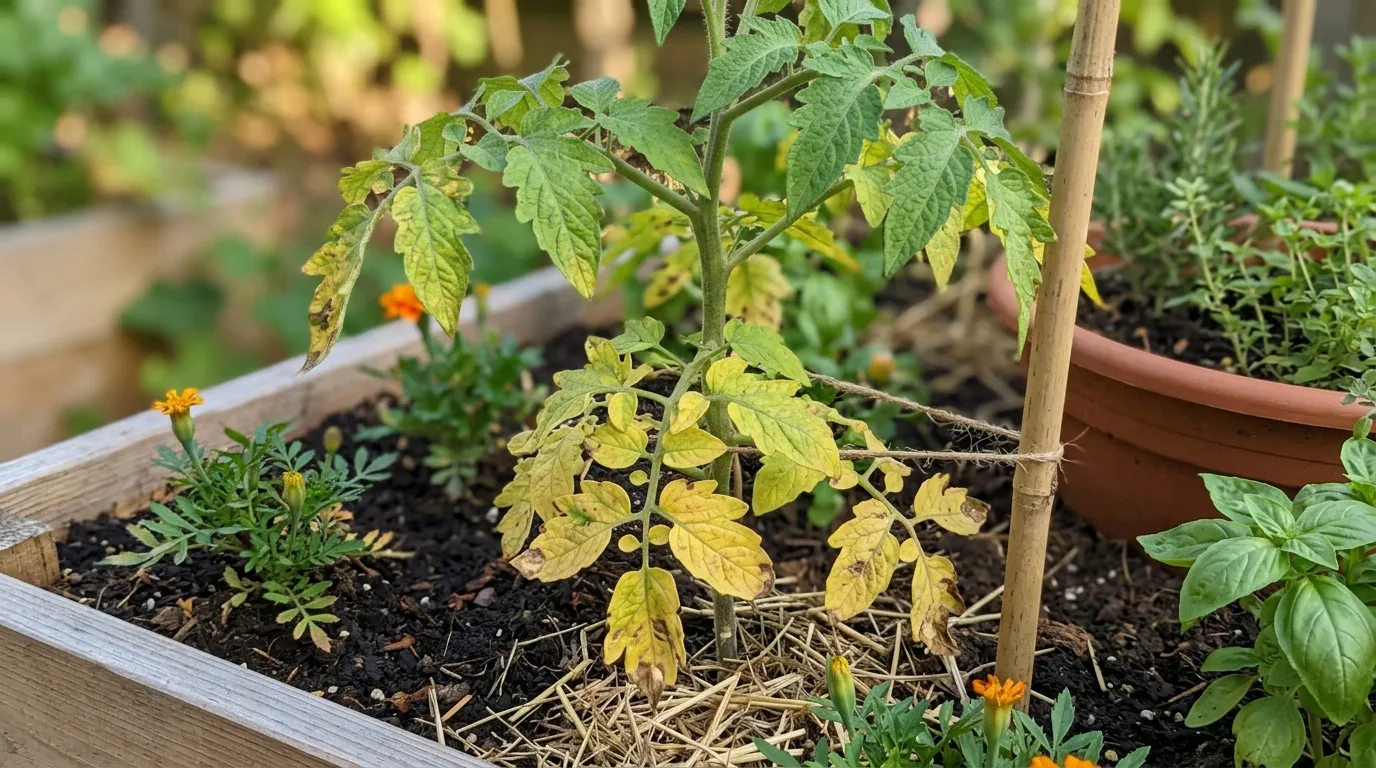
I still remember the first time I walked out to my tomatoes in late July and felt my stomach drop. The lower leaves — the big, beautiful ones that had been so deep green just a week before — were fading to a sickly pale yellow. A few had brown spots like coffee stains. I had watered every day, I had fed them, I had done everything the seed packet said. So why were they suddenly looking so tired?
If that’s you right now, take a breath. Yellow leaves on tomatoes are incredibly common, and while they’re never fun to see, they’re almost always fixable. Think of yellowing not as a death sentence, but as a language. Your tomato is trying to tell you that something underground or overhead is out of balance — water, food, light, or air. Once you learn to read where the yellow starts and what it looks like, you can diagnose it as confidently as you read the weather.
I learned this the hard way over a few summers of over-loving my plants with water and nitrogen. These days I can spot the difference between overwatering and early blight from across the garden path, just by the pattern. Let me walk you through exactly how to do that, so you can fix it fast and get back to watching those green fruits swell.
Quick Answer: If your tomato’s lower leaves are turning a soft, even pale yellow and feel a bit limp, overwatering or a nitrogen shortage is the most likely culprit — let the soil dry a bit, improve drainage, and side-dress with compost or balanced fertilizer. If yellow leaves have dark spots, brown crispy edges, or green veins with yellow tissue in between, think early blight, underwatering, or iron chlorosis from high pH. In all cases, snip off the affected leaves, trash them (don’t compost), improve airflow, and keep watering steady at 1 to 1.5 inches per week at the base before 10 a.m.
At a Glance
| Pattern | Most Likely Cause | First Fix |
|---|---|---|
| Lower leaves, even pale yellow, soft limp | Overwatering / nitrogen deficiency | Dry, drain, side-dress compost or 10-10-10 |
| Yellow with dark spots + halo, starts low | Early blight / septoria leaf spot | Remove, trash, mulch, water at base |
| Edges yellow-brown crispy, wilting midday | Underwatering / heat stress | Deep soak 8 inches + mulch 3 inches |
| Upper new leaves, green veins yellow tissue | Iron chlorosis / high pH above 7.2 | Test pH, chelated iron + sulfur to 6.0-6.8 |
| Tiny speckles, sticky, webbing underside | Aphids / spider mites | Water blast, insecticidal soap |
| Pale interior inside dense bush | Too little light / crowding | Prune suckers, stake, space 24-36 inches |
| Whole plant pale, stunted, slow growth | Nutrient hunger, pH lockout, cold | Test soil, even water, warm soil 60°F+ |
Why Tomato Leaves Turn Yellow — And Why Location Matters More Than You Think
Tomatoes aren’t shy plants. They’re heavy-feeding, fast-growing sun lovers that can put on six inches of vine in a hot week. That vigor is wonderful, but it also means they show stress quickly — faster than peppers or beans, which tend to sulk more quietly. Unlike a houseplant that yellows slowly from one issue at a time, a field tomato in August might be dealing with heat, soil splash, a hungry root system, and a fungal spore all in the same week.
Here’s the trick I teach every beginner at Paliurus: don’t just look at the color. Look at where the yellow starts. Is it the oldest leaves at the bottom that go first, fading evenly like old paper? That’s usually a mobile nutrient problem — nitrogen is being moved up to support new growth — or too much water drowning those lower roots. Is it the newest leaves at the top, with the veins staying green while the tissue between them turns lemon-yellow? That’s interveinal chlorosis, almost always about iron or magnesium being locked out by alkaline soil. Are there spots, halos, or brown edges involved? That’s often disease or pest-driven.
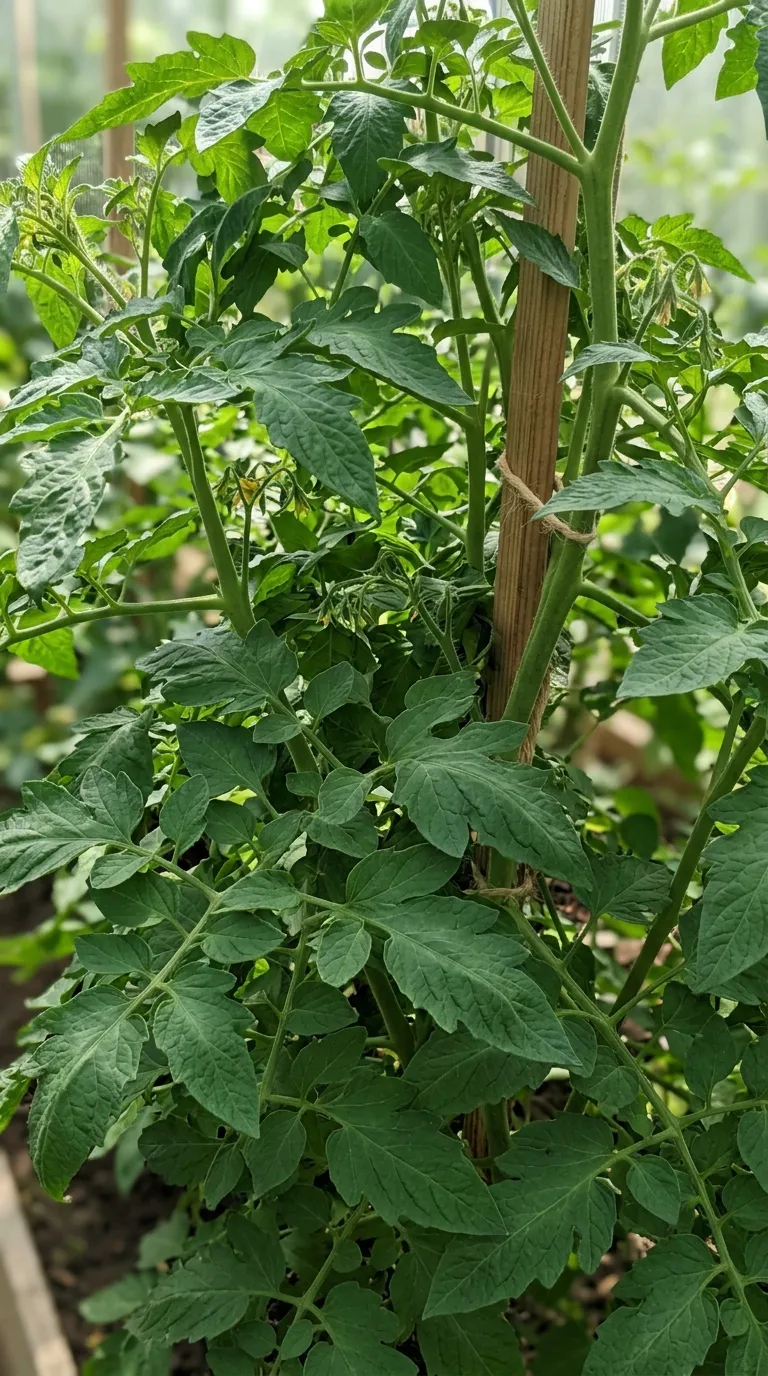
Healthy tomato foliage should stay that rich, slightly fuzzy deep green until the very end of the season when nights cool. Early yellowing is your cue to investigate within a day or two, not a week. The sooner you catch it, the less you have to cut. For the big picture on growing them well from the start, my guide to how to grow tomatoes pairs perfectly with this, and if you want to understand yellowing in all your plants, the broader how to fix yellow leaves is a great companion read. Stage-specific water is covered in how often to water tomato plants.
9 Causes and Easy Fixes — Read the Pattern Before You Treat
1. Overwatering & Poor Drainage (The Number One Beginner Mistake)
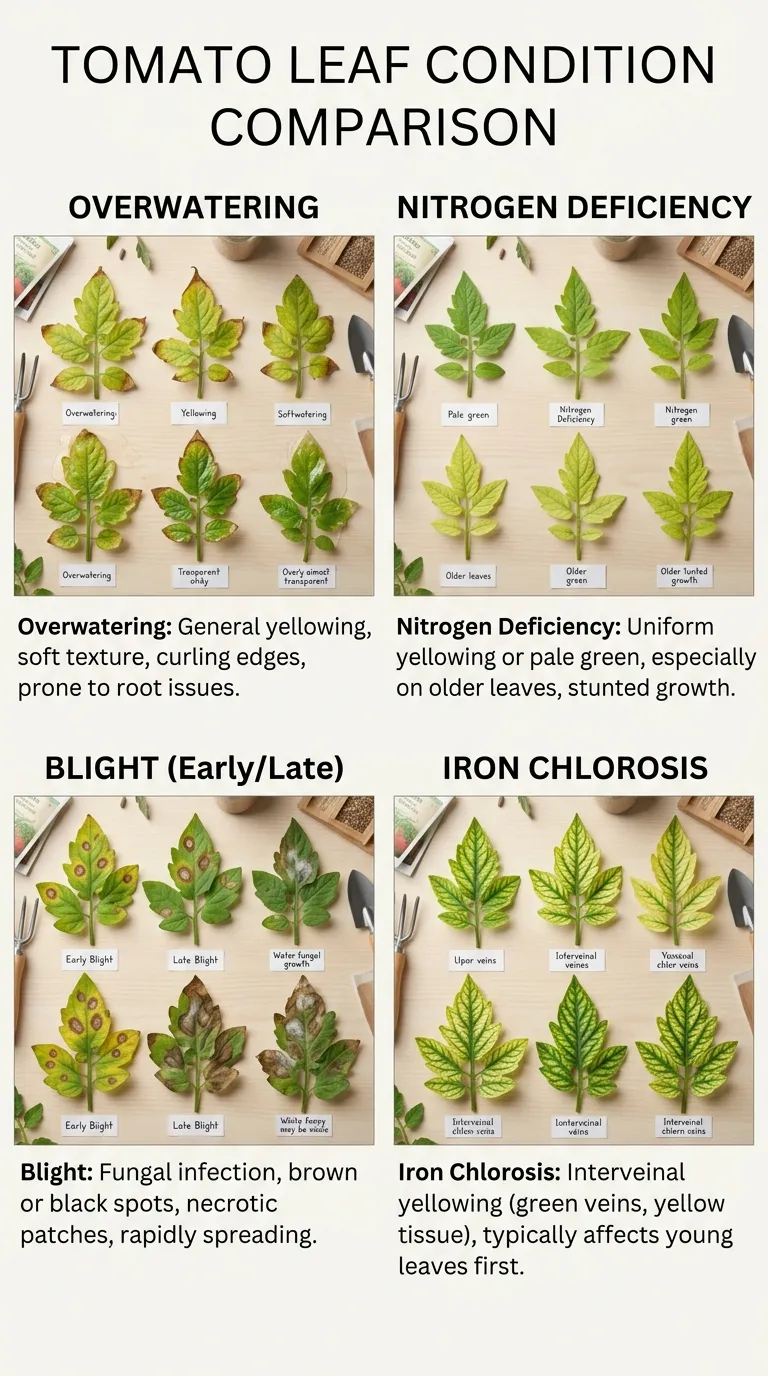
This is, hands down, the cause I see most in new gardens and containers. The symptoms are distinctive once you know them: lower leaves turn a pale, even yellow, feel soft and limp rather than crispy, and the soil stays damp for days. You might see a faint white mold on the soil surface, or the stem near the soil line looks a touch darker. Poke your finger two inches down — does it come up wet and cool? That’s your answer.
Why does it happen? Tomato roots need oxygen as much as water. When soil stays soggy, air pockets collapse, roots turn brown and mushy, and they can’t take up nitrogen even if it’s there. So the plant cannibalizes lower leaves. My second year, after ten days of drizzle plus nightly watering, my ‘Celebrity’ row turned translucent yellow at the bottom with a faint sour smell. I had to stop watering, pull back mulch so sun kissed the soil, and prune the worst leaves so air could move.
How to fix it: Stop watering immediately. Let the top 2 to 3 inches dry completely. In a pot, lift it — does it feel heavy as a wet bag? Wait. Check drainage — do containers have holes? Is your in-ground bed in a low spot where water pools? Improve airflow by pruning the lowest yellow leaves and any suckers touching soil. Going forward, water deeply 2 to 3 times per week instead of a light daily sprinkle, and mulch 3 inches deep with straw after the soil dries slightly.
2. Nitrogen Deficiency (The Hungry Plant Fade)
Nitrogen is a mobile nutrient, which is a fancy way of saying the plant can move it from old leaves to new ones when it’s running low. So where does yellowing show first? The oldest, lowest leaves fade uniformly to pale yellow or light green while new growth at the top looks small and a bit washed-out. No spots, just a gentle, even fading. Growth slows, and fruits stay smaller than usual.
This is especially common in sandy soils, in beds where you skipped compost, or after heavy rain has leached nitrogen away. Tomatoes are gluttons; a single plant can pull astonishing amounts of nitrogen to make all those leaves and eventual pounds of fruit.
How to fix it: Side-dress when plants are about 12 inches tall and again when first fruits are marble-sized. Use blood meal, fish emulsion, or balanced granular like 10-10-10, sprinkled in a ring 6 inches from the stem at the drip line, then watered in well. Don’t dump fertilizer against the stem — it burns. And don’t overdo it; more nitrogen after flowering just makes jungle vines with no tomatoes. See my deeper dive in vegetable garden fertilizer.
3. Early Blight (The Spotted Culprit with Bullseyes)
If your yellow leaves have dark brown or black spots with yellow halos — like a bullseye or target — you’re likely looking at early blight (Alternaria). It almost always starts on the lowest leaves after a warm, wet spell and marches upward. Leaves yellow around spots, then turn brown, crisp, and fall. Soil splash is the usual delivery service; spores overwinter in soil and on debris.
I find this most often after a thunderstorm where soil splashed up stems, or in gardens where tomatoes were planted in the same spot as last year.
How to fix it — and stop the spread: Act fast. Snip every affected leaf with clean, alcohol-wiped scissors, cutting at the petiole base. Don’t shake the plant — you’ll puff spores. Trash the leaves. Never compost diseased tomato foliage. Water only at the base before 10 a.m. so foliage dries quickly. Mulch immediately to create a clean barrier between soil and leaves. Space plants 24 to 36 inches apart and stake or cage them. Rotate crops yearly — no tomatoes, potatoes, or peppers in that same bed for 2 to 3 years if blight was severe. See vegetable garden diseases.
4. Septoria Leaf Spot (The Confetti of Black Dots)
Septoria looks similar but with smaller, more numerous spots — many tiny dark dots with pale centers, surrounded by yellowing. It also starts low and moves up, especially in humid weather with warm days and nights. Like early blight, it spreads by splash.
How to fix it: Same protocol as early blight — remove, trash, mulch, water at base, airflow. Removing the first spotted leaf in July often saves you from stripping half the plant in August. Early action is gentle; late action is drastic. Keep at least two-thirds foliage overall so fruit doesn’t sunscald.
5. Underwatering & Heat Stress (The Crispy Edge)
This yellowing looks different — more yellow-brown, dry, and papery at edges before the whole leaf wilts. Think of toast left a bit too long, curled inward. The soil pulls away from the pot edge, the plant droops in afternoon heat even though mornings look fine, and flowers may drop too.
Tomatoes need surprisingly consistent moisture to move calcium and keep skins elastic. In heat above 90°F, an in-ground plant can drink a gallon every 2 to 3 days. A 5-gallon container on a sunny patio? Sometimes twice a day.
How to fix it: Give a deep soak until water reaches 8 inches down — check with a trowel — then lay down that 3-inch straw mulch to hold it. Drip irrigation is the gold standard; it delivers slowly without wetting leaves. If you’re hand-watering, water the soil, count to 20 per plant, and come back for a second pass. That second pass is what really soaks in. And water early; that cool morning water feels like a long drink after a hot night.
6. Iron & Magnesium Chlorosis (The Green-Vein Puzzle)
Here’s a beautiful diagnostic clue: new leaves at the top turn yellow between veins while veins themselves stay sharply green. Older lower leaves may still look fine. That’s classic interveinal chlorosis, and on tomatoes it usually means iron is locked up because soil pH is too high — above 7.2 is a common threshold. The iron is there, but the plant can’t sip it.
I saw this in a bed next to a limestone path where pH had crept to 7.6. Everything looked chlorotic, no matter how I fed. A simple pH test solved the mystery in five minutes.
How to fix it: Test first, guess second. Use my guide on how to test soil pH — a $15 kit is fine. If pH is high, correct with chelated iron as a short-term foliar rescue and elemental sulfur for a long-term shift down toward 6.0 to 6.8. For magnesium-related yellowing (more common on older leaves with reddish tints), a foliar epsom spray can help, but pH is the root check. Don’t just add iron blindly; pH controls the door.
7. Pests: Aphids, Whiteflies & Spider Mites (The Tiny Specklers)
Sometimes yellowing isn’t a solid wash but a field of tiny yellow speckles or a mottled, dusty look. Flip the leaf over. Do you see clusters of pear-shaped green or black aphids, tiny whiteflies that puff up when you brush the leaf, or ultra-fine webbing stippled with specks? That’s spider mites — they love hot, dusty conditions and will make leaves look bronzed and tired.
These pests pierce leaves and drain them, and aphids and whiteflies leave sticky honeydew that can blacken with sooty mold. They also transmit viruses that cause curling and persistent yellowing, so early action matters.
How to fix it gently: Start with a strong jet of water from the hose, aimed at leaf undersides, two mornings in a row. That alone knocks back 70% of aphids. For persistent colonies, spray insecticidal soap in early morning or evening — never in hot midday sun — coating undersides thoroughly. Introduce ladybugs by planting nearby dill or yarrow if you can. See get rid of aphids naturally and vegetable garden pests.
8. Too Little Light or Crowding (The Interior Fade)
Have you ever parted a big, bushy tomato and found pale yellow leaves hiding inside like they never saw the sun? Because they didn’t. Dense, unpruned plants shade their own interior, especially indeterminate types that just keep vining. Those inner leaves yellow, drop, and can trap humidity that invites disease.
Tomatoes need 6 to 8 hours of direct sun and, just as importantly, air moving through the canopy.
How to fix it: Stake, cage, and prune with intention. For indeterminate varieties, I prune suckers below the first flower cluster and any leaves touching the ground. I keep at least two-thirds of foliage — tomatoes need leaves to photosynthesize and shade fruit from sunscald. Space plants 24 to 36 inches apart at planting. See vegetable garden layout for spacing templates.
9. Natural Senescence & Late Season Fade (When Yellow Is Normal)
Late August into September, lower yellowing is normal as the plant throws energy into ripening. Fruits are coloring, nights cool, and the oldest leaves fade even with perfect care. Don’t panic — just keep harvesting, remove the ugliest leaves, and pinch new flowers about 4 weeks before first frost so the plant finishes what it started. If new top growth stays green and glossy while only the bottom 2 to 3 leaves yellow slowly, that’s attrition, not crisis. Take a photo today and compare in seven days — is green moving up or yellow moving up? That trajectory is your truth.
Should You Remove Yellow Tomato Leaves? Yes — Gently and Cleanly
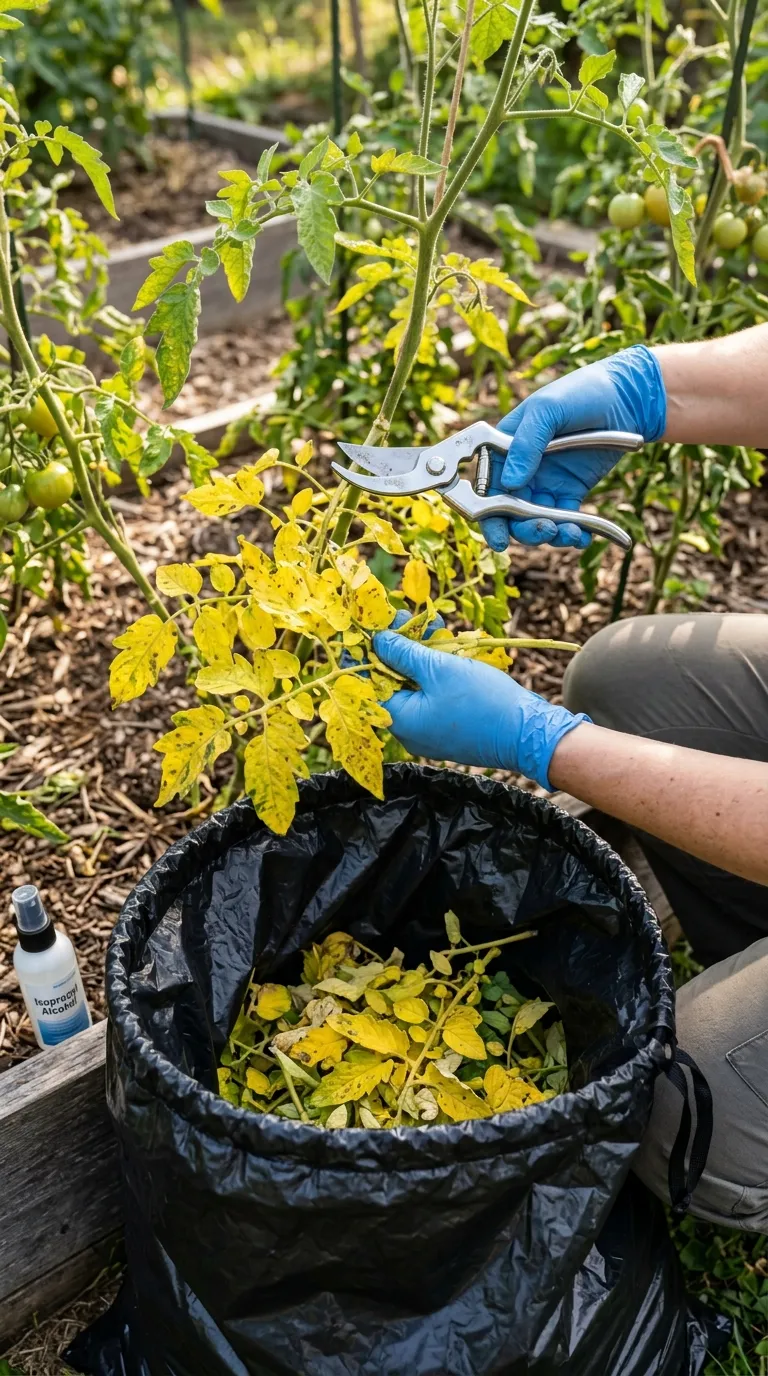
Think of yellow leaves as spent solar panels. A fully yellow leaf will never turn green again. It’s no longer feeding the plant; it’s costing energy and blocking light and air. Removing it redirects that energy to new, healthy growth and to the fruit that is counting on those sugars.
How I do it: I wipe scissors or pruners with rubbing alcohol, then snip at the petiole base where leaf stem meets main stem. I do this on a dry morning, not right after rain, so cuts heal quickly. I never rip leaves — torn stems invite bacteria. And I immediately bag any spotted or diseased foliage and trash it; I never compost it, even in hot compost. Clean-up after pruning is as important as the cut itself.
Will your plant look a bit thinner? Probably. That’s okay. In two weeks you’ll see improvement — better airflow, less spotting on new leaves, and you can actually see whether your fix is working because you’re monitoring fresh growth, not old damage. For a full pruning rhythm, see how to prune tomato plants.
My 60-Second Diagnosis Flow — Try This Tomorrow Morning
Walk out with coffee and ask these in order:
- Stick your finger 2 inches down. Wet for days? Overwatering. Bone dry and pulling away from pot? Underwatering.
- Look where yellow starts. Lower and even? Water/nitrogen. Upper with green veins? pH/iron.
- Look for spots or halos. Yes? Blight/septoria — remove and trash, mulch, water at base.
- Flip leaves. Speckles, honeydew, webbing? Pests — water blast, then soap if needed.
- Step back. Is plant dense as a hedge, shading itself? Prune and stake for air.
If you answer those five, you’ve narrowed it to one or two causes in under a minute. That’s all you need to pick the right fix instead of trying everything at once.
Common Mistakes That Turn a Few Yellow Leaves Into a Whole Yellow Plant
- Feeding when water is the issue. Feeding a waterlogged plant burns roots and wastes money. Fix moisture first, wait 48 hours, then reassess.
- Composting diseased foliage. Spores survive compost and return next year. Trash, never compost, spotted leaves.
- Overhead watering late in the day. Leaves stay wet all night — fungal paradise. Water at base before 10 a.m.
- Removing more than one-third foliage at once. It shocks the plant and exposes fruit to sunscald. Prune lightly and often.
- Ignoring pH year after year. Iron chlorosis repeats until pH is corrected to 6.0 to 6.8. Test every spring.
- Planting tomatoes in the same spot yearly. Rotation is the simplest disease prevention — 2 to 3 years between nightshades.
Seasonal Calendar — When Leaves Are Most At Risk
- Spring (transplant to 12 inches): Biggest risk is cold plus overwatering. Keep soil moist but not soggy, protect from nights below 50°F, and don’t mulch until soil warms. Yellow at this stage is almost always too much water.
- Early summer (flowering): Watch nitrogen. Side-dress lightly, ensure 6 to 8 hours sun, and start staking early so air flows.
- High summer (fruiting & heat above 85°F): Check water daily with finger test, watch for blight after storms, and remove lower spotted leaves immediately. This is when that daily 60-second walk matters most.
- Late summer to fall: Lower yellowing is normal as plant throws energy into ripening. Don’t panic — just keep harvesting, remove ugliest leaves, and pinch new flowers about 4 weeks before first frost.
Prevention for Greener Leaves All Season Long
Consistency is the quiet magic behind perfect tomato foliage. Here is the simple routine that has kept my plants green into late September:
- Water 1 to 1.5 inches per week, consistently, at the base before 10 a.m. Use a tuna can to measure. Deep, even moisture keeps calcium moving and leaves happy.
- Mulch 3 inches with straw after soil warms. I wait until soil is at least 60°F, then tuck straw like a blanket. It cuts evaporation by half, keeps soil cool, and stops splash.
- Feed by the calendar, not by panic. Compost and balanced fertilizer at transplant, again when plants are 12 inches tall, and again when first fruits set. That’s usually enough. See best fertilizer for tomatoes.
- Keep soil pH 6.0-6.8 and test every spring. A $15 test beats a season of chlorotic leaves. See best soil for tomatoes.
- Space and air. 24 to 36 inches between plants, one strong stake or cage per plant, and a weekly 5-minute scout for spots or pests.
- Rotate and tidy. No tomatoes in same spot year after year, and at season’s end, remove all tomato debris.
Troubleshooting Quick Fixes by Symptom
- Whole lower leaf fades evenly to yellow, soil wet: Overwatering — dry, drain, prune.
- Whole lower leaf fades evenly, soil dry, growth stunted: Nitrogen — side-dress and water in.
- Yellow halo around brown/black spots, starts low and moves up: Blight/septoria — remove, trash, mulch, never overhead water.
- Leaf edges yellow-brown and crispy, wilting midday: Underwatering/heat — deep soak + mulch, water early.
- Top leaves yellow between green veins: Iron chlorosis/high pH — test pH, apply chelated iron + sulfur if needed.
- Tiny yellow speckles, sticky or webbing underneath: Pests — blast with water, soap if needed, protect beneficials.
- Pale interior leaves inside dense bush: Light/air — prune suckers, stake, space better next year.
Behind the Scenes — Why These Details Matter More Than They Sound
I used to think all this talk about pH and spacing was fussiness. It’s not. It’s physics and biology you can feel with your hands.
Every time I pushed my finger 2 inches into soil and actually waited a day when it felt cool and damp, I saved a watering and a yellow leaf. Every time I buried a stem deep and watched those tiny hairs become roots, I gave the plant a second engine. Do you know that small thrill when you tug gently on a deep-planted tomato a week later and it doesn’t move? That’s roots holding.
We gardeners love to buy things. But the biggest yield bumps I have measured came from not buying — not buying extra nitrogen after bloom, not buying a daily sprinkle habit, not buying a spray when a shake would do. The restraint is the technique.
A Note on Microclimates — Your Garden Is Not My Garden
Your fence, your oak tree, your wind corridor between houses — they all tweak sun and airflow by an hour or two. That’s enough to shift watering needs by a full day. I now keep a $8 max-min thermometer at tomato height for a week in June. The night temperature I thought I had and the one my plants actually felt differed by 4°F. That 4°F was the difference between set and drop.
So take any schedule here — mine included — and test it against your finger, your trowel, your tuna can. The schedule is a starting point. Your hands are the final authority. Have you checked your actual canopy temperature yet? Try it tomorrow. You may be surprised.
The Soil Food Web You Can’t See But Can Feed
Compost is not just nutrients. It’s a city. Bacteria, fungi, earthworms — they glue soil into crumbs that hold air and water in the same pore. When you add 2 to 3 inches of compost, you aren’t just feeding tomatoes. You are housing the workforce that will feed them for you, slowly, all summer.
I learned to add compost in fall, not just spring. Fall compost sits, settles, and lets frost do the mixing. Spring compost I work lightly into the top 6 inches only. Deep turning every year hurts the very fungi that help tomatoes find phosphorus. Less tillage, more surface blanket — that’s been my quiet revolution.
Common Mistakes Revisited — The Subtle Ones That Creep In Year Two
We covered the big mistakes. Here are the sneaky ones that show up after you think you’ve mastered the basics.
-
Mulching too early when soil is still cold. You trap 48°F soil under a blanket and roots sit shivering for an extra two weeks. Warm to 60°F first, then tuck in.
-
Watering on a clock, not after rain. That Tuesday-and-Friday timer doesn’t know about Monday’s inch. Always check the tuna can first.
-
Feeding high-nitrogen “tomato food” that is actually lawn food in disguise. Read the first number. If it’s 20 or higher and the bag shows grass, put it down.
-
Pruning in wet weather. Cuts stay open and invite bacteria when leaves stay damp. Prune on dry mornings, 3 to 5 days after watering, with alcohol-wiped shears.
-
Saving seed without noting which plant actually yielded. Next year you grow the pretty one, not the productive one. Tag the winner with yarn at harvest.
Which of these feels familiar? I have done every single one, some twice. The fix is not shame — it’s one new habit for seven days until it sticks.
Seasonal Timeline — Week by Week When It Actually Happens
-
Late April: Cover future tomato row with black plastic for 7 days to push soil from 50°F toward 60°F. Chive clumps wake up; borage self-sows reveal themselves. This is anticipation, not planting.
-
Early May: Sow carrots and lettuce in future tomato alleys while hardening off seedlings. They germinate while tomatoes toughen outdoors a few hours daily.
-
Mid-May (after last frost, soil 60°F): Transplant deep, composted, balanced feed, staked, watered in. Basil companions go 12 inches south of each tomato. Marigolds at corners. Water hole before plant, then after.
-
Late May to Early June: Keep top inch moist but not soggy. Purple stems? Usually cold, not phosphorus. Wait for warmth rather than adding more food.
-
Early to Mid-June: Plants hit 12 to 18 inches. First light side-dress if needed, first sucker pruning below first bloom, mulch now after soil is warm. Daily finger checks become every other day.
-
Late June to Mid-July: First flowers open. Switch to low-nitrogen. Shake flowers at midday. Bees arrive and stay if you let one basil flower. Watch lower leaves for first spots — remove early.
-
Mid-July to Mid-August: Fruit swelling, peak thirst and hunger. Even moisture plus second low-nitrogen feed 3 to 4 weeks after first fruits if warm. Scout for hornworms weekly. Harvest cherries every 2 days.
-
Mid-August: Second sowing of spinach or lettuce in dappled shade under trellised tomatoes. Garlic gaps from July harvest get new basil transplants. The bed gives again without extra space.
-
Late August to September: Taper water slightly to concentrate flavor as fruits blush. Pinch new flower clusters 4 weeks before first frost. Stop fertilizing. Let ripening take center stage.
-
At First Frost Warning: Harvest all, including greens, ripen indoors on counters. Pull vines for trash if blighted, compost if healthy. Wash stakes in 10% bleach, sun-dry. Spread fall compost.
I tape this to the fridge. It turns “am I late?” into “oh, next is that — I can do it this weekend.”
Troubleshooting Deep Dive — Real Garden Conversations
Q: “My leaves yellow from the bottom but I’m sure I didn’t overwater.” Have you checked nights? Cold soil below 55°F mimics nitrogen deficiency because roots stall. Warmth often greens the next leaves without any feed. Cover at night, wait ten days, then reassess.
Q: “I watered evenly but fruits still cracked after that storm.” Mulch is the buffer between you and weather. Without 3 inches of straw, even perfect watering between rains can’t stop a 2-inch overnight deluge from splitting tight skins. Mulch evens the spike.
Q: “My cherry sets fruit but beefsteak doesn’t in the same bed.” Heat sensitivity differs. Cherries set at 92°F when beefsteaks stall above 90°F nights above 75°F. That’s variety genetics, not your care. Grow both and harvest across temperatures.
Q: “Can I fix blossom end rot with calcium spray?” Usually water is the fix, not calcium. Most soils have enough calcium; irregular moisture stops its ride to fruit tips. Even water plus mulch solves the next fruits. Only add lime if a soil test shows pH low.
Q: “Should I mist flowers to help pollination?” Please don’t. Wet pollen is dead pollen. Dry vibration at midday is the help. Keep water at soil.
If you answer your own garden with these prompts, you will hear what it’s actually asking for rather than what the internet shouted loudest yesterday.
What I Keep in My Apron — The Small Tools That Make Big Differences
- A $8 soil thermometer that tells me when 60°F is real, not calendar-guessed.
- A $6 packet of yarn to tag flower trusses the day I shake them.
- A cheap electric toothbrush in a zip bag for buzz pollination.
- A tuna can nailed to a stake as a rain gauge, shocking in its accuracy.
- A pocket notebook — one line per week: date, weather, what I did, what leaves looked like. By September, I have next year’s plan.
Could you assemble these this week? They cost less than one nursery tomato and save a season of guessing.
Quick Field Checklist — Tape This to Your Watering Can
- Sunday: finger test 2 inches, prune one spotted leaf if needed, note in book
- Midweek: shake tomato flowers at midday, check pepper undersides for aphids
- After rain: check tuna can, skip watering if inch collected, pull mulch back if soggy
- At first blush: pick promptly, leave a few to fully ripen for flavor test
- Before frost: pinch new flowers 4 weeks out, stop feeding, harvest all greens
This five-line loop replaces worry with rhythm. It takes six minutes and covers water, pruning, and pollination in one walk.
Small Tools, Big Payoff
A soil thermometer, yarn for tagging trusses, a $8 heat mat for pepper seeds, a tuna can gauge, and a pocket notebook. These cost less than two nursery plants and answer questions you would otherwise Google at midnight.
Frequently Asked Questions
Q: Why are my tomato leaves turning yellow?
A: It’s almost always one of four things — too much water, not enough nitrogen, early blight, or simply not enough sun and air. The pattern is your best clue. If the oldest lower leaves go pale yellow first, think water or nitrogen; you’re seeing the plant pull resources upward. If new leaves at the top show yellow tissue with crisp green veins, iron chlorosis from high pH is more likely. And if you see spots with yellow halos that move up the plant, that’s fungal — remove those leaves right away, trash them, mulch to stop soil splash, and water only at the base in the morning. Start with the finger test: poke two inches down. Soggy for days? Let it dry. Bone dry? Deep soak and mulch.
Q: Can yellow tomato leaves turn green again?
A: I wish I could say yes, but no — once a leaf has turned fully yellow, the chlorophyll is gone and it won’t green back up, even if you fix the cause perfectly. Think of it as a spent leaf that’s finished its job. The good news? The plant is incredibly good at making new, deep-green growth once the stress is removed. So snip those fully yellow leaves cleanly at the petiole with alcohol-wiped shears, tidy them into the trash, and watch the new leaves at the top over the next 10 to 14 days. If those stay green and glossy, your fix worked.
Q: Should I remove yellow leaves from tomato plants?
A: Absolutely, and don’t feel guilty about it — you’re helping. I remove any leaf that is more than half yellow, has spots, or is touching the soil line. Use clean, sharp scissors, cut at the base of the leaf stem on a dry morning, and bag diseased foliage for the trash — never the compost pile. Why so strict? Diseased spores overwinter so well in compost, and you don’t want to re-invite blight next spring. Removal does three lovely things: it stops disease from marching upward, it lets light and breeze into the interior, and it gives you a clear scoreboard after pruning.
Q: How do you fix yellow tomato leaves from overwatering?
A: The fix is about air as much as water. First, pause all watering until the top 2 to 3 inches feel dry to your knuckle — yes, even if it’s hot. If it’s in a pot, make sure water truly drains out the bottom and never leaves the pot sitting in a saucer of water. Next, gently prune the soft, pale yellow lower leaves to open airflow, and pull mulch back for a day or two so the soil surface can breathe. If roots look mushy and brown when you peek, shake off soggy soil and repot in fresh, airy mix. Going forward, hug those two habits: water deeply 2 to 3 times per week for 1 to 1.5 inches at the base before 10 a.m., and keep a 3-inch straw mulch once the soil has dried slightly.
Related Articles
- How to Grow Tomatoes
- How Often to Water Tomato Plants
- How to Prune Tomato Plants
- Best Soil for Tomatoes
- Tomato Companion Plants
- Best Fertilizer for Tomatoes
Sources & References
- University of Minnesota Extension — https://extension.umn.edu/yard-and-garden/vegetables/tomato-leaf-problems
- Cornell Vegetables — https://www.vegetables.cornell.edu/crops/tomatoes/
- Iowa State University Extension — https://hortnews.extension.iastate.edu/tomato-yellow-leaves
- NC State Extension — https://content.ces.ncsu.edu/tomato-leaves-turning-yellow
- University of California IPM — https://ipm.ucanr.edu/PMG/GARDEN/VEGES/tomato.html
