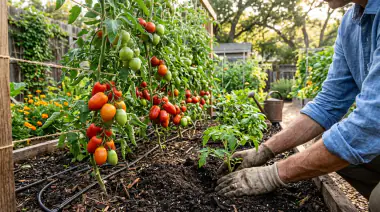
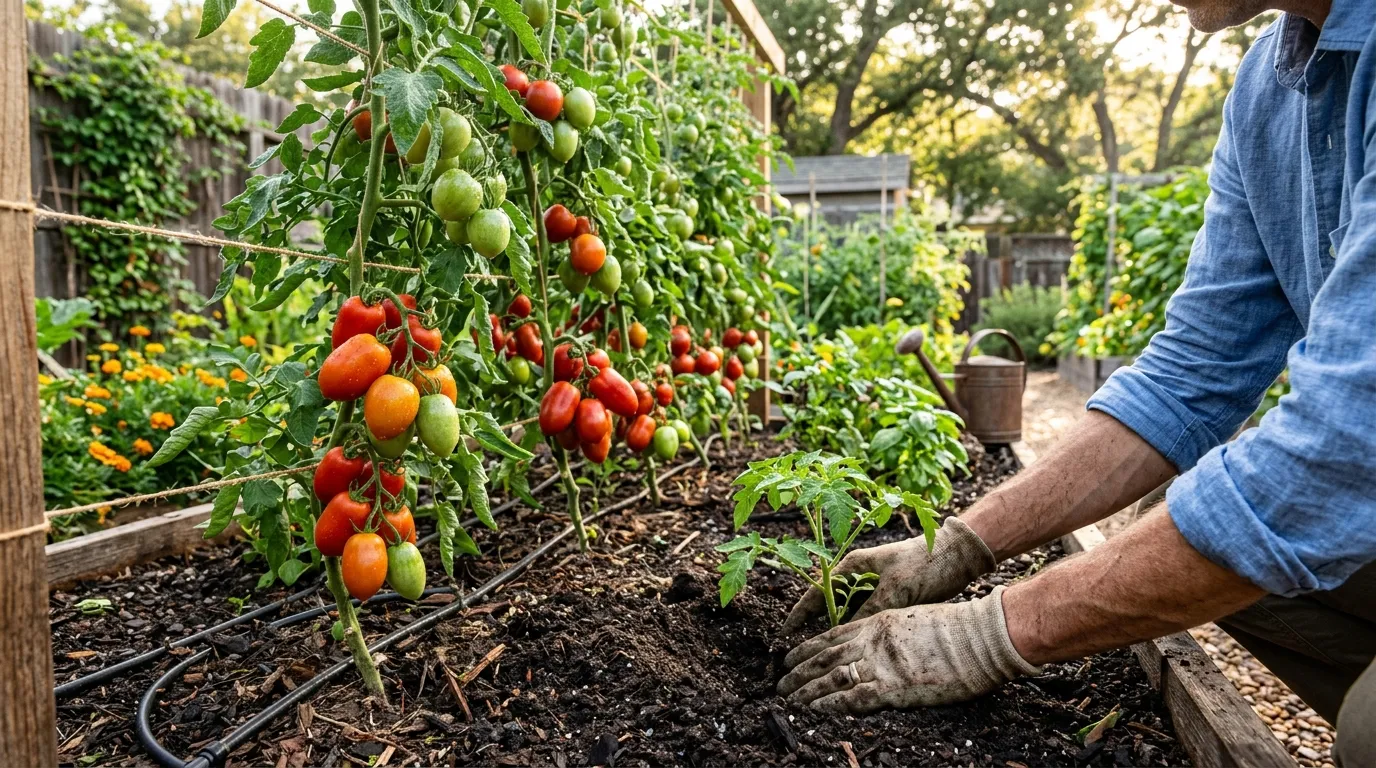
My first tomato summer, I did everything wrong with such confidence it still makes me laugh. I bought the tallest, most flower-covered transplant at the big box store, plopped it into cold clay the weekend after the last frost date on the calendar — not the soil temperature, the calendar — and watered it every evening with a cheerful splash that wet every leaf. It grew. It even flowered. Then August arrived, and I had exactly two cracked, pale-shouldered fruits and a jungle of yellow-spotted leaves. That was the year the tomato taught me humility.
The next year, I asked neighbors who’d gardened the same street for decades. One showed me how deep she buried stems. Another handed me straw mulch and said, nothing else. A third tapped a flower and said, shake it, dear. Those tiny, unglamorous habits added up to bushels. This 10-step guide is that collected, dirt-under-nails wisdom, refined over seasons where I kept a little notebook and learned which steps actually move the needle for a bigger, tastier harvest — not just a prettier vine.
Why does it matter now, at the start of the season? Because tomatoes reward the first two weeks after transplant more than any other window. Get sun, soil, depth, and water right in those fourteen days, and the plant builds the root engine that carries you through July heat and September blush. Skip them, and you’re chasing problems all summer.
Quick Answer: Plant tomatoes outdoors after the last spring frost when soil is at least 60°F (15°C) — warmer is better. Choose a spot with 6 to 8 hours of direct sun, work 2 to 3 inches of compost into the top 6 inches, and set transplants deep so the stem is buried up to the first true leaves to grow extra roots. Space 24 to 36 inches, stake or cage at planting, keep soil consistently moist with 1 to 1.5 inches per week at the base, mulch 3 inches after soil warms, feed lightly by stage, prune suckers on indeterminate types, and harvest when fruits reach full color and yield slightly to gentle pressure.
At a Glance
| Fact | Details |
|---|---|
| Sun | 6 to 8 hours direct sun daily, morning sun ideal |
| Soil | Loose, well-drained loam enriched with 2 to 3 inches compost |
| Soil pH | 6.0 to 6.8, slightly acidic |
| Water | 1 to 1.5 inches per week, evenly, at base before 10 a.m. |
| Spacing | 24 to 36 inches apart, rows 36 to 48 inches |
| Planting depth | Deep — bury stem up to first true leaves |
| Support | 6-foot stake or 54-inch cage at planting time |
| Time to harvest | 60 to 85 days from transplant depending on variety |
| Difficulty | Beginner-friendly once watering and support are consistent |
Why Grow Your Own? The Flavor Equation That Changed My Kitchen
Store tomatoes and garden tomatoes share a name and almost nothing else. The one was picked green, gassed, and shipped cold. The other you pick warm, when its shoulders have finally blushed fully and its scent — that green, earthy, vine perfume that says summer — rises as soon as your thumbnail kisses the stem. Do you remember the first truly sun-warm tomato you ever tasted sliced with salt? The juice ran down your wrist. The acidity and sweetness were not opposing forces; they were harmony.
One well-grown plant gives 10 to 15 pounds of fruit. Two or three plants can feed a small family through August and still leave you enough to roast, freeze, or share. New to growing anything at all? Start with my how to start a vegetable garden for beginners to get beds and timing right, then come back here for the tomato-specific magic. And if you’re mapping sunshine, my vegetable garden layout planning saves you from that mid-July shading surprise where one bed steals another’s light.
What Homegrown Actually Tastes Like
It’s not just sweeter. It’s more tomato. The umami depth, the bright acid that makes a raw sauce sing without sugar, the dense flesh that doesn’t water out your sandwich by noon — those come from full vine ripening plus even water and potassium. Uneven watering dilutes sugars right when fruits are coloring. That’s why consistent moisture tastes like flavor, not just health.
The 10 Easy Steps — From Seed Pack to Sauce Pot
Step 1: Choose the Right Variety for Your Space and Patience
This is where harvest size is quietly decided, weeks before planting. Determinate (bush) tomatoes grow to about 3 to 4 feet, set most fruit in a concentrated 2 to 3 week window, and stop. They suit containers, small spaces, and short seasons. Indeterminate (vining) tomatoes keep growing and fruiting until frost, need taller supports, and give you 8 to 12 weeks of picking. Most slicing and cherry types are indeterminate.
Cherry and grape tomatoes are forgiving for beginners. They tolerate a little watering wobble, ripen fastest at around 60 days, and keep producing even when slicers sulk in heat. If you’re growing your first bed, try one cherry like ‘Sungold’ or ‘Sweet 100’ and one slicer like ‘Celebrity’ or ‘Brandywine.’ You’ll get both steady snacking and sandwich glory, plus a built-in weather insurance policy — cherries often power through heat when big fruits pause.
Do you have a short, cool summer? Pick early or heat-set types. Long, hot summer? You can grow those luscious 80-day heirlooms without fear. Catalogs love superlatives; your local extension vegetable list is more honest about what actually yields here.
Step 2: Start from Seed or Buy Transplants — Both Are Honest Paths
Starting from seed gives you the widest choice and costs pennies per plant. Sow indoors 6 to 8 weeks before your last frost, ¼ inch deep in seed-starting mix at 70 to 80°F (21 to 27°C). Bright light is non-negotiable within a day of emergence — a sunny windowsill alone grows leggy, pale stems. I use a simple shop light 2 inches above seedlings for 14 to 16 hours a day, and a heat mat until they sprout in 5 to 10 days. See my starting seeds indoors for the full light and watering setup.
About a week before transplant, harden off. This is that gentle ritual of carrying trays outside for a few hours, lengthening daily, so leaves and stems thicken to handle sun and wind. Skip it, and sunscald bleaches leaves white in a single afternoon.
Buying transplants? Totally fine for your first season, and faster. Choose stocky, deep-green plants with stems as thick as a pencil, no flowers or fruit yet if you can. If flowers are already open, pinch them at planting so roots establish first.
Step 3: Prepare Soil That Feels Like Chocolate Cake (and Tests Like It Too)
Tomatoes like loose, rich, well-drained loam with pH 6.0 to 6.8. If you can squeeze a handful and it holds shape then crumbles, you’re close. If it stays in a slick ribbon, it’s clay; if it falls through fingers, it’s sand. Either grows tomatoes once amended.
Work 2 to 4 inches of finished compost into the top 6 inches a week before planting. Not fresh manure, not half-finished wood chips — dark, crumbly, earthy-smelling compost that looks like forest floor. Test pH if you can; a $15 kit or county soil test turns guessing into knowing. At pH above 7.2, iron locks out; below 5.8, calcium struggles. Compost buffers gently both ways. For a deeper dive, my how to prepare soil for planting and how to test soil pH walk through the five-minute steps.
I also sprinkle a balanced granular like 10-10-10 per label rate at planting time if my compost is leaf-based and nitrogen-light. Warm soil matters as much as rich soil — I lay black plastic for a week in early May to nudge root-zone temperature to that magical 60°F mark.
Step 4: Plant Deep — The Most Important Trick Nobody Believes Until They Try It
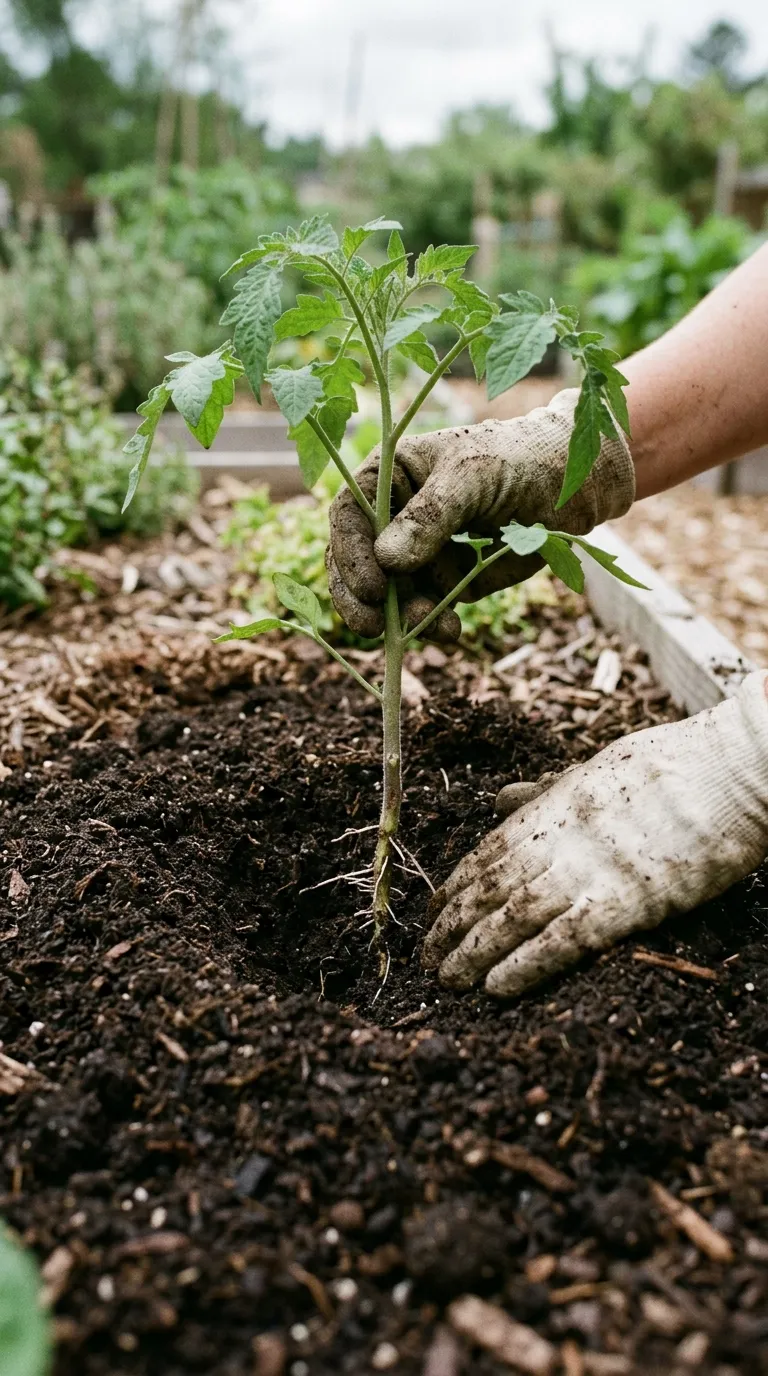
Here’s the habit that doubled my vigor overnight: tomatoes root along the stem. Every tiny hair can become a root if buried. So I strip lower leaves, dig a deep hole or shallow trench, and bury the stem so only the top 4 to 6 inches remain above soil. Some gardeners lay plants sideways in a trench and curve the tip up; either works.
Why does depth matter so much? More roots mean more water and nutrient uptake, better drought resilience, and a sturdier plant that doesn’t topple in August storms. Shallow planting gives you a shallow engine. Deep planting gives you a deep one. On my second try with deep planting, the same variety, same bed, same weather out-yielded the previous year by nearly half, with far less wilting. Research from Cornell Vegetables highlights this adventitious rooting as a key advantage.
Don’t forget spacing: 24 to 36 inches between plants, 36 to 48 inches between rows. It looks sparse in May. It looks perfect in July.
Step 5: Stake or Cage at Planting — Don’t Make the Plant Wait
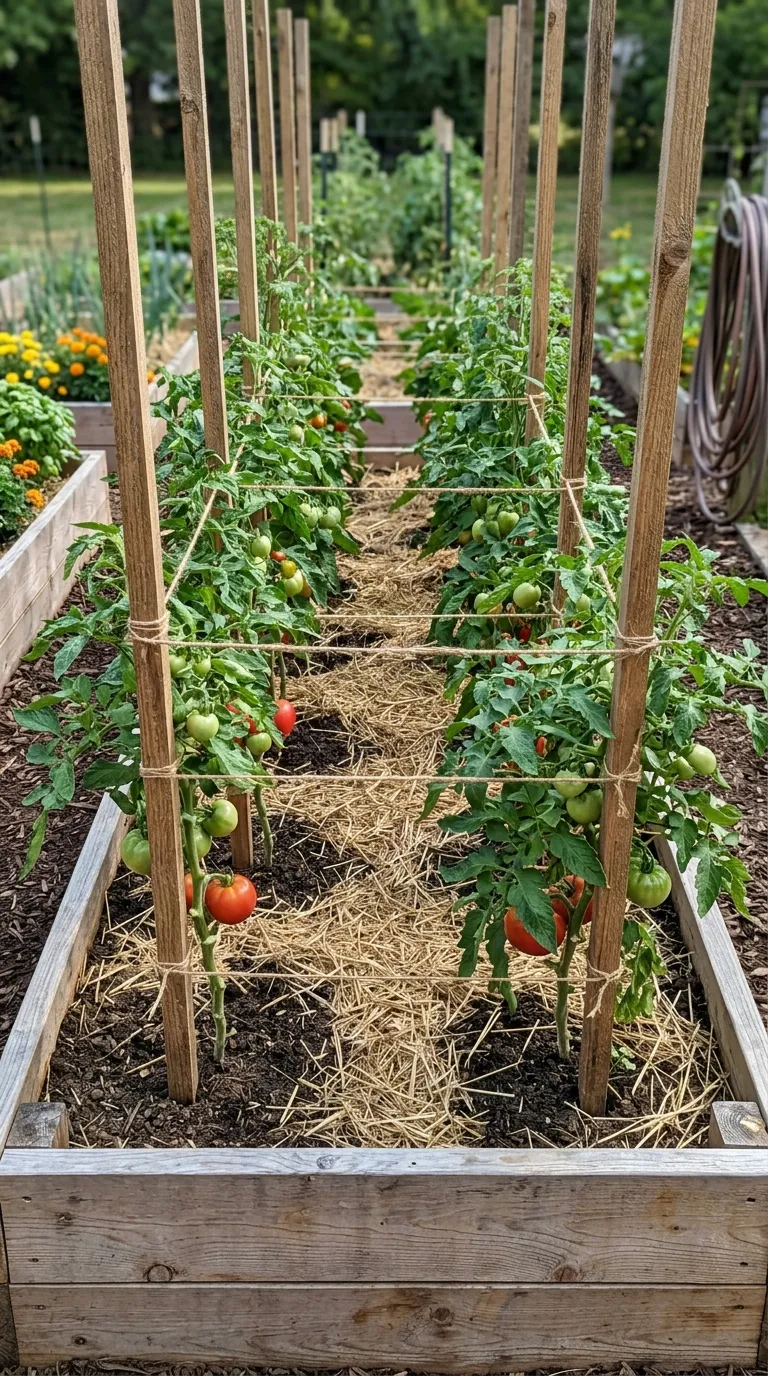
Tomato supports are not decoration. They lift fruit off soil, improve airflow that prevents blight, and make harvesting actually pleasant rather than a stooped hunt through foliage. Set them at planting so you don’t stab new roots later.
A 6-foot stake driven 12 to 18 inches deep with soft twine ties every 10 to 12 inches works beautifully for indeterminate vines pruned to 1 or 2 leaders. A 54-inch wire cage lets determinate bushes sprawl a bit while still keeping fruit clean. I tie with strips of old t-shirt; they give without cutting stems. Plan this with my vegetable garden layout ideas if you’re juggling multiple beds and paths.
Ever skipped support and regretted it by July 4th when vines flopped and fruits rotted where they touched damp mulch? I have. Mulched ground is humid. Fruit on mulch bruises, slugs find it, and soil splash invites disease. Upright plants are healthier plants with more pounds per plant, even if the vine looks tidier than wild.
Step 6: Water Deeply and Evenly — The Promise That Prevents Cracks and Rot
Consistency is everything. Aim for 1 to 1.5 inches per week, delivered in 2 to 3 deep sessions, not a daily sprinkle. Deep soakings invite roots downward where soil stays cool; shallow sips keep roots near the hot surface. In heat above 90°F, edge toward 2 inches total, but track rain with a simple tuna can or gauge — an inch from a thunderstorm counts.
Water at the base in the morning so leaves stay dry. Wet foliage for hours invites early blight and septoria. I switched to a soaker hose on a battery timer set to 6:30 a.m. for 45 minutes, and my cracking and blossom end rot dropped to background noise. Blossom end rot — that leathery black patch on the bottom — isn’t lack of calcium in most soils; it’s calcium movement failure when water swings (Source: University of Minnesota Extension).
Mulch 3 inches deep with straw, shredded leaves, or clean wood chips after soil warms to 60°F. Keep mulch a couple inches from stems to prevent moisture on the crown. See how often to water tomato plants and how often to water vegetables for stage-by-stage timing.
Step 7: Feed by Stage, Not by Calendar — Balanced Early, Low Nitrogen Later
Tomatoes are heavy feeders, but they want different ratios as they grow. At planting and about 3 weeks after transplant, a balanced fertilizer like 10-10-10 or organic 5-5-5 supports roots and leaves. Once flowers open and marble-sized fruits form, switch to low-nitrogen, higher phosphorus and potassium like 5-10-10 or 3-4-6. That shift tells the plant, make fruit, not more leaves.
Side-dress in a ring at the drip line, 6 inches from the stem, scratch lightly, water in well. Never against the stem, never on dry soil, and never high-nitrogen lawn food after bloom — you’ll get jungle vines with no tomatoes. See vegetable garden fertilizer and best fertilizer for tomatoes for organic vs. synthetic choices and container tweaks.
Step 8: Prune Suckers with Intention — Air, Light, and Not Too Much
Suckers are the shoots in the V between leaf branch and main stem. On indeterminate types, I remove suckers below the first flower cluster early, and keep 1 to 2 main leaders thereafter. On determinate bushes, I leave most suckers — they add to that single big harvest.
Prune in the dry morning when stems snap crisply, with clean shears, never removing more than a third at once. Keep at least two-thirds of foliage overall; leaves are sugar factories that feed fruit and shade it from sunscald. If leaves yellow from the bottom up after pruning, walk through how to fix yellow leaves — often it’s water or feed, not the pruning itself.
This one habit, plus staking, does more against disease than any spray in my shed.
Step 9: Scout Pests and Disease Weekly — Catch One Leaf, Save the Vine
The tomato hornworm is the legend: a huge green caterpillar you miss until a branch is stripped overnight. Check weekly in midsummer, hand-pick, or use Bacillus thuringiensis (Bt) if needed (Source: University of California IPM). Aphids cluster on new growth; a strong hose jet plus insecticidal soap usually suffices (get rid of aphids naturally). Early blight shows brown spots with yellow halos on lower leaves — remove and trash affected leaves immediately, mulch, water at base.
Scout with a routine: coffee walk Monday, flip three leaves (low, middle, high) Thursday. Tag a spotted leaf with yarn to see if it spreads. Early action is gentle; late action is drastic.
Step 10: Harvest at Peak and Keep Picking — The Flavor Window Is Short
Tomatoes are ready when they reach full color for their variety and give slightly to gentle pressure. Flavor peaks on the vine, but fruit picked at first blush continues ripening indoors with little loss. Pick every 2 to 3 days to keep plants producing; leaving overripe fruit signals the plant to slow. Before first frost, harvest all remaining green fruit and ripen on a counter, in a paper bag with a banana if you’re in a hurry.
Store counter-ripe, never in the fridge until sliced — cold mutes aroma volatiles. For keeping, see harvesting and storing vegetables.
Common Mistakes That Cost You Pounds
- Planting too early into cold soil. It stunts roots for weeks. The fix: wait for 60°F at 2 inches and frost-free nights; use black plastic to warm.
- Shallow planting. Weak roots, wobbly plants, drought stress. The fix: bury up to first true leaves.
- Watering lightly every day and wetting leaves. Shallow roots, blight, cracks. The fix: deep 2 to 3 times weekly at base, mulch 3 inches.
- Skipping support until vines flop. Rot and disease. The fix: stake or cage at planting.
- High nitrogen after flowers open. All vine, no fruit. The fix: switch to 5-10-10 or 3-4-6 at fruit set.
- Ignoring early spots. One spotted leaf becomes ten in a humid week. The fix: remove, trash, mulch, water at base.
- Leaving ripe fruit on the vine. Slows new set. The fix: pick promptly, even slightly early at blush.
I made at least four of these the first summer. If you recognize yourself, you’re in good company — and a single correction often rebounds yield within two weeks.
Seasonal Calendar — Put This on the Fridge
- 6 to 8 weeks before last frost: Sow seeds indoors, ¼ inch deep, 70 to 80°F, 14 to 16 hours light.
- 1 week before transplant: Harden off outdoors, lengthening time daily.
- At transplant (soil 60°F, frost past): Compost, balanced feed, plant deep, stake, water in deeply, add row cover if cold snap threatens.
- 3 weeks after transplant: Light balanced side-dress, first sucker pruning below first bloom, mulch after soil warms.
- First flowers to marble fruits: Switch to low-nitrogen 5-10-10, daily bee and shake for pollination, even moisture.
- Midsummer fruit swell: Steady 1 to 1.5 inches water, weekly scouting, second low-nitrogen feed 3 to 4 weeks after first fruit set if vigorous.
- 4 weeks before first fall frost: Pinch new flowers and vine tips, stop fertilizing, let energy ripen existing fruits.
- At frost warning: Harvest all, ripen indoors.
Troubleshooting Quick Fixes
- Blossom end rot? Even out water first, mulch, don’t chase with lime unless pH test says low.
- Flowers drop? Heat above 90°F or nights above 75°F, or still air. Shade cloth 30% over tops, shake flowers at midday, keep even moisture.
- Cracking? Drought then flood. Deep even watering plus mulch between rains prevents it.
- Wilting even though soil is wet? Roots suffocating. Let top 2 to 3 inches dry, pull mulch back a day, check drainage, prune for airflow.
- Yellowing lower leaves? Water or nitrogen or blight. Finger test 2 inches, side-dress if dry and pale, remove spotted leaves and trash.
- No fruit on vigorous vine? Too much nitrogen. Flush with water, pause feed, resume low-nitrogen at fruit set.
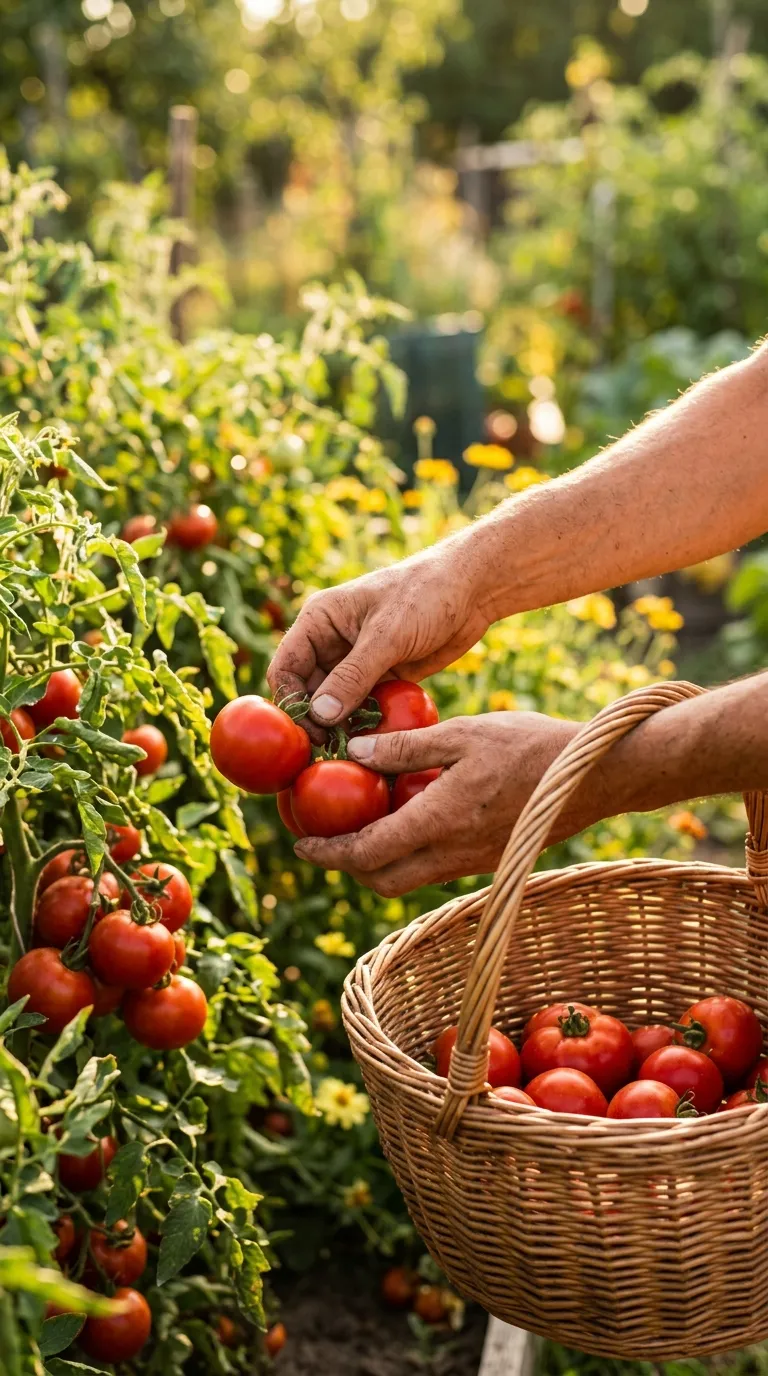
Container vs. Raised Bed vs. In-Ground — How Steps Shift Slightly
Containers want potting mix, not garden soil, and feeding more often — half-strength liquid weekly during heavy fruiting because nutrients leach with daily watering. A 5-gallon pot dries by afternoon in July; check both morning and evening. Raised beds split the difference: they warm and drain faster than in-ground, so mulch from day one and expect to water every 2 to 3 days. In-ground beds hold nutrients longest and need that deep schedule only 2 to 3 times a week. Match your rhythm to your setup and you’ll stop fighting it.
Behind the Scenes — Why These Details Matter More Than They Sound
I used to think all this talk about pH and spacing was fussiness. It’s not. It’s physics and biology you can feel with your hands.
Every time I pushed my finger 2 inches into soil and actually waited a day when it felt cool and damp, I saved a watering and a yellow leaf. Every time I buried a stem deep and watched those tiny hairs become roots, I gave the plant a second engine. Do you know that small thrill when you tug gently on a deep-planted tomato a week later and it doesn’t move? That’s roots holding.
We gardeners love to buy things. But the biggest yield bumps I have measured came from not buying — not buying extra nitrogen after bloom, not buying a daily sprinkle habit, not buying a spray when a shake would do. The restraint is the technique.
A Note on Microclimates — Your Garden Is Not My Garden
Your fence, your oak tree, your wind corridor between houses — they all tweak sun and airflow by an hour or two. That’s enough to shift watering needs by a full day. I now keep a $8 max-min thermometer at tomato height for a week in June. The night temperature I thought I had and the one my plants actually felt differed by 4°F. That 4°F was the difference between set and drop.
So take any schedule here — mine included — and test it against your finger, your trowel, your tuna can. The schedule is a starting point. Your hands are the final authority. Have you checked your actual canopy temperature yet? Try it tomorrow. You may be surprised.
The Soil Food Web You Can’t See But Can Feed
Compost is not just nutrients. It’s a city. Bacteria, fungi, earthworms — they glue soil into crumbs that hold air and water in the same pore. When you add 2 to 3 inches of compost, you aren’t just feeding tomatoes. You are housing the workforce that will feed them for you, slowly, all summer.
I learned to add compost in fall, not just spring. Fall compost sits, settles, and lets frost do the mixing. Spring compost I work lightly into the top 6 inches only. Deep turning every year hurts the very fungi that help tomatoes find phosphorus. Less tillage, more surface blanket — that’s been my quiet revolution.
Common Mistakes Revisited — The Subtle Ones That Creep In Year Two
We covered the big mistakes. Here are the sneaky ones that show up after you think you’ve mastered the basics.
-
Mulching too early when soil is still cold. You trap 48°F soil under a blanket and roots sit shivering for an extra two weeks. Warm to 60°F first, then tuck in.
-
Watering on a clock, not after rain. That Tuesday-and-Friday timer doesn’t know about Monday’s inch. Always check the tuna can first.
-
Feeding high-nitrogen “tomato food” that is actually lawn food in disguise. Read the first number. If it’s 20 or higher and the bag shows grass, put it down.
-
Pruning in wet weather. Cuts stay open and invite bacteria when leaves stay damp. Prune on dry mornings, 3 to 5 days after watering, with alcohol-wiped shears.
-
Saving seed without noting which plant actually yielded. Next year you grow the pretty one, not the productive one. Tag the winner with yarn at harvest.
Which of these feels familiar? I have done every single one, some twice. The fix is not shame — it’s one new habit for seven days until it sticks.
Seasonal Timeline — Week by Week When It Actually Happens
-
Late April: Cover future tomato row with black plastic for 7 days to push soil from 50°F toward 60°F. Chive clumps wake up; borage self-sows reveal themselves. This is anticipation, not planting.
-
Early May: Sow carrots and lettuce in future tomato alleys while hardening off seedlings. They germinate while tomatoes toughen outdoors a few hours daily.
-
Mid-May (after last frost, soil 60°F): Transplant deep, composted, balanced feed, staked, watered in. Basil companions go 12 inches south of each tomato. Marigolds at corners. Water hole before plant, then after.
-
Late May to Early June: Keep top inch moist but not soggy. Purple stems? Usually cold, not phosphorus. Wait for warmth rather than adding more food.
-
Early to Mid-June: Plants hit 12 to 18 inches. First light side-dress if needed, first sucker pruning below first bloom, mulch now after soil is warm. Daily finger checks become every other day.
-
Late June to Mid-July: First flowers open. Switch to low-nitrogen. Shake flowers at midday. Bees arrive and stay if you let one basil flower. Watch lower leaves for first spots — remove early.
-
Mid-July to Mid-August: Fruit swelling, peak thirst and hunger. Even moisture plus second low-nitrogen feed 3 to 4 weeks after first fruits if warm. Scout for hornworms weekly. Harvest cherries every 2 days.
-
Mid-August: Second sowing of spinach or lettuce in dappled shade under trellised tomatoes. Garlic gaps from July harvest get new basil transplants. The bed gives again without extra space.
-
Late August to September: Taper water slightly to concentrate flavor as fruits blush. Pinch new flower clusters 4 weeks before first frost. Stop fertilizing. Let ripening take center stage.
-
At First Frost Warning: Harvest all, including greens, ripen indoors on counters. Pull vines for trash if blighted, compost if healthy. Wash stakes in 10% bleach, sun-dry. Spread fall compost.
I tape this to the fridge. It turns “am I late?” into “oh, next is that — I can do it this weekend.”
Troubleshooting Deep Dive — Real Garden Conversations
Q: “My leaves yellow from the bottom but I’m sure I didn’t overwater.” Have you checked nights? Cold soil below 55°F mimics nitrogen deficiency because roots stall. Warmth often greens the next leaves without any feed. Cover at night, wait ten days, then reassess.
Q: “I watered evenly but fruits still cracked after that storm.” Mulch is the buffer between you and weather. Without 3 inches of straw, even perfect watering between rains can’t stop a 2-inch overnight deluge from splitting tight skins. Mulch evens the spike.
Q: “My cherry sets fruit but beefsteak doesn’t in the same bed.” Heat sensitivity differs. Cherries set at 92°F when beefsteaks stall above 90°F nights above 75°F. That’s variety genetics, not your care. Grow both and harvest across temperatures.
Q: “Can I fix blossom end rot with calcium spray?” Usually water is the fix, not calcium. Most soils have enough calcium; irregular moisture stops its ride to fruit tips. Even water plus mulch solves the next fruits. Only add lime if a soil test shows pH low.
Q: “Should I mist flowers to help pollination?” Please don’t. Wet pollen is dead pollen. Dry vibration at midday is the help. Keep water at soil.
If you answer your own garden with these prompts, you will hear what it’s actually asking for rather than what the internet shouted loudest yesterday.
What I Keep in My Apron — The Small Tools That Make Big Differences
- A $8 soil thermometer that tells me when 60°F is real, not calendar-guessed.
- A $6 packet of yarn to tag flower trusses the day I shake them.
- A cheap electric toothbrush in a zip bag for buzz pollination.
- A tuna can nailed to a stake as a rain gauge, shocking in its accuracy.
- A pocket notebook — one line per week: date, weather, what I did, what leaves looked like. By September, I have next year’s plan.
Could you assemble these this week? They cost less than one nursery tomato and save a season of guessing.
Quick Field Checklist — Tape This to Your Watering Can
- Sunday: finger test 2 inches, prune one spotted leaf if needed, note in book
- Midweek: shake tomato flowers at midday, check pepper undersides for aphids
- After rain: check tuna can, skip watering if inch collected, pull mulch back if soggy
- At first blush: pick promptly, leave a few to fully ripen for flavor test
- Before frost: pinch new flowers 4 weeks out, stop feeding, harvest all greens
This five-line loop replaces worry with rhythm. It takes six minutes and covers water, pruning, and pollination in one walk.
Small Tools, Big Payoff
A soil thermometer, yarn for tagging trusses, a $8 heat mat for pepper seeds, a tuna can gauge, and a pocket notebook. These cost less than two nursery plants and answer questions you would otherwise Google at midnight.
Frequently Asked Questions
Q: What are the 10 steps to grow tomatoes for a bigger harvest?
A: The 10 steps are: choose the right variety, start seeds or buy transplants, prepare rich soil, plant deep, space and stake, water consistently, feed by stage, prune suckers, monitor pests, and harvest at peak color. Follow them in order and give 6 to 8 hours of sun daily for the most flavorful yield. What makes them powerful is sequence — deep planting and staking at transplant build the root and support system early, so later water and feeding actually pay off in pounds rather than just leafy growth. Keep notes and repeat the sequence yearly.
Q: How many days does it take to grow tomatoes from planting to harvest?
A: Tomatoes take 60 to 85 days from transplant to ripe fruit, plus 6 to 8 weeks if starting from seed indoors. Cherry types ripen fastest around 60 days, while large beefsteaks need 80 to 85 days. Warm soil above 60°F and steady moisture shorten that window. The seed packet’s days-to-maturity usually counts from transplant, not sowing, so add indoor weeks when you plan spring. Once fruits set, cherries blush in about 40 days, slicers in 60, so staggered varieties spread harvest beautifully.
Q: Do tomatoes need full sun to produce fruit?
A: Yes, tomatoes need 6 to 8 hours of direct sun daily for strong yields and sweet flavor. With less than 6 hours they grow leggy and set few fruits that taste bland. A south-facing bed with morning sun and good airflow gives the best harvests even in short summers. If your yard is partly shaded, track light for a full day before you plant — dappled light is not direct sun — and consider containers you can move to chase the brightest spot.
Q: How often should you water tomatoes for the biggest harvest?
A: Water tomatoes deeply 2 to 3 times per week for 1 to 1.5 inches total, keeping soil evenly moist 8 inches down. Mulch 3 inches deep, water at the base before 10 a.m., and avoid overhead watering to prevent cracking and blossom end rot. Check with a finger 2 inches down — dry means water, damp means wait. In heat above 90°F edge toward 2 inches total, but after a soaking rain skip a session. Even, deep moisture is the single easiest lever for heavier, tastier harvests.
Related Articles
- How Often to Water Tomato Plants
- Best Fertilizer for Tomatoes
- How to Prune Tomato Plants
- Best Soil for Tomatoes
- Tomato Companion Plants
- Tomato Leaves Turning Yellow
Sources & References
- University of Minnesota Extension — https://extension.umn.edu/yard-and-garden/vegetables/growing-tomatoes
- Cornell Vegetables — https://www.vegetables.cornell.edu/crops/tomatoes/
- Iowa State University Extension — https://hortnews.extension.iastate.edu/growing-tomatoes-home-garden
- NC State Extension — https://content.ces.ncsu.edu/growing-tomatoes
- University of California IPM — https://ipm.ucanr.edu/PMG/GARDEN/VEGES/tomato.html
