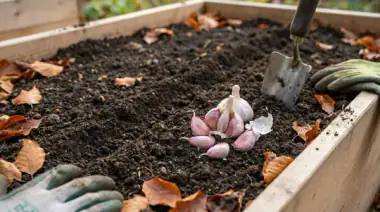
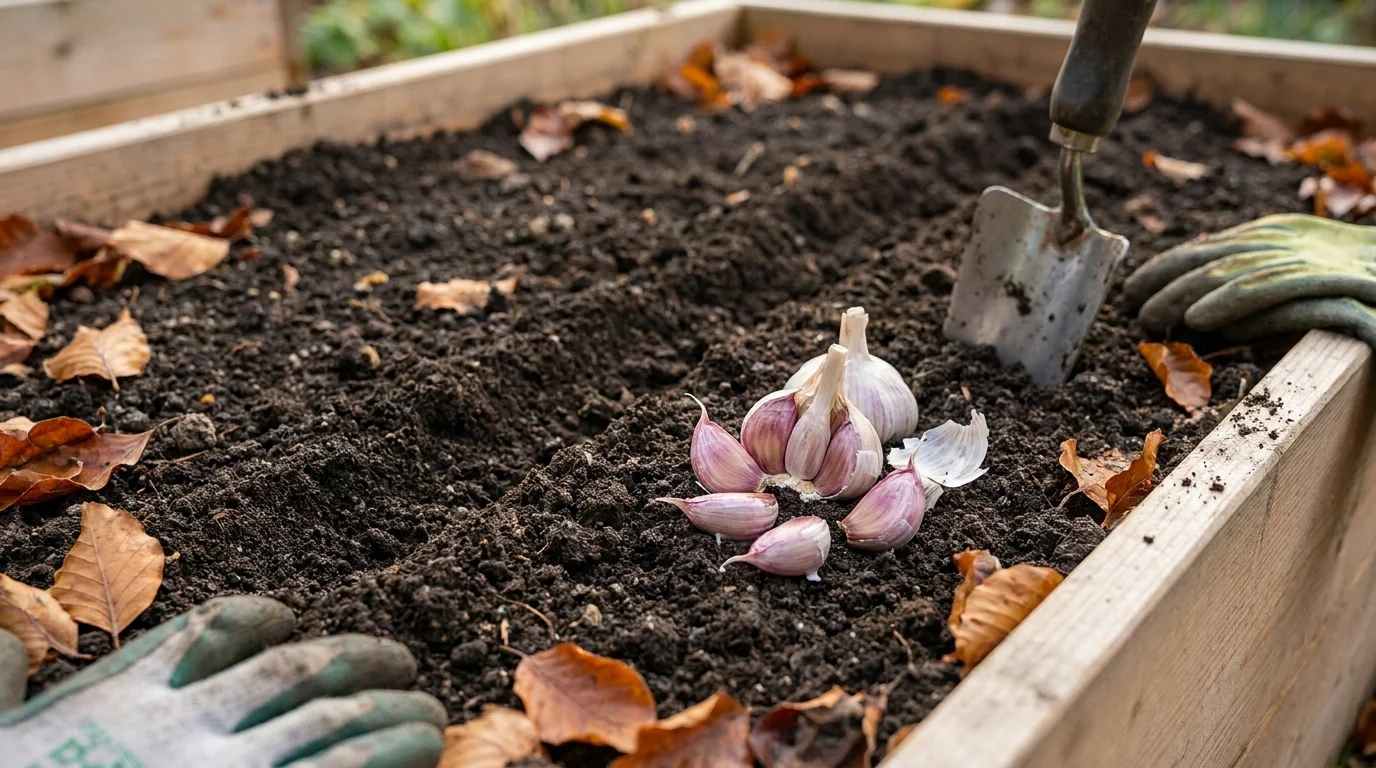
Garlic is the most forgiving crop a beginner can grow - and the most rewarding to harvest. You plant a single clove in autumn, walk away for eight months, and pull out a full bulb of homegrown garlic that puts anything from the supermarket to shame. No greenhouse, no fussing, no daily maintenance. In exchange, garlic quietly gives you one of the highest yields per square foot of any vegetable, plus a natural pest deterrent for the rest of your garden.
This complete guide covers everything from choosing the right variety to curing bulbs for six months of storage, including the one timing rule that decides between fat bulbs and tiny disappointments.
Quick Answer: Plant garlic cloves (pointy end up, 2 inches deep, 6 inches apart) in full sun 2–4 weeks before the ground freezes in fall. Water well after planting, mulch heavily for winter, fertilize in early spring, cut scapes in June, and harvest when the lower third of the leaves turn brown. Cure bulbs for 2–3 weeks before storing.
Why Grow Garlic? The Beginner’s Best Crop
Garlic is often the first thing experienced gardeners recommend to newcomers, and for good reason. It asks for almost nothing and gives back more than almost anything.
- It’s set-and-forget. Plant in autumn, and the bulb does the rest while you ignore it for the winter.
- No pests to fight. Garlic contains natural sulfur compounds that repel most insects - it is famously one of the few crops with almost no pest problems. Garden pests simply avoid the area, which is one reason garlic shows up so often in companion planting combinations.
- It stores for months. Properly cured garlic keeps for 6–12 months in your pantry, so one fall planting feeds your kitchen until the next.
- It’s expensive to buy, cheap to grow. Two or three bulbs of seed garlic multiply into hundreds of cloves. Homegrown flavor also beats supermarket bulbs - the varieties you grow at home simply don’t exist on store shelves.
- It’s beautiful. Garlic sends up elegant tall green leaves, and hardneck varieties produce dramatic curled scapes. It looks at home in a flower border as much as a vegetable bed.
If you are building your first vegetable garden, garlic is the perfect autumn anchor crop. Our vegetable garden for beginners guide shows you how to set up the beds it will grow in.
Hardneck vs. Softneck: Choosing the Right Garlic
Before planting, understand that garlic comes in two main families, and your climate and cooking style decide which is right for you.
Hardneck Garlic: How to Grow It
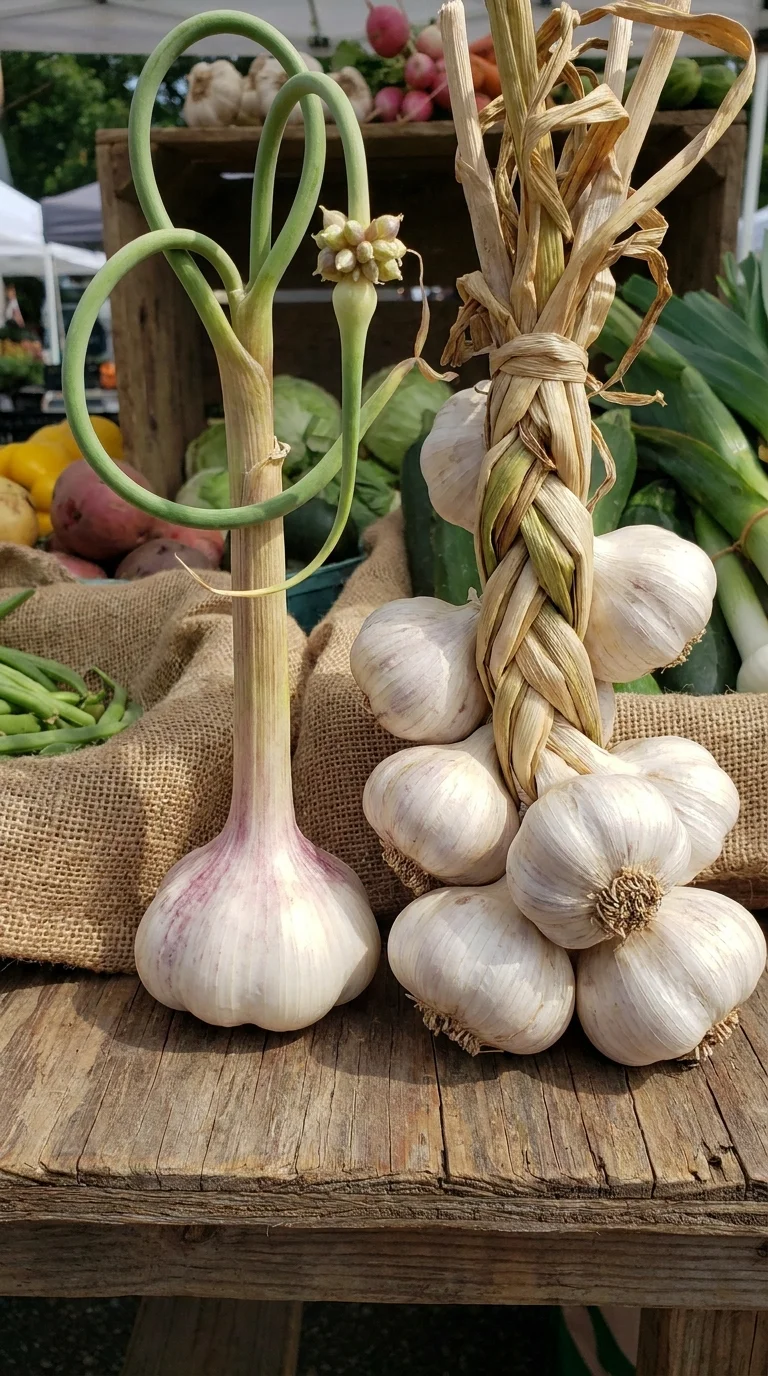
Hardneck garlic grows a stiff central stalk and produces a curly flower stem called a scape in early summer.
- Best for cold climates - it handles harsh winters and produces the classic bold, complex flavors.
- Varieties: Rocambole (fruity, spicy), Purple Stripe (rich, earthy), Porcelain (pungent, large cloves).
- Pros: More flavor, fewer but larger cloves, edible scapes.
- Cons: Stores only 4–6 months, and you must remove the scapes for big bulbs.
Softneck Garlic: How to Grow It
Softneck garlic has a flexible, pliable stem and no scape - the kind braided into the classic garlic bunches you see in markets.
- Best for mild climates - it thrives where winters stay above about 10°F (-12°C) and needs less winter chill.
- Varieties: Artichoke (mild, stores long), Silverskin (strong flavor, braids beautifully).
- Pros: Stores 8–12 months, forgiving, better for warmer zones.
- Cons: Milder flavor than hardneck.
For most home gardeners in cold and temperate regions, hardneck garlic is the better starting choice because flavor is the whole point of growing your own. Gardeners in the South or Southwest should lean softneck. If you are unsure, grow a clove or two of both - garlic is cheap and curiosity is free.
When to Plant Garlic: The One Timing Rule That Matters
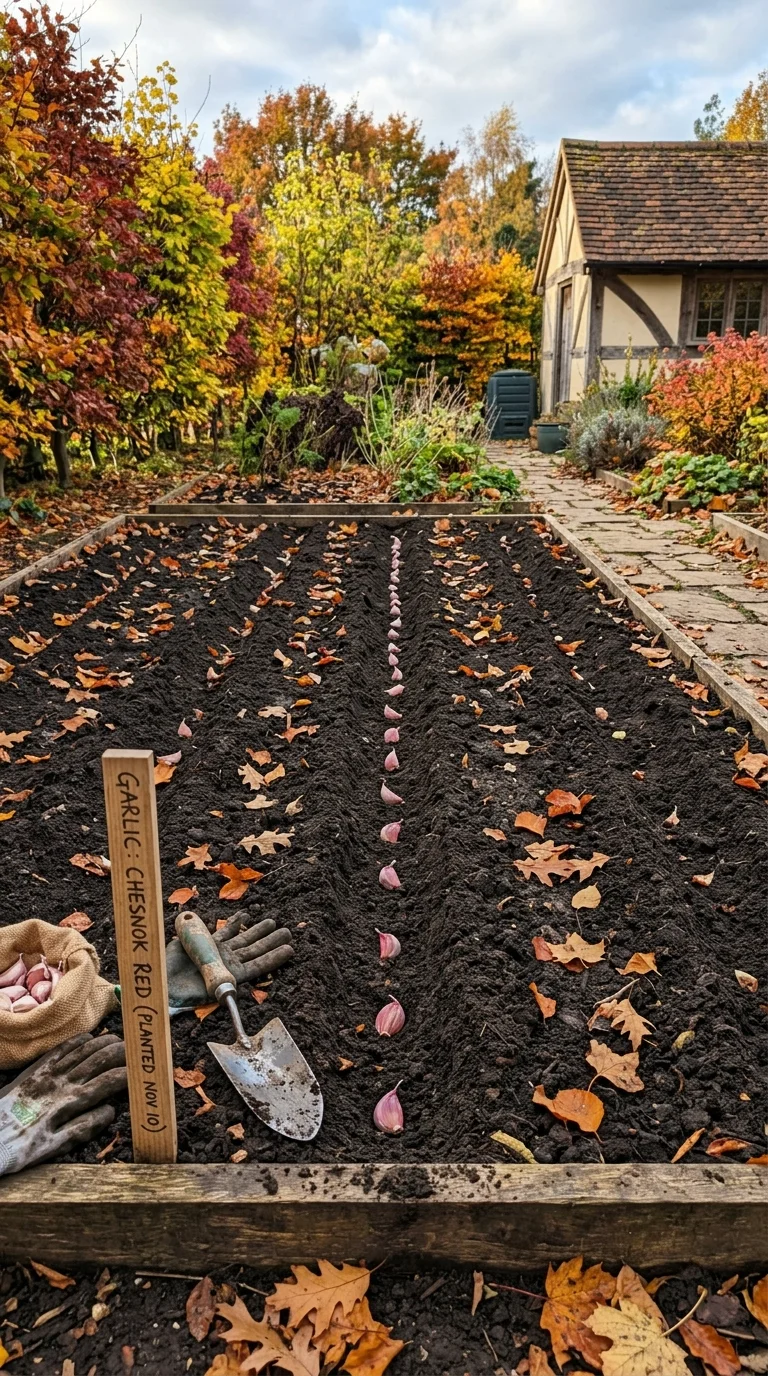
Garlic is an autumn crop. The single most important rule in garlic growing is this: plant 2 to 4 weeks before the ground freezes hard, after the soil has cooled in fall but early enough that cloves can root before winter arrives.
Regional Planting Windows (US)
| Region | Best planting window | Harvest window |
|---|---|---|
| Northeast / Midwest | Late September – mid October | Late June – July |
| Pacific Northwest | October – November | July – August |
| South / Gulf states | October – December | May – June |
| Southwest / California | October – December | June – July |
| Mountain states | Late September – October | July – August |
The goal is roots, not leaves. Garlic cloves must form a root system before the ground freezes, but the green shoot should stay underground through winter. If you plant too early, leaves shoot up and get frost-burned. If you plant too late, roots never establish and spring growth is weak.
The three-week rule: aim for a planting date such that the soil stays above 40°F (4°C) for three more weeks. In practice, most gardeners plant 4–6 weeks before their first hard frost date. Check your local frost dates first - our when to plant vegetables guide covers frost-date planning in detail.
Step 1 - Prepare the Soil for Garlic
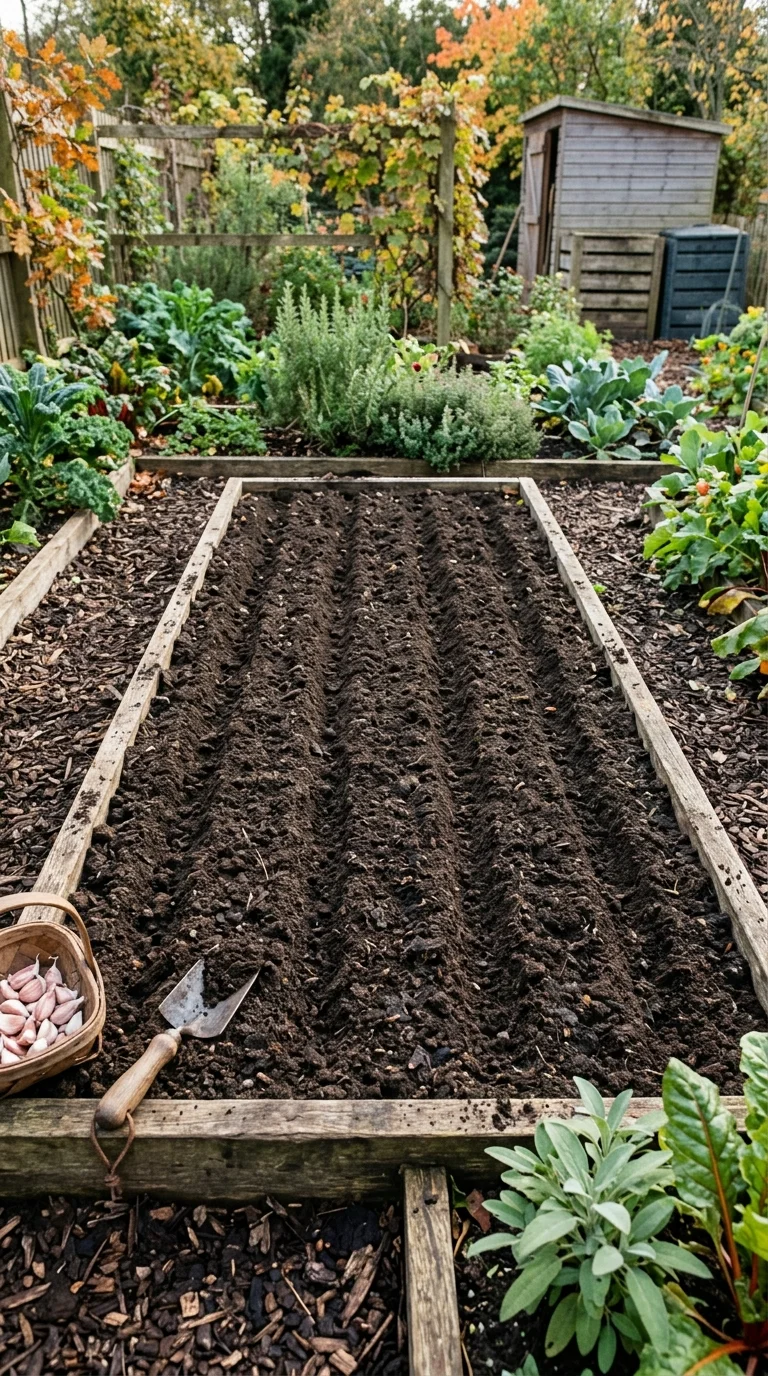
Garlic is not demanding, but it has three hard requirements: full sun, good drainage, and rich soil. Poor drainage is the number one killer of garlic - cloves literally rot in standing water over winter.
Soil requirements:
- Full sun - at least 6–8 hours of direct sunlight daily.
- pH between 6.0 and 7.0 - slightly acidic to neutral. If unsure, test your soil first with our soil pH testing guide.
- Rich, loose, well-draining soil - amend with 2–3 inches of compost worked into the top 8 inches.
Two weeks before planting:
- Clear the bed of weeds and debris.
- Dig in compost or well-rotted manure (never fresh manure - it burns the cloves).
- Work in a balanced organic fertilizer like a 5-5-5 or bone meal, following label rates.
- Rake smooth and let the bed settle before planting.
Garlic hates soggy feet, so if your soil is heavy clay, plant garlic in a raised bed instead. Our raised bed gardening guide walks you through building the perfect bed, and our soil preparation guide covers the general routine.
Step 2 - Buy and Prepare Seed Garlic
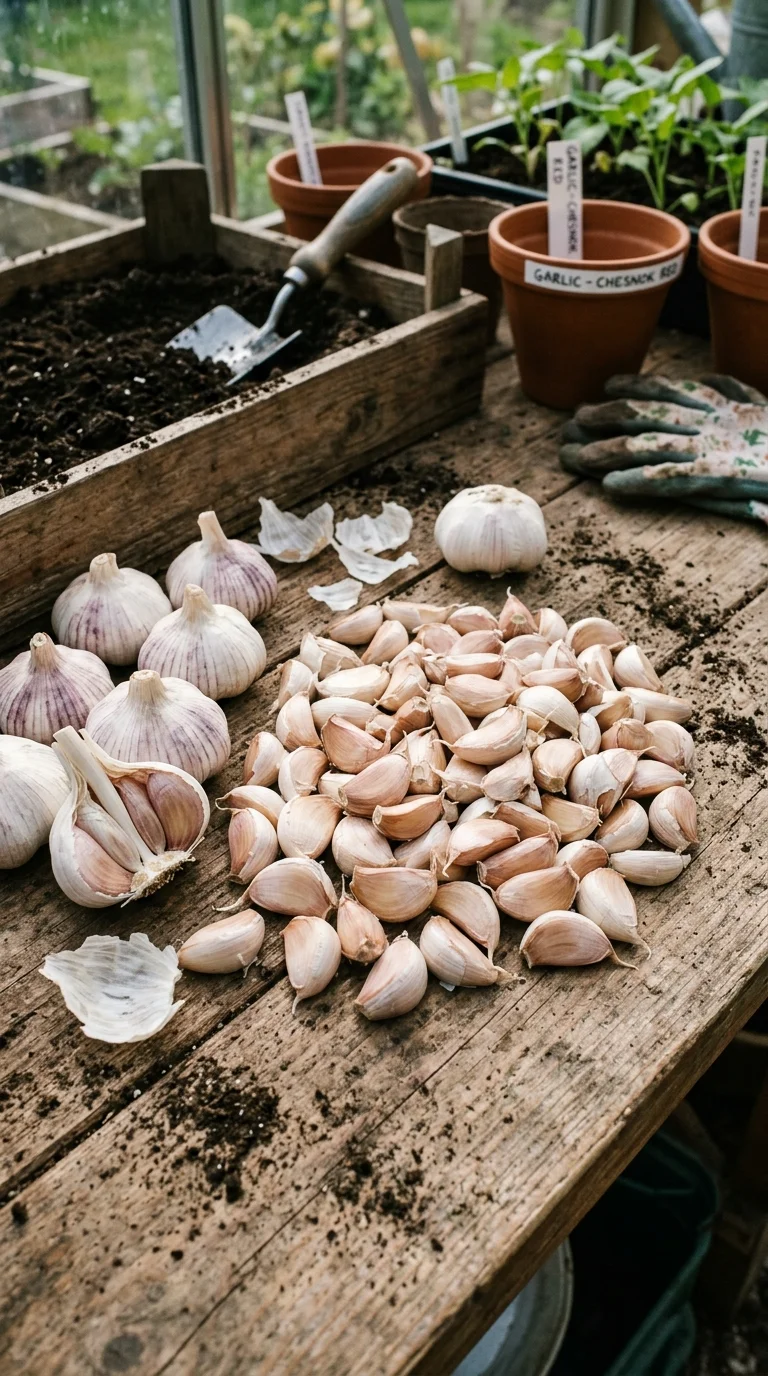
Garlic is planted from cloves - each clove grows a new bulb. Your “seed” is simply garlic you choose not to eat.
Buying Seed Garlic
- Buy certified seed garlic from a nursery or online garlic farm. It is disease-free and adapted to your climate.
- Do not plant supermarket garlic. Store garlic is often sprayed to prevent sprouting, may carry disease, and comes from climates and varieties that will not grow well at home. It’s also usually softneck grown for shelf life, not flavor.
- Buy in late summer, before the good varieties sell out - the selection shrinks fast.
- One bulb yields about 10–12 cloves, so plan roughly 20 cloves per 10 feet of row.
Preparing the Cloves
- Break the bulb gently into individual cloves about a week before planting, keeping the papery skin on each clove.
- Keep the largest, firmest cloves. Reserve the biggest for planting - small cloves grow small bulbs. Use the small ones in the kitchen.
- Do not peel the cloves, and do not damage the flat bottom (the root plate) - that’s where the roots form.
- Optional: soak cloves in water with a little liquid seaweed or baking soda solution for a few hours before planting; some gardeners find this speeds rooting. Not required.
Step 3 - Plant the Cloves
Planting garlic is a 15-minute job. The technique determines everything.
Planting steps:
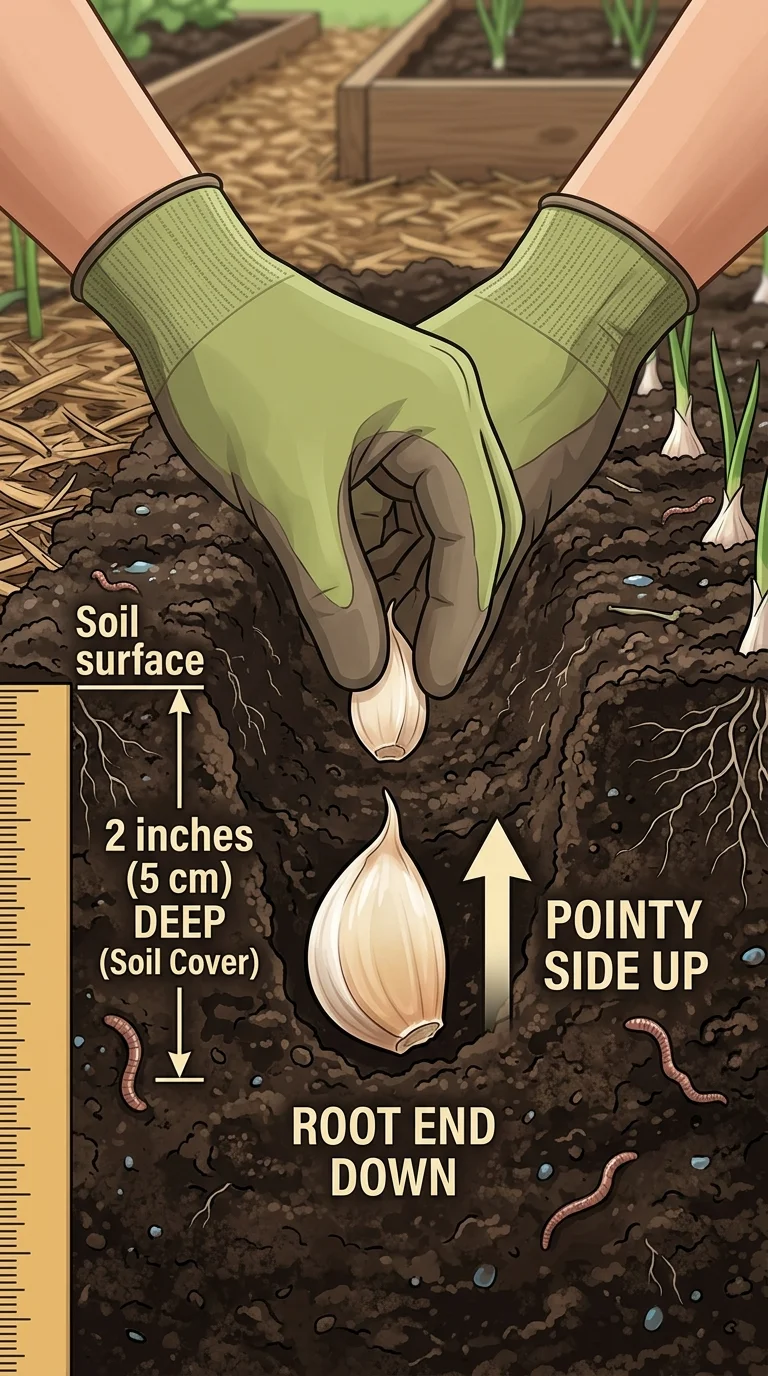
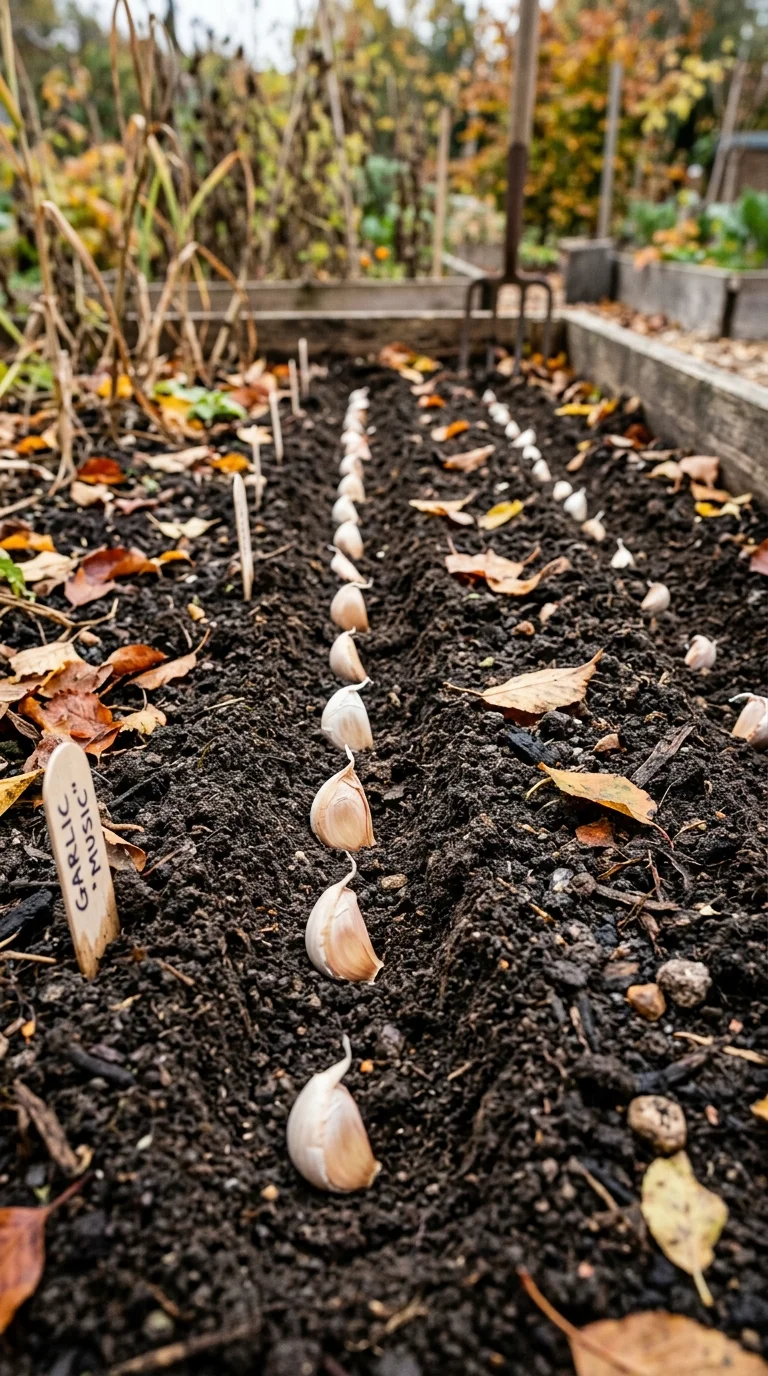
- Plant each clove pointy end up, flat root plate down. It’s the classic mistake to plant upside down - the shoot will still find its way up, but it wastes energy and often yields a twisted, smaller bulb.
- Plant 2 inches deep, measured from the tip of the clove to the soil surface. In cold climates, 3 inches is safer.
- Space cloves 6 inches apart in rows, with 12 inches between rows. Crowded garlic produces small bulbs.
- Press each clove firmly into the soil so it’s in full contact with the soil - no air pockets.
- Cover and water well - a thorough watering settles the soil around the cloves.
The first week: keep the soil lightly moist while roots establish, then back off. Once the ground cools and winter arrives, stop watering entirely - winter moisture will handle everything.
One spacing note: garlic is a fantastic interplanting companion. Slip cloves between rows of other crops, around the edges of beds, or between roses - garlic repels aphids and other pests while it grows. See our companion planting guide for the best combinations.
Step 4 - Winter Protection
The bulbs sleep all winter, but that sleep needs a blanket. A thick mulch layer protects cloves from freeze-thaw cycles that heave them out of the ground, and it suppresses the weeds that would crowd spring growth.
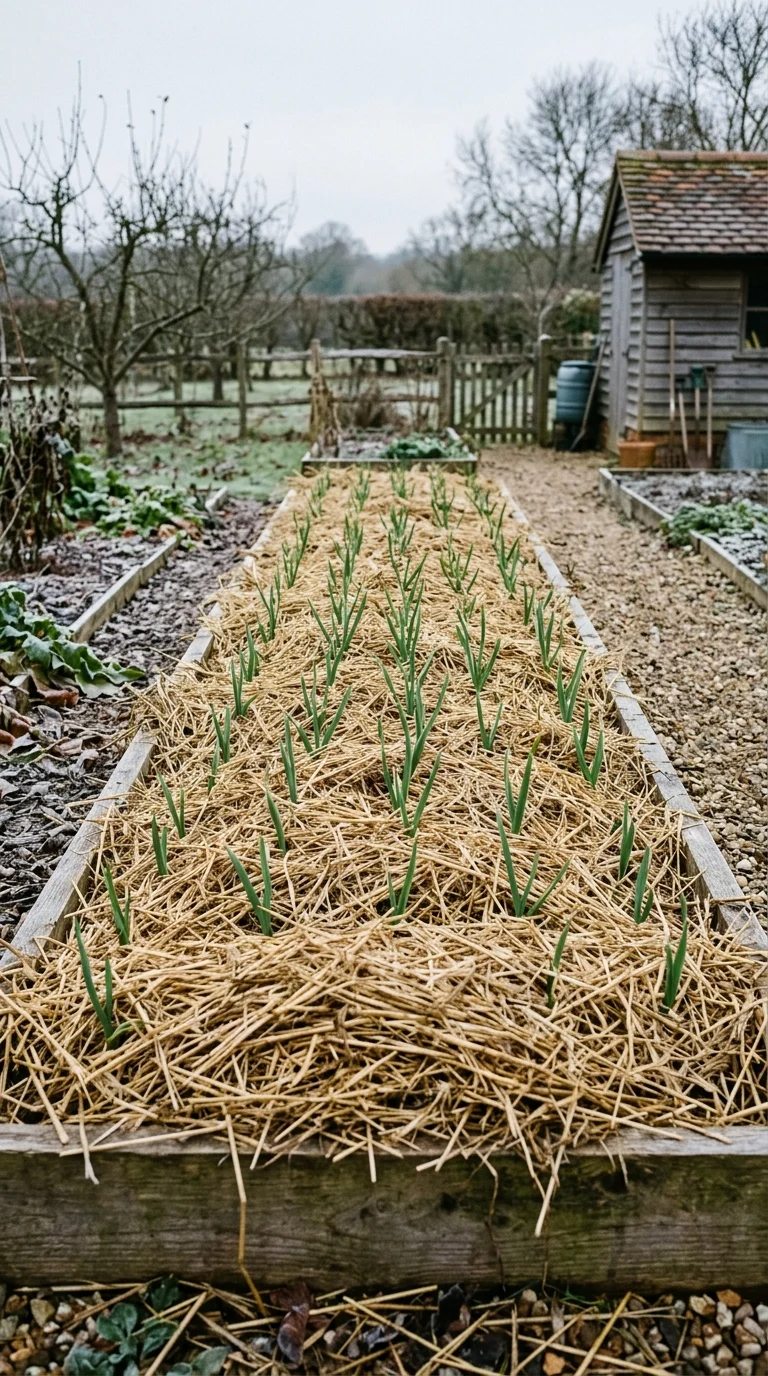
- After the first hard frost, apply 3–6 inches of straw, shredded leaves, or hay over the bed.
- The mulch insulates - the soil stays at a more even temperature, so cloves don’t freeze, thaw, and get pushed up.
- In spring, once growth begins, pull most of the mulch back into the aisles (leave a light layer for weed control).
- In very cold zones (below -20°F/-29°C), double the mulch depth - this is where hardneck garlic also shines.
Do not mulch too early - warm soil in fall under mulch can rot the cloves. Wait for frost to arrive, then cover.
Step 5 - Spring Care: Fertilize, Water, and Weed
As soon as the snow melts and green shoots poke through, garlic starts its growing season in earnest. Three spring tasks decide bulb size.
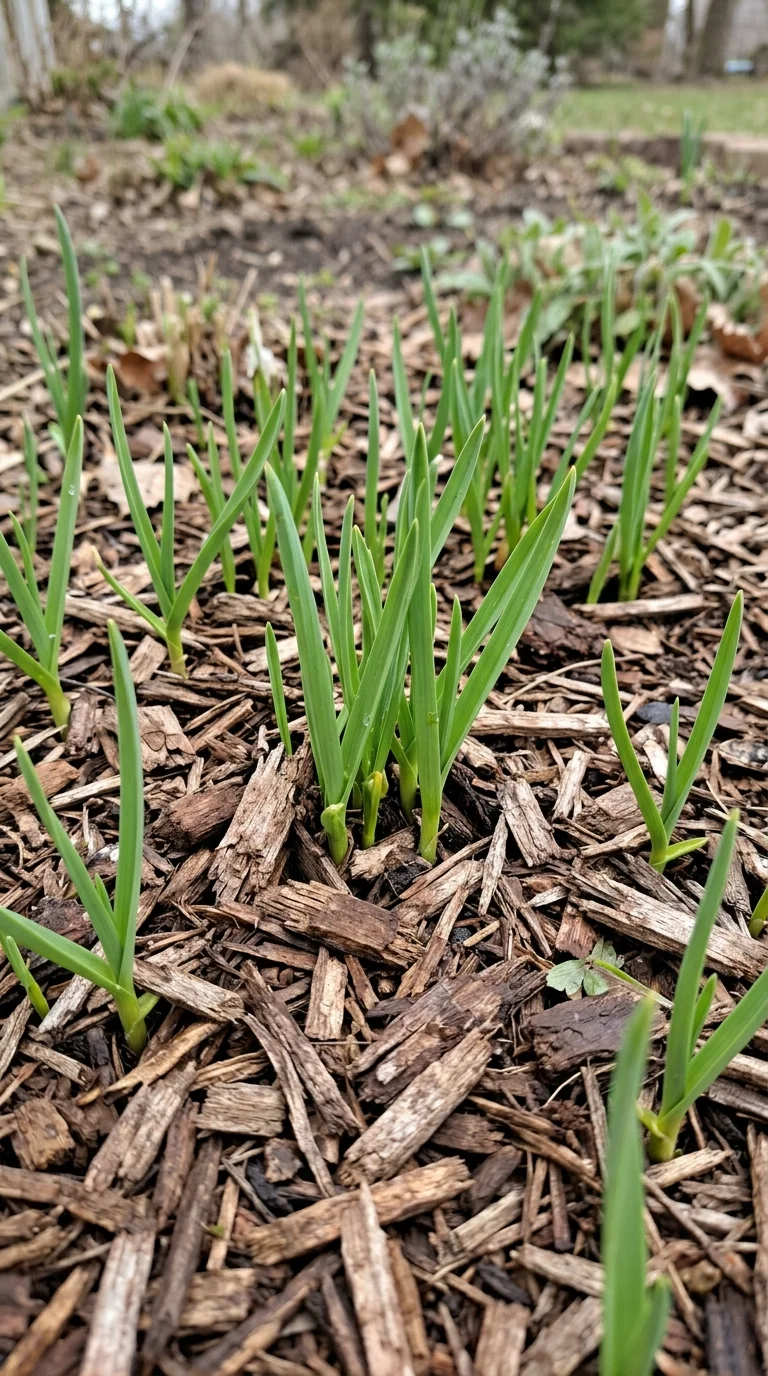
Fertilize Twice
Garlic is a hungry plant and grows most of its bulb in the final month before harvest. Feed it:
- Early spring (as soon as shoots appear): side-dress with a nitrogen-rich organic fertilizer - blood meal, compost tea, or fish emulsion. This is the growth phase. See exact NPK ratios in our vegetable garden fertilizer guide.
- 4 weeks later: a second feeding of balanced fertilizer.
- Stop fertilizing by mid-May in most climates - feeding late produces soft bulbs that rot in storage.
Water Consistently in Spring
Garlic needs steady moisture from April through June while leaves grow and bulbs swell. Inconsistent watering produces split, deformed bulbs.
- Water about 1 inch per week when rain doesn’t provide it.
- Stop watering completely 2–3 weeks before harvest - dry soil makes bulbs store longer and clean more easily.
Weed Relentlessly
Garlic is a poor competitor. Weeds rob it of water, nutrients, and light, and the easiest time to win the war is early spring while garlic is still small. Pull weeds by hand or shallow-hoe; garlic’s roots run close to the surface, so dig carefully. A light mulch between rows keeps the bed quiet.
Step 6 - Cut the Scapes (Hardneck Only)
Sometime in early summer - June in most regions - hardneck garlic sends up a curly, snaking flower stalk called a scape. Cutting it is the single most important size-boosting task of the season.
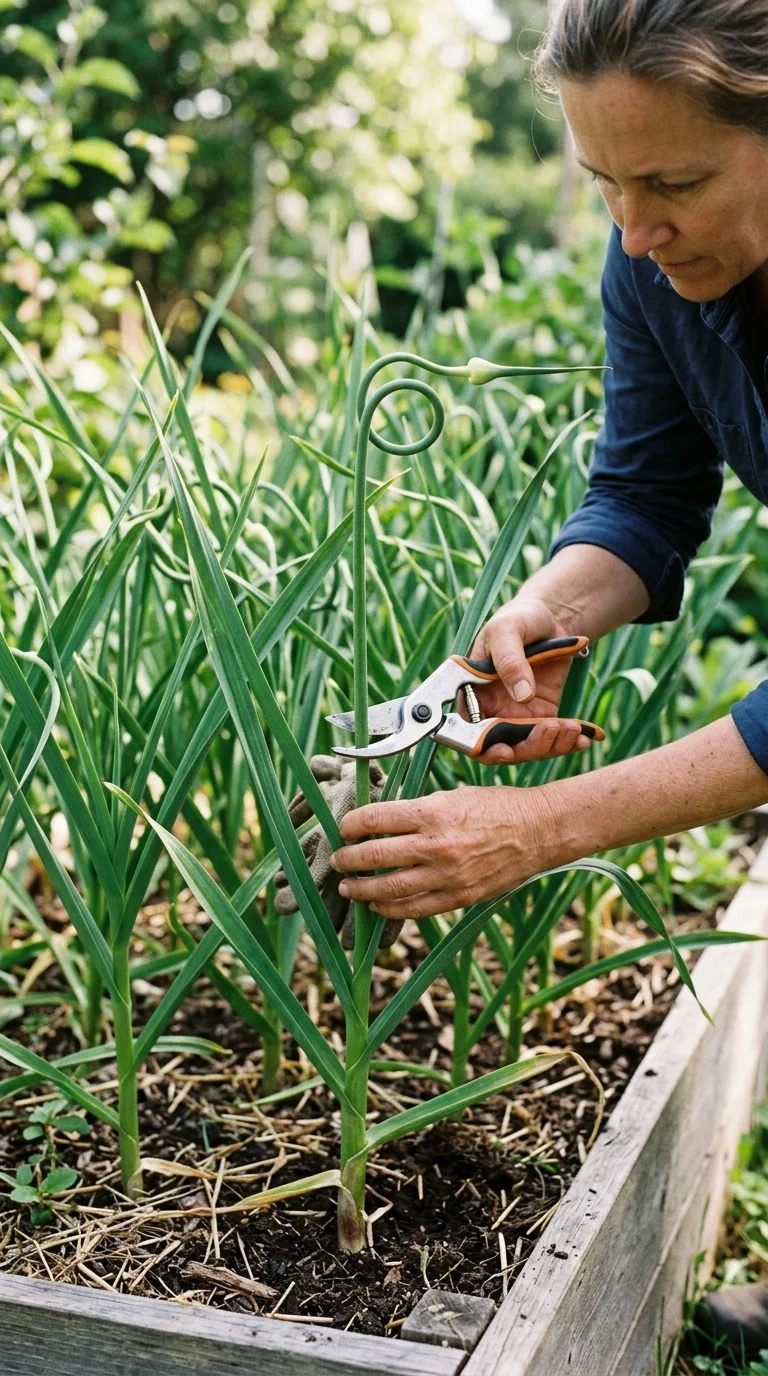
Why cut scapes: if the scape stays, the plant spends its energy producing seeds and the bulb grows up to 30 percent smaller. Remove the scape and all that energy goes into the bulb instead.
How to cut scapes:
- Wait until the scape curls into a complete loop or two - this is the peak flavor and the exact right timing.
- Snip it near the base of the stem, low enough to remove it cleanly.
- Do not pull the scape - pulling can rip the plant from the soil. Always cut.
Bonus: scapes are a delicacy. Sauté them like green beans, grill them, or blend into pesto. You get a free gourmet crop and bigger bulbs in one action.
Step 7 - Know When to Harvest
Harvest timing is the second most important decision in garlic growing. Too early gives you small, underdeveloped bulbs; too late gives you bulbs that split open in storage and keep poorly.
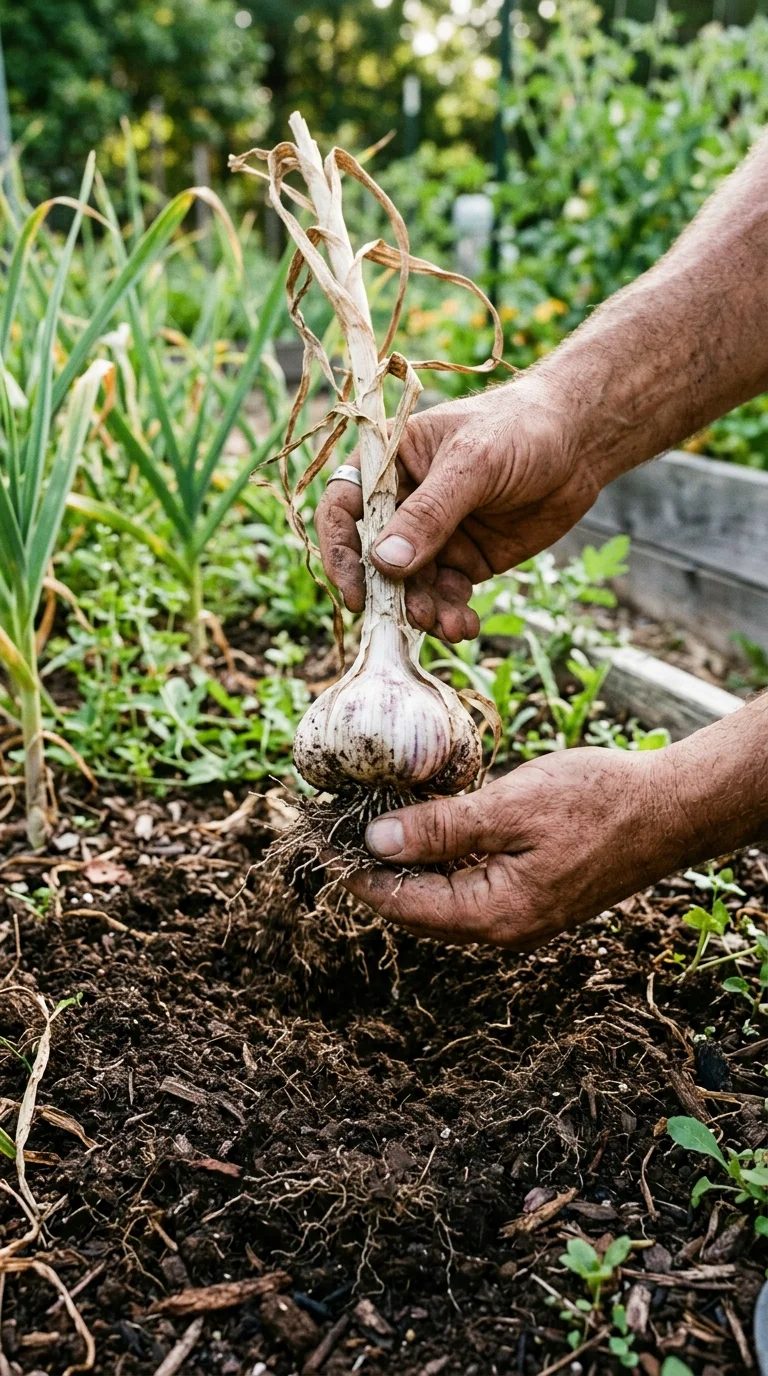
The Leaf Rule
Watch the leaves from early summer on. Garlic is ready when the lower third of the leaves have turned brown, while the top half is still green. That’s the sweet spot:
- Lower leaves brown = bulb finished growing, ready to harvest.
- All leaves brown = over-mature, bulbs splitting, stores poorly.
- All leaves green = too early, small bulbs that won’t store.
Harvest Day Steps
- Pick a dry day. Harvest in the morning or afternoon when the soil is dry, never after rain.
- Loosen the soil with a garden fork a few inches from the plant, then lift gently.
- Never pull by the leaves - the stem snaps, the bulb bruises, and the garlic rots in storage.
- Do not wash the bulbs. Brush off loose soil only; washing introduces moisture that causes rot.
- Move them to shade immediately - sun scald ruins bulbs in minutes.
For reference, garlic is usually ready about 2–3 weeks after the scapes appear, and about 8–10 months after fall planting. Check our harvesting and storing vegetables guide for the broader harvesting picture.
Step 8 - Cure and Store Garlic
Curing transforms fresh, watery garlic into shelf-stable bulbs that last months. Skipping or rushing this step is why so much homegrown garlic goes soft within weeks.
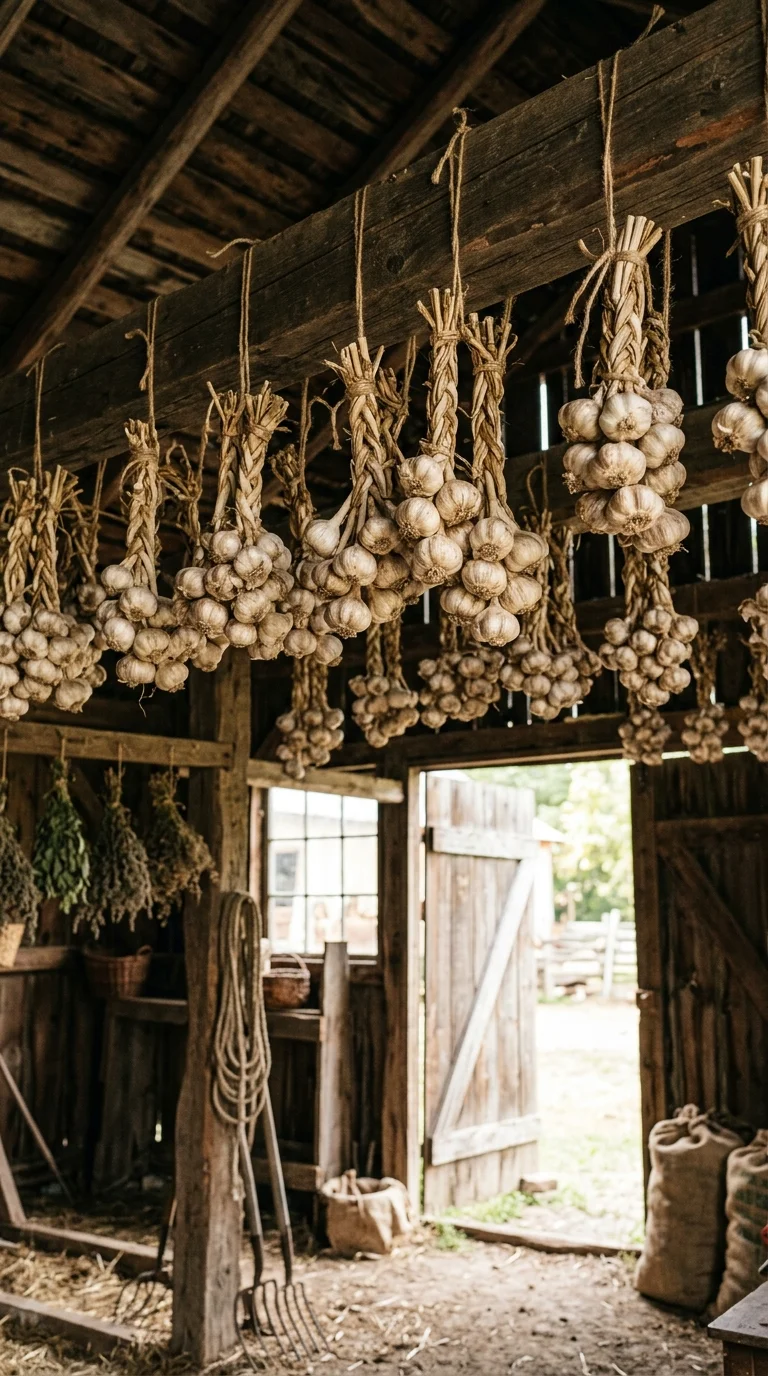
How to Cure
- Keep leaves and roots attached - they feed the bulb while curing.
- Bundle 8–10 bulbs by the stems and hang, or lay them in a single layer on a wire rack or screen.
- Cure in a dry, dark, well-ventilated spot - a shed, garage, or covered porch. No direct sun, no damp basements.
- Let them cure 2–4 weeks (longer in humid climates) until the skin is papery and the neck is tight and dry.
How to Store
- When cured, cut stems to about 1 inch and trim the roots close.
- Store in a cool (55–65°F/13–18°C), dark, dry place with airflow - a mesh bag, wire basket, or braided softneck garlic.
- Never refrigerate - cold triggers sprouting.
- Keep garlic away from potatoes, which release moisture and cause sprouting.
- Sort periodically; use any soft or sprouting bulbs first.
Hardneck garlic stores 4–6 months; softneck stores 8–12 months. If you plan to cook with garlic daily, plant enough to cover the gap between harvests.
Growing Garlic in Containers
No garden bed? Garlic thrives in pots. This is also the route for apartment gardeners with a sunny balcony.
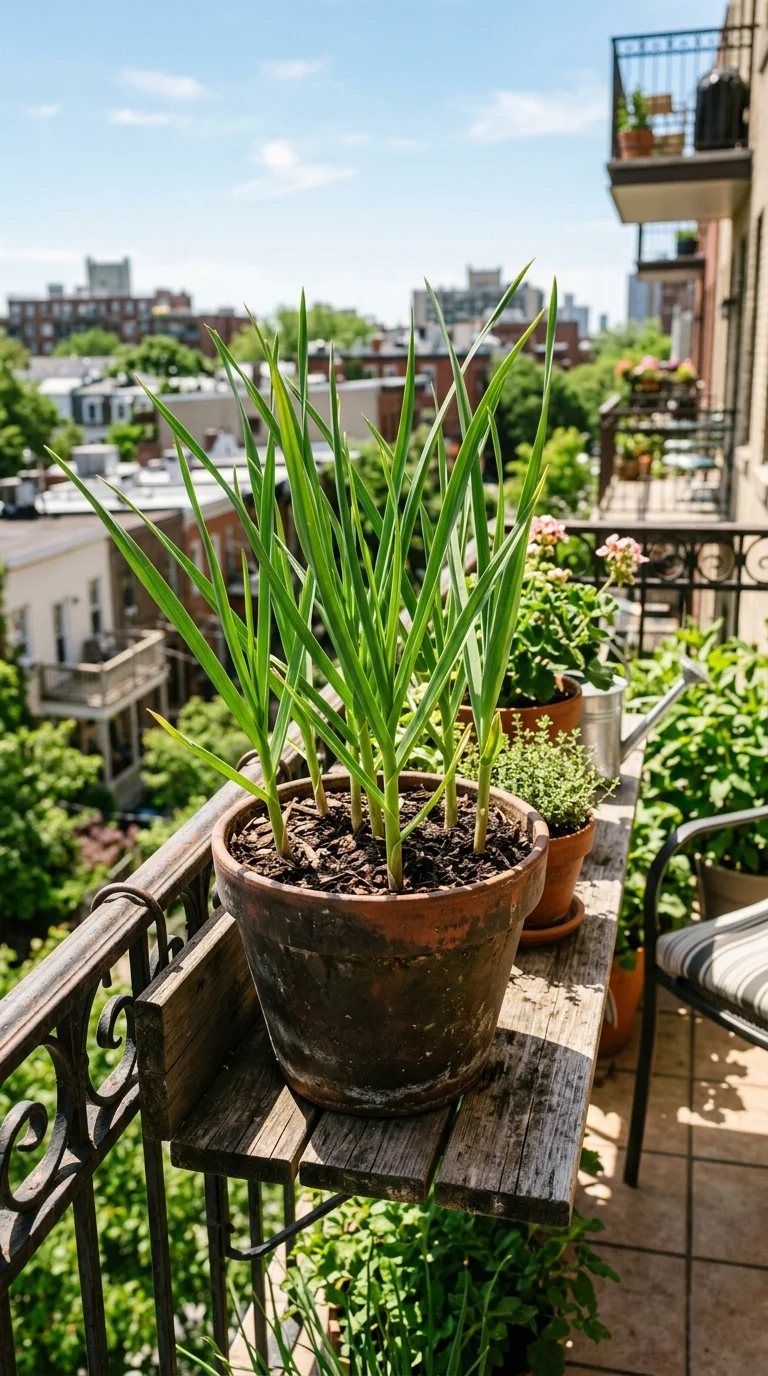
- Pot size: at least 8–10 inches deep; 5 gallons or more is ideal.
- Drainage is everything - container garlic rots fast in soggy mix.
- Soil: quality potting mix blended with extra perlite (see our potting mix guide).
- Spacing: 2–4 inches apart in the pot.
- Winter: in cold zones, move pots against a wall or wrap them to insulate roots from deep freeze - container roots freeze harder than garden soil.
- Water: more frequently than beds, since pots dry out faster - but always check soil first.
- Harvest slightly earlier; container bulbs mature a bit sooner.
Garlic Pests and Problems - and the Easy Fixes
Garlic is famously low-maintenance, but a few issues are worth knowing before they bite.
Problems You Might See
| Problem | Cause | Fix |
|---|---|---|
| Soft, mushy cloves in the ground | Wet soil / poor drainage | Improve drainage, raised beds, don’t overwater |
| Small bulbs | Late planting, crowding, early harvest, supermarket seed | Follow timing, spacing, and harvest rules |
| Leaves yellowing in spring | Cold weather stress or hungry soil | Feed at early spring; ignore brief cold snaps. If yellowing spreads, see how to fix yellow leaves |
| Stunted plants, purple leaves | Cold snaps | Mulch; be patient |
| Moldy bulbs in storage | Cured too wet or stored damp | Cure fully, store dry with airflow |
| No bulbs at all | Planted a whole bulb, not cloves | Always plant individual cloves |
Pests
- Aphids occasionally attack spring leaves - wash off or treat naturally with our aphid control guide.
- Onion maggots target the base of plants in some regions - rotate crops yearly and clear debris.
- Fungus diseases - mostly a wet-soil issue; prevention beats treatment, so prioritize drainage.
The Rotation Rule
Never plant garlic in the same spot two years running - rotate with other crops each year to avoid soil-borne diseases. In a small garden, plan a 3–4 year rotation. Our vegetable garden layout guide helps you map the rotation.
Your Garlic Season at a Glance
| Month | What to do |
|---|---|
| July – August | Order seed garlic; prepare the bed |
| September – October | Plant cloves (4–6 weeks before hard frost) |
| October – November | Mulch after first hard frost |
| March – April | First spring feeding; pull mulch back |
| April – May | Second feeding; steady watering; weed |
| June | Cut scapes; stop feeding |
| July | Stop watering; harvest when lower leaves brown |
| July – August | Cure, store, save biggest bulbs to replant |
Frequently Asked Questions
Can I use garlic from the grocery store to plant?
Technically yes, but it usually fails. Supermarket garlic is treated to prevent sprouting, carries disease risks, and is often a variety unsuited to your climate. Certified seed garlic from a nursery is cheap, vigorous, and adapted to your region - the few dollars are worth the difference between bulbs and no bulbs.
What happens if I plant garlic too deep or too shallow?
Too shallow (under 1 inch) exposes cloves to frost heaving and winter kill; too deep (over 4 inches) delays emergence and wastes spring energy. Two inches from clove tip to surface is the sweet spot - three inches in very cold regions.
Should I soak garlic cloves before planting?
It’s optional. Some gardeners soak cloves in water with liquid seaweed or a mild baking soda solution for a few hours to discourage fungal disease. Unsoaked cloves plant perfectly fine. Do not soak and then plant into soggy soil - the combination promotes rot.
Why does my garlic have no cloves inside?
This happens when cloves are harvested too early or when summer heat arrives suddenly before the bulb divided. The plant forms a single “round” instead. Rounds are edible - use them like fresh garlic - and replant them for a full bulb next season.
How do I know garlic scapes are ready to cut?
When the scape has made one full curl or loop, cut it. At that point it’s tender and flavorful, and the plant has invested enough in the stem that removing it redirects energy to the bulb. Some gardeners cut earlier (as the scape just starts to curve) for the most tender scapes - both timings work.
How do you grow hardneck vs softneck garlic?
Both plant the same way — cloves pointy-end up, 2 inches deep, 6 inches apart in fall. Choose hardneck for cold winters and bold flavor (cut the scapes in June, stores 4–6 months); choose softneck for mild winters above 10°F, braiding, and 8–12 month storage (no scapes to cut).
Which way up do you plant garlic cloves?
Pointy end up, flat root plate down, 2 inches deep. Upside-down cloves still sprout but waste energy curving around, giving smaller twisted bulbs.
