I used to think feeding peppers was like feeding a teenager — more is better, and if they’re not growing, they must be hungry. The summer I proved that wrong is still vivid: a bed of ‘Bell Boy’ peppers I had loved with extra fish emulsion, then extra 10-10-10 because the leaves looked a little light, then again because a gardening show said “feed weekly.” By August I had the most beautiful, jungle-green, waist-high pepper plants on the block. And seven peppers. Total. My neighbor who had tossed a shovelful of compost at planting and then ignored hers picked a bowlful every week.
Peppers taught me the quiet truth that now guides all my feeding: they are not heavy feeders like corn, and not dainty like herbs. They want a calm, steady diet that shifts as they do — a little nitrogen to build leaves early, then phosphorus and potassium to hold flowers and swell fruit, with calcium and magnesium quietly supporting from the background. Get that shift right, and you don’t need heroic feeding. Get it wrong — too much nitrogen at bloom — and the plant pours all its energy into leaves that shade the very flowers trying to become peppers.
This is the feeding rhythm I use now, with both organic and synthetic options, so you can choose what fits your soil and your style.
Quick Answer: Feed peppers lightly and by stage. At planting, work 2 to 3 inches of finished compost into the top 8 inches plus a balanced organic or synthetic fertilizer like 5-10-10 or 5-5-10 at half to full label rate. At first flowers (about 4 weeks after transplant), side-dress with a low-nitrogen, higher phosphorus and potassium “bloom” fertilizer — N-P-K around 3-4-6, 5-10-10, or fish bone meal + kelp — lightly at the drip line and water in. When fruits are swelling, one final light side-dress of compost or organic bloom feed if leaves are pale or yield stalls; avoid high-nitrogen (first number high) after flowering. Keep soil pH 6.0–6.8, mulch, and water evenly so nutrients actually reach roots.
At a Glance
| Stage | Goal | What to Feed | How Much |
|---|---|---|---|
| At planting / transplant | Build roots & leaves | 2–3“ compost + balanced 5-10-10 or 5-5-10 | Half to full label rate, water in |
| Vegetative (weeks 3–4) | Steady leaf growth | Usually nothing if compost was added | Compost tea or light fish feed only if pale |
| First flowers | Hold blossoms, set fruit | Low-N bloom 3-4-6, fish bone meal, or 5-10-10 | Side-dress lightly at drip line |
| Fruit swelling | Fill walls, ripen | Compost or organic bloom again if needed | Light handful per plant, water in |
| If soil test says low Ca/Mg | Prevent blossom end rot | Gypsum (Ca) or Epsom salt only if deficient | Per soil test, not by guess |
Think of nitrogen as the leaf builder, phosphorus as the flower holder, potassium as the fruit fattener. Too much of the first at the wrong time steals from the other two. Balance is the whole game.
Understanding N-P-K for Peppers — What Those Three Numbers Mean in the Garden
Every bag shows N-P-K: nitrogen (N) for leafy growth, phosphorus (P) for roots, flowers, and energy, potassium (K) for overall vigor, disease resistance, and fruit quality. A bag that says 5-10-10 is 5% nitrogen, 10% phosphorus, 10% potassium by weight. For peppers, that gentle first number matters more than anything at bloom time.
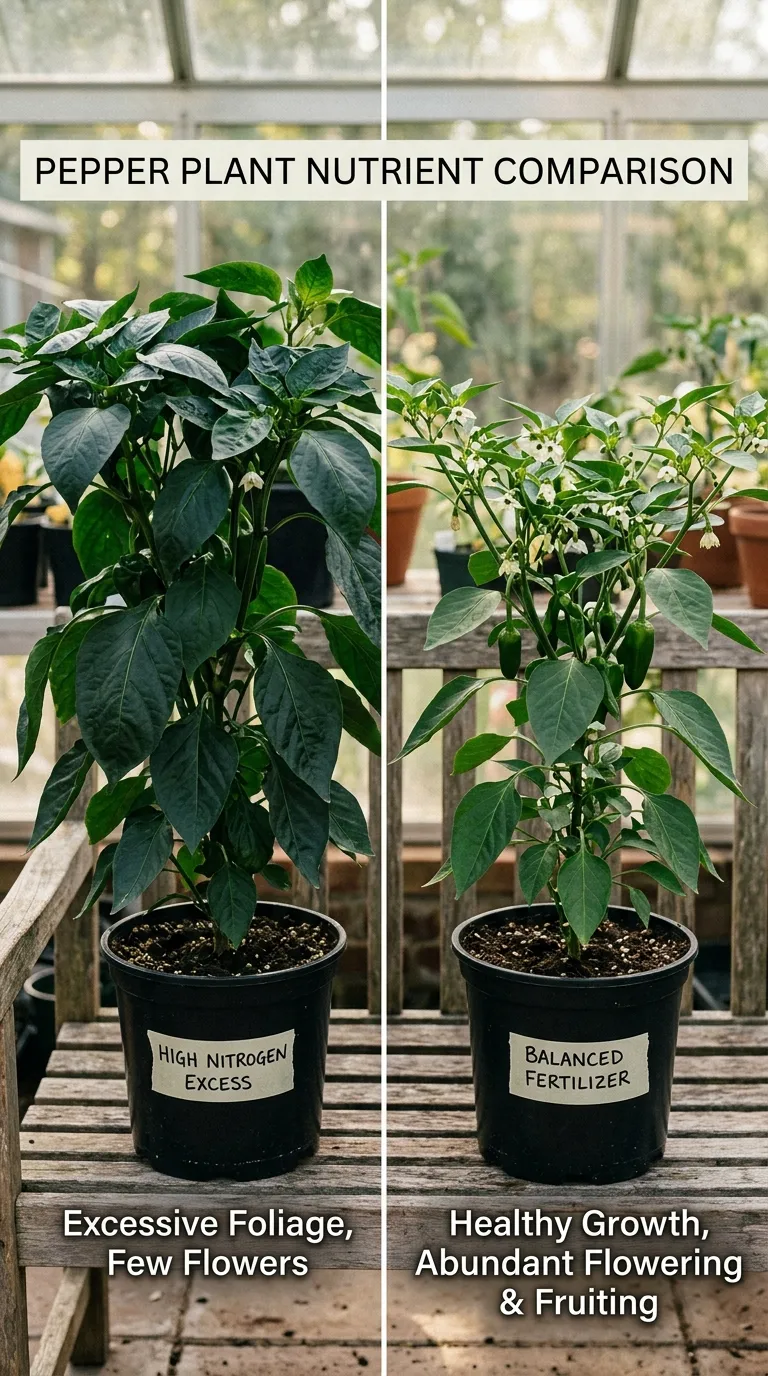
Early on, a little nitrogen is welcome — it greens leaves that will photosynthesize for fruit later. But once flowers appear, high nitrogen tells the plant, “Make more leaves!” Leaves shade flowers, pollen suffers, flowers drop. I learned to read the bag backwards at flowering: I want the first number to be the smallest. A 3-4-6 organic tomato-pepper blend, a 5-10-10, even a simple side-dress of bone meal (phosphorus) plus kelp (potassium) does more for fruit set than another shot of 10-10-10.
Calcium and magnesium are the quiet supporting cast. They don’t get big numbers on the bag, but calcium moves with water to prevent blossom end rot (that black leathery bottom), and magnesium sits at the center of chlorophyll. Most decent compost and balanced fertilizers plus pH 6.0–6.8 provide enough. Only add gypsum or Epsom salts if a soil test says you are low — guessing creates more problems than it solves. For soil building, see how to prepare soil for planting and best soil for vegetables.
Organic fertilizers — granular blends, fish meal, bone meal, compost — release nutrients slowly as microbes break them down, which matches peppers’ preference for steady, not spiky, feeding. Synthetics work too; they act faster but burn more easily, so use half rate and always water in. Both can grow excellent peppers. Choose organic if you are building soil long-term; choose synthetic if you need a quick correction mid-season. The plant doesn’t care about your philosophy — it cares about evenness.
When and How to Feed — The Three Moments That Matter
1. At Planting — Set the Table
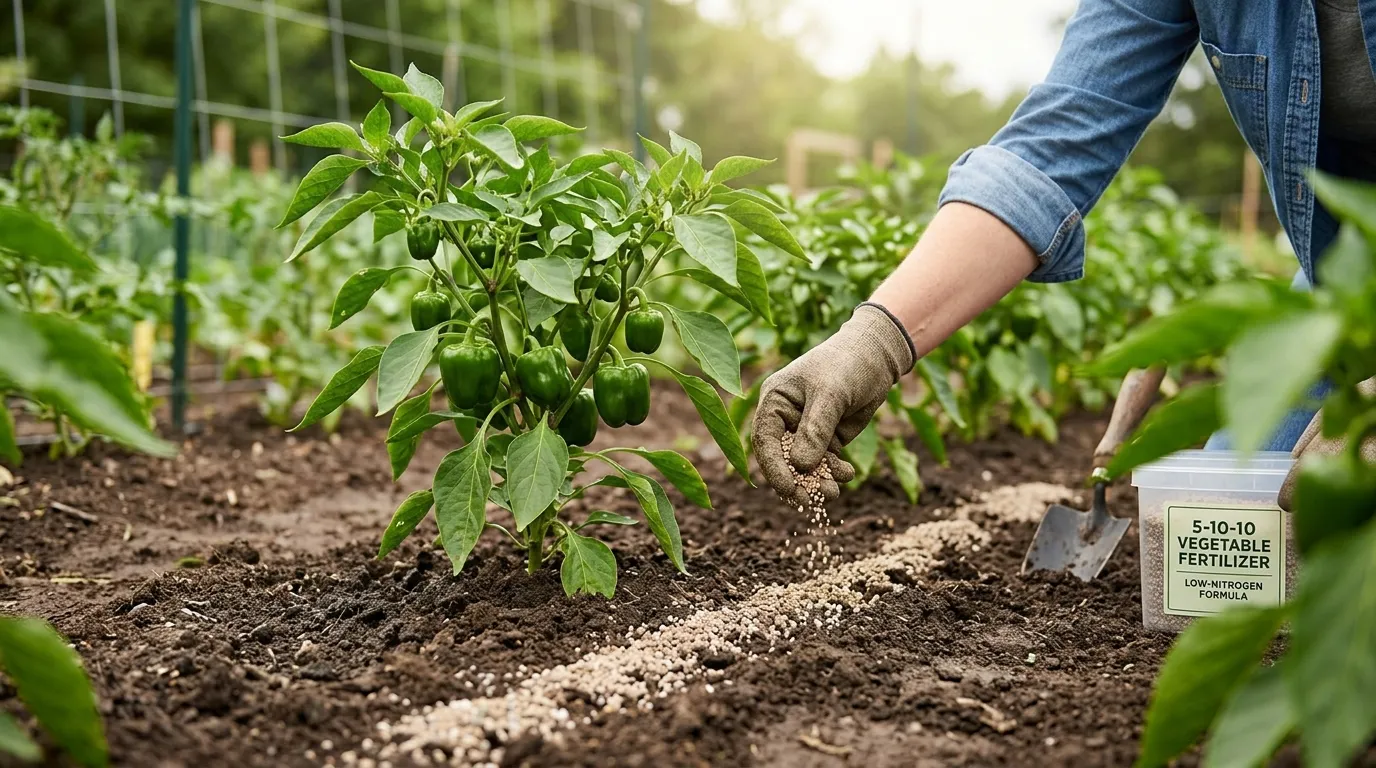
Two to three weeks before transplanting, work 2 to 3 inches of well-finished, dark, crumbly compost into the top 8 inches. Compost does three jobs at once: nutrients, moisture holding, and biology. On transplant day, add a balanced fertilizer in the planting hole or banded 3 inches to the side: about 1 tablespoon of granular 5-10-10 per plant, or a palmful of organic tomato-pepper blend, mixed lightly with soil and watered in. Don’t let granules touch the stem directly — offset them an inch.
If your soil test shows pH below 6.0, correct with lime per lab recommendation now; peppers struggle to take up phosphorus in acidic soil, and no amount of bloom fertilizer fixes pH lockout. If pH is above 7.0 and leaves yellow between veins, chelated iron and sulfur take time — start early.
2. At First Flowers — The Shift
About 3 to 4 weeks after transplanting, when the first white or pale-purple flowers open, the plant is deciding: hold or drop? This is the moment to shift from nitrogen to bloom nutrition. Side-dress lightly at the drip line (the circle where rain drips off the leaves), not against the stem: sprinkle 1 to 2 tablespoons of organic 3-4-6 or 1 tablespoon of 5-10-10 per plant, scratch into the top inch, water deeply. Fish bone meal (P) plus kelp meal (K) is my favorite organic pair — about 1 tablespoon each per plant, watered in.
Water before and after feeding if soil is dry. Feeding dry soil burns roots; feeding then soaking carries nutrients to the root zone where they belong. Avoid foliar feeding flowers directly — it can damage pollen. If you use liquid fish emulsion or seaweed, dilute to half strength and apply at the base in evening, not on blooms at noon.
3. During Fruit Swelling — Only If Needed
Once fruits are marble-sized and swelling, most peppers need nothing more if you fed at flower. If leaves are pale green (not yellow), growth has stalled, and fruits are thin-walled, one more light side-dress 4 weeks after the bloom feed helps: another palmful of compost or a light sprinkle of organic bloom blend, watered in. More is not better here; peppers that are deep green, flowering, and fruiting steadily need nothing. Overfeeding now delays ripening and softens walls.
For timing with watering rhythm, see how often to water pepper plants and the general feeding primer in vegetable garden fertilizer.
Organic vs Synthetic — Honest Pros and Cons for Peppers
Organic Options I Reach For
Finished compost: The base. 2 to 3 inches at planting, plus a 1-inch side-dress at bloom. Mild N-P-K around 1-1-1 but rich in biology and micronutrients. Never causes burn. Also the best mulch partner.
Fish meal / fish bone meal: Phosphorus for flowers, plus nitrogen. Smells briefly, cats love it, plants do too. 1 tablespoon bone meal per plant at bloom, watered in, is a classic.
Kelp meal: Potassium and trace minerals, gentle. Pairs beautifully with bone meal. Adds stress tolerance in heat.
Granular organic tomato-pepper blends (e.g., 3-4-6, 4-6-4): Easy, slow-release, formulated for fruiting crops. Follow label at half to full rate — organics are more forgiving but still count.
Compost tea / worm casting tea: Gentle foliar or soil drench for early vegetative boost if seedlings are pale. Not a replacement for granular at bloom, but a nice nudge.
Synthetic Options That Work
5-10-10 or 5-5-10 granular: Old reliable for fruiting vegetables. Use 1 tablespoon per plant at planting and again at bloom, water in thoroughly. Half rate first if you are nervous.
10-10-10 balanced: Use at half the label for peppers, only at planting if soil is poor. Too strong at bloom — easy to push leaves over fruit.
Water-soluble bloom boosters (e.g., 9-15-30 types): Fast-acting for mid-season correction if a soil test shows K deficiency. Dilute to half strength and apply at base, not on leaves at noon.
My practical rule: build with compost + organic granular, correct quickly with synthetic only if a test or a clear deficiency says you must. The slow, steady organic base prevents the boom-bust that causes flower drop.
The Calcium Question and Blossom End Rot
Almost every pepper grower sees blossom end rot at least once: a water-soaked spot on the bottom of a fruit that turns black and leathery. The instinct is to add calcium — tums, eggshells, sprays. But in most gardens, soil already has enough calcium; the problem is water swung between dry and wet, so calcium couldn’t move to the fruit tip.
So before you add anything, even out water to 1 to 1.5 inches per week, mulched, morning at the base. Keep pH 6.0–6.8 so calcium stays available. Only if a soil test says “low calcium” should you add gypsum (calcium sulfate) per lab rate — it doesn’t change pH much — or if pH is low, lime. Epsom salts (magnesium sulfate) help only if magnesium is low; random Epsom doesn’t cure rot and can make it worse by competing with calcium.
Healthy, evenly watered peppers in compost-rich soil rarely get blossom end rot more than once. Fix water first, test soil second, amend third.
How Soil pH and Water Unlock — or Block — Fertilizer
I wasted a whole bottle of bloom fertilizer one year because I never tested pH. The peppers were pale, flowers dropped, fruits were thin-walled, and I kept feeding more bloom food, convinced they were hungry. A $15 soil test that fall showed pH 5.3 — strongly acidic. In acidic soil phosphorus locks up, no matter how much bone meal you add, and calcium uptake stalls even though the soil had calcium. One winter application of garden lime per lab recommendation, plus 2 inches of compost, and the next summer the same bed with half the fertilizer gave me twice the yield.
Peppers want pH 6.0 to 6.8. At that range phosphorus, calcium, magnesium, and micronutrients like boron and zinc are all available. Below 6.0, phosphorus and calcium are shy; above 7.0, iron and manganese hide, and you see yellowing between veins on new leaves. Test before you feed — it is the cheapest fertilizer you will ever buy.
Water is the other unlock. Fertilizer on dry soil burns roots because salts concentrate. Fertilizer flooded with a heavy rain washes past roots. The sweet spot is moist soil the day before, fertilizer at the drip line scratched in lightly, then a deep watering after. Think of water as the delivery truck — without it, nutrients sit in the driveway.
If you mulch heavily with straw, remember that soil biology under mulch is already busy. Over-fertilizing mulched, compost-rich beds is easy because you are feeding an already-fed system. In compost-rich beds I use half the label rate at planting and see if the plant asks for more at bloom before adding.
Feeding Peppers in Containers vs Raised Beds vs In-Ground
In-ground clay beds hold nutrients but need organic matter to prevent compaction. 2 to 3 inches of compost plus a balanced 5-10-10 at half rate at planting establishes them. Nutrients leach slowly, so 2 feeds (planting + bloom) often carry the season.
Raised beds are perfect for peppers but leach faster because water drains freely. They often want that third light feed when fruits swell, especially sandy raised mixes. Watch leaves — if they pale from deep green to light green during fruit sizing, a palmful of compost or a light organic bloom sprinkle brings them back.
Containers are the hungriest. Potting mix has little mineral reserve and weekly watering flushes nutrients out the bottom. Container peppers in 5-gallon pots want a light feed every 3 to 4 weeks: half-strength organic granular or half-strength liquid fish/seaweed at the base, always on moist mix. Fabric grow bags leach even faster. I feed containers lighter but more often than beds — small, frequent, gentle, never a heavy dump that burns a confined root ball.
For containers, slow-release organic granules mixed into the top 2 inches at planting, plus a light liquid feed at first flowers, is the easiest hands-off combo. For in-ground, compost + one granular bloom feed is often enough. Match system to system, not one schedule fits all.
Micronutrients — The Small Numbers That Make Big Differences
You rarely need to buy these separately if compost is in the bed and pH is right, but when peppers look odd despite good N-P-K and even water, micronutrients are worth knowing.
Calcium: Moves with water to fruit tips. Deficiency shows as blossom end rot. Fix water first, test soil second. Gypsum adds calcium without raising pH; lime adds calcium and raises acidic pH.
Magnesium: Center of chlorophyll. Deficiency shows as older leaves yellowing between veins while veins stay green, with leaf curl. Epsom salts help only if a test says low magnesium — random Epsom does not help calcium-related rot.
Boron: Tiny need, big effect on flower retention. Boron deficiency causes flowers to drop without setting even though plant looks healthy. Compost and balanced organic blends usually supply enough; don’t add borax by guess — too much boron is toxic quickly.
Iron: New leaves yellow between green veins when pH is high or soil is waterlogged. Foliar chelated iron greens them temporarily while you correct pH or drainage.
My rule: feed macros by stage (N-P-K), supply micros via compost and correct pH, and add specific micros only per soil test. Guessing with micros creates more yellowing than it cures.
Synthetic Feeding Schedules That Don’t Burn — If You Prefer Synthetics
If you prefer synthetics for precision or cost, peppers do great with them — you just need to be more careful about burn.
At planting, use 5-10-10 at 1 tablespoon per plant, banded 3 inches from the stem, mixed with soil and watered in. Not 10-10-10 full strength at the stem — that is a common burn. At first flowers, side-dress 5-10-10 again at 1 tablespoon per plant at the drip line, water deeply before and after. That’s often the whole season. Only add a third feed if a soil test or a clear pale-leaf signal says potassium is low — then a light 0-0-60 potash or a water-soluble bloom booster at half label, at the base in evening, does the job.
Never use lawn fertilizer (high nitrogen, weed killer contamination) near peppers. Never fertilize a dry, wilted plant at noon — wait for cool morning and moist soil. And never double up because you missed a week; skip it. Peppers prefer a missed meal to a double.
Common Mistakes — Why Peppers Get Leafy but Not Fruity
1. High nitrogen at bloom. The number one yield killer. That 10-10-10 or straight blood meal right when flowers open pushes leaves and drops blossoms. Switch to low-N, higher P/K at first flowers.
2. Feeding on a schedule, not by plant. Weekly feeding because “it’s Sunday” burns roots and pushes soft growth. Peppers want 2 to 3 feeds total: at planting, at bloom, and optionally at swelling — not weekly.
3. Dry soil + fertilizer = burn. Granules on dry soil scorch roots. Water the day before, sprinkle fertilizer at drip line, scratch in, water deeply again. Never fertilize a wilted plant at noon; wait until cool morning.
4. Mulching with unfinished wood chips that rob nitrogen. Fresh wood chips tie up nitrogen at the surface, leaving peppers pale even though you fed. Use straw or aged chips, or keep fresh chips as a path, not a bed mulch.
5. Ignoring pH. At pH below 6.0, phosphorus locks up; blossoms drop no matter how much bloom food you add. Test once a year. A $20 soil test saves $50 in wasted fertilizer.
6. Foliar feeding open flowers at midday. Salt burn on pollen. If you foliar feed, do it evening, at half strength, avoiding open flowers.
7. Too much compost + fertilizer combined. Two inches of rich compost plus full-rate synthetic can double-dose nitrogen early. If compost is heavy, use half-rate granular at planting.
Seasonal Feeding Timeline
| When | What to Do | How |
|---|---|---|
| 3 weeks before planting | Soil test, add compost, adjust pH | 2–3“ compost, lime/sulfur per test |
| Transplant day | Balanced feed at planting | 1 Tbsp 5-10-10 or organic equivalent per plant, offset from stem, water in |
| 3–4 weeks later, first flowers | Bloom feed — low N, higher P/K | 1–2 Tbsp 3-4-6 or bone+kelp at drip line, water deeply |
| 4 weeks after bloom, if fruits pale | Optional light side-dress | Palmful compost or light bloom sprinkle, water in |
| Hot midsummer, deep green plants fruiting well | Nothing — let them be | Overfeeding now hurts more than helps |
| Fall, after harvest | Top-dress bed with 1“ compost | Feeds soil for next season, not current crop |
Troubleshooting — Reading Leaves and Flowers
Tall, dark green, lush plants, flowers dropping with no fruit: Too much nitrogen. Stop all high-N feeds, ensure 6 to 8 hours sun, keep water even, wait. Flowers will hold once nitrogen flush passes.
Pale lower leaves, slow growth before bloom: Hungry or dry. Check moisture 2 inches deep; if moist, side-dress balanced feed once and compost. If dry, water correctly first — dryness looks like hunger.
Yellowing between green veins on new leaves: pH/iron, not fertilizer lack. Test pH; keep 6.0–6.8, use chelated iron foliar for quick green while correcting soil.
Small fruits with thin walls, pale: Potassium low or water uneven. Ensure even 1.5“ per week via bloom feed with K (kelp), keep mulch.
Blossom end rot on first fruits, later fruits fine: Water swing, not calcium shortage. Even out water, mulch, don’t chase with random calcium.
Burnt leaf edges after feeding: Fertilizer burn. Flush with a deep watering, remove heavily burnt leaves, wait 10 days before any feed.
What I Do Now — A Simple, Repeatable Routine
Early May, I send a soil sample. While I wait, I spread 2 inches of finished compost — the kind that smells like forest after rain — over the pepper bed and fork it in. At transplant, I sprinkle a palmful of organic 3-4-6 around each plant, 3 inches from the stem, and water with a full watering can per plant. Then I mulch with straw after a week, once soil is warm.
When the first flowers open — usually mid-June here — I walk the row with a small yogurt cup of fish bone meal and kelp, a tablespoon each per plant at the drip line, scratch, water in. That’s it for most summers. If August fruits look pale and leaves have lightened, I side-dress a single inch of compost and water. No weekly teas, no bloom booster sprays unless a test says so. Peppers get the message: build leaves, then hold flowers, then fill fruit.
That restraint is the hardest part. It feels like you should do more. But peppers are not asking for more. They’re asking for steady, timely, and done.
Feeding Peppers That Grow With Tomatoes — Can They Share?
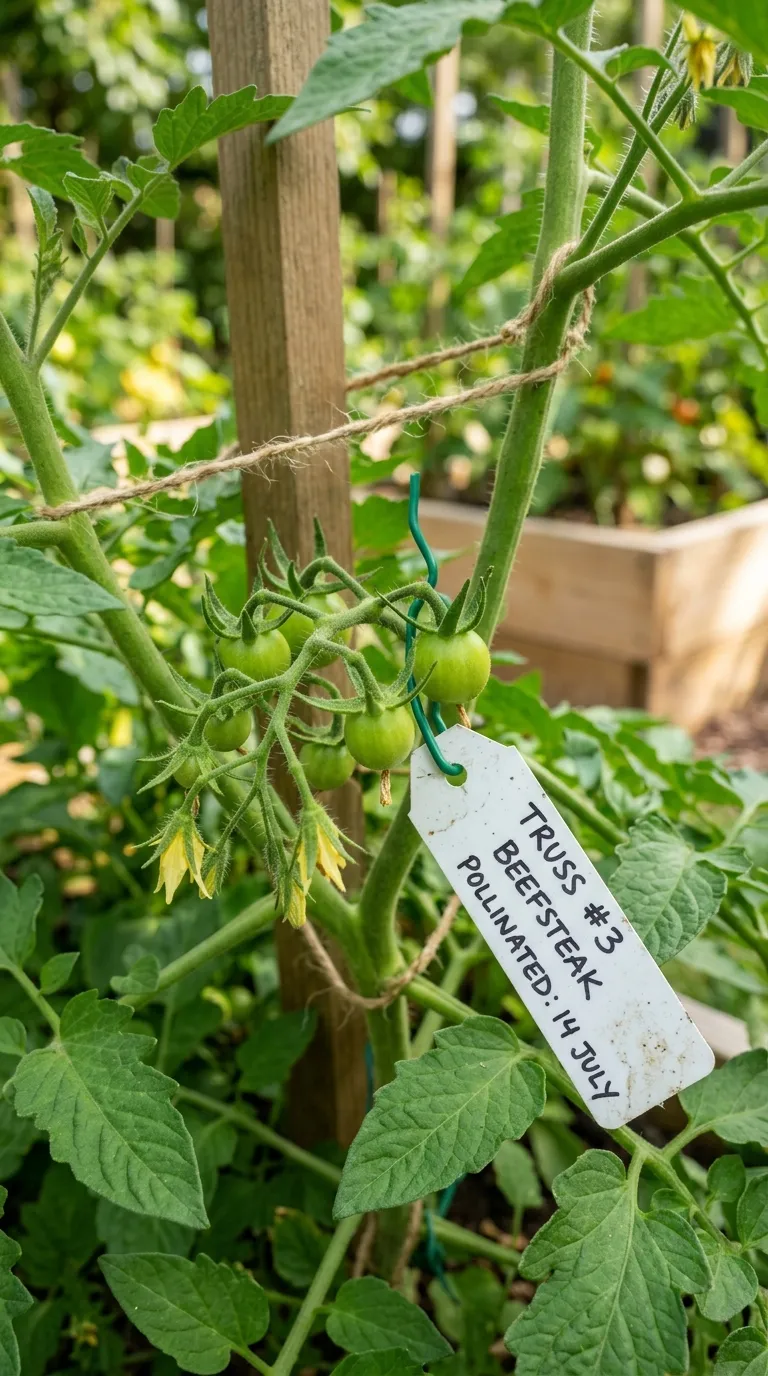
Yes, with nuance. Peppers and tomatoes are cousins, share pH and most nutrients, and both shift from nitrogen to bloom nutrition at flower. A balanced tomato-pepper organic blend like 3-4-6 or 4-6-4 works beautifully on both. Where they differ: tomatoes are heavier feeders overall and tolerate richer beds. Peppers want a touch leaner — especially less nitrogen at bloom.
If you feed a mixed bed, feed to the pepper’s lighter appetite. Use the pepper timing: balanced at planting, bloom feed at first flowers, light optional at swelling. Tomatoes won’t complain about a touch less, but peppers will absolutely drop flowers if you feed tomatoes’ heavier weekly schedule.
Interplanting tip: tuck basil or carrots between peppers — they sip lightly and don’t compete. Avoid planting peppers where you heavily manured tomatoes last year without a soil test; residual nitrogen can keep peppers leafy all summer.
DIY Mixes — Kitchen and Garden Ingredients That Actually Work
If you like mixing your own, keep it simple and slow-release. Peppers don’t want a chemistry experiment.
My backyard mix at bloom: 1 tablespoon fish bone meal (about 3-16-0, phosphorus), 1 tablespoon kelp meal (about 0-0-8, potassium plus micros), and a palmful of worm castings per plant, scratched into the top inch at the drip line and watered in. That gives roughly the 3-4-6 profile without a bag.
Compost + wood ash caution: Hardwood ash is potassium and calcium, but it spikes pH fast and is easy to over-apply. If your pH is below 6.0 and you add ash, use no more than 1 cup per 10 square feet, once a year, and retest. I prefer kelp for potassium because it doesn’t swing pH.
Coffee grounds myth: Used grounds are about 2-0.3-0.3 and mildly acidic, but they are not a bloom fertilizer. They are a light nitrogen source and good compost addition, not a phosphorus-potassium fix at flower. Don’t pile them thick — they mat and repel water.
Store mixes dry, label with N-P-K and date, and use within a season.
How to Top-Dress Without Burning — The Dripline Technique
Broadcasting fertilizer over the whole bed wastes half on paths and risks stem burn. The dripline method puts food where feeder roots actually are.
Find the dripline: imagine rain falling off the leaves — the circle where it drips is where the finest feeder roots cluster, typically 6 to 10 inches from the stem on a mature plant. Sprinkle your measured amount in a thin ring there, not against the stem, scratch lightly with a hand fork 1 inch deep, and water slowly for 15 minutes so nutrients move down, not sideways.
If you use liquid fish or seaweed, dilute to half label, pour in the same ring in evening, not on leaves at noon. Foliar feeding is a quick green-up for pale seedlings, but for fruiting peppers soil feeding at the dripline is more effective and less likely to scorch flowers.
What Over-Feeding Looks Like Versus Under-Feeding — Learn the Leaves
Too much nitrogen: Plants are tall, dark green, leaves large and maybe curled downward, stems thick, flowers yellow and drop, few small fruits, maybe leaf tip burn. Solution: stop nitrogen, keep water even, wait. Flush with a deep watering if you heavily over-applied. Next year, cut planting feed in half.
Too little overall nutrition: Plants are light green, slow, thin stems, small leaves, flowers small, fruits set but stay small and pale. Check moisture first — dry looks like hungry — then side-dress balanced organic at half rate and compost if soil was not enriched at planting.
Phosphorus low (common in cold acidic soil): Deep green but purplish tinge on undersides, delayed flowering, few flowers. Correct pH, side-dress bone meal at bloom.
Potassium low: Edges of older leaves yellow then brown, fruits small with thin walls and poor color. Kelp meal or organic potassium at bloom helps.
Learning to read those subtle differences saves you from the most common trap: feeding a dry plant or feeding a low-pH plant where food can’t be taken up. Moisture + pH first, then food.
Building Long-Term Fertility So You Feed Less Every Year
The best fertilizer for peppers is soil that barely needs fertilizer.
Each fall after harvest, I top-dress beds with 1 inch of finished compost — no digging, just lay it like a blanket. Earthworms pull it down all winter. By spring, that inch has become humus that holds moisture, buffers pH, and slowly releases N-P-K plus micros. After 3 years of this, my beds test “optimal” in phosphorus and potassium without any granular at planting — just that fall compost plus a light bloom-side dress if plants ask.
Rotate peppers away from where peppers or tomatoes grew last 2 years. Nightshade rotation prevents nutrient imbalances and disease. Follow peppers with beans or peas — legumes fix nitrogen gently — then a compost top-dress, and next spring that bed is pepper-ready with less added.
Cover crops are the quiet multiplier: sow crimson clover or oats after fall harvest, mow in spring 3 weeks before planting, let residue become organic matter. The compost you add on top then goes further.
Cheat Sheet — Quick Bag Translations
Standing in the garden center, bags blur. Translate by the first number.
If bag says 10-10-10: It’s balanced, relatively strong. For peppers, use half the label rate, only at planting if beds are poor. Too strong at bloom.
If bag says 5-10-10 or 4-6-4: Perfect at planting and at bloom — low enough N, good P/K. Follow label at full rate, watered in.
If bag says 3-4-6 or 2-3-4 organic tomato-pepper: Ideal bloom feed. Use the label’s vegetable rate at first flowers.
If bag says 12-0-0 blood meal or 20-0-0 urea: Leaf maker, not fruit maker. Never at bloom; use sparingly early only if soil test says nitrogen low and plants are truly pale.
Take a photo of the label and compare at home rather than guessing in the aisle. Peppers reward the boring, steady choice over the exciting high-number bag.
The First-Year vs Third-Year Pepper Bed — What Changes
Year one on new soil, you are building. Compost at planting plus balanced 5-10-10 at planting and a bloom feed at flower is the safe plan. Expect to feed the soil as much as the plant.
Year two, after fall compost and rotation, you may find balanced at planting plus only bloom feed is enough. Leaves stay green longer, mulch holds moisture, earthworms are everywhere.
Year three, with annual 1-inch fall compost and pH kept 6.2, many beds need only compost at planting and a light bloom-side dress if fruits look pale. The soil’s clay and organic matter now bank nutrients. That is the compounding return you cannot buy in a bottle — living soil that feeds peppers steadily while you do less.
Start where you are. Feed the soil this fall, and future you will feed peppers less and harvest more.
Pairing Water and Feed — Why They Must Travel Together
Feed without water is salt on dry roots. Water without attention to feed leaves peppers pale even though they are drinking. The best pepper gardeners pair the two: every deep watering carries fertility to roots, every feeding is immediately watered in.
A practice that changed my harvest: always fertilizer at 6 p.m. after watering the day before, scratch in lightly at the dripline, then water again slowly the next morning at 6 a.m. That 12-hour gap lets granules soften without burning, and morning water carries nutrients down as roots wake. Never fertilizer at noon on a wilted plant - that is throwing salt on a sunburn.
Keep mulch as the mediator. Mulch slows both water loss and nutrient leaching, so paired water-feed cycles work with mulch, not against it. Bare soil leaches both in one storm.
Related but Often Forgotten — Wind, Shade, and Neighbors
Peppers sheltered from drying wind need 20 % less water than those hammered by a prairie breeze every afternoon. A simple burlap windbreak or a neighbor row of basil reduces transpiration and keeps flowers from desiccating. Likewise, a bed that gets reflected heat from a white wall or south-facing fence runs 5–7°F hotter at the soil — water a half-inch more there and mulch thicker. Tuck peppers where they get 6 to 8 hours of sun but not a howling corridor, and every watering you give goes further.
A Final Walk Before You Water Next
Every garden has its own microclimate. Your pepper bed near the south fence warms a week earlier. The one by the birch gets afternoon shade and stays cooler longer. Your straw may be weed-free oat straw; mine is leaf mulch that mats faster. So after reading any schedule — even this one — adapt it with your hands.
Tomorrow morning, before the heat, walk to the peppers with your coffee. Kneel, push your finger two inches, feel the story. Lift a little mulch, look at the soil color — dark brown moist, light tan dry. Check the youngest flowers, are they crisp and open? Then decide: water today slowly at the base, or wait and let roots breathe. That daily, gentle attention — five minutes, no app needed — is what steady pepper harvests are built on. Not perfection, just presence.
And remember mulching, feeding, and timing are not separate chores but one conversation with the plant. Water carries feed, mulch holds water, shade protects water, pH unlocks feed. When one part of that conversation is quiet or loud, the others adjust. Listen long enough and peppers stop feeling fussy and start feeling companionable — warm-season friends that ask for steadiness and give back crisp, sweet abundance.
My Morning Watering Ritual — Five Quiet Minutes
I water peppers at 6:30 a.m. because that is when the light is gold and the bees are not yet up. Kettle on, door open, I carry the watering can to the bed and tip it slowly in a ring, watching water sink rather than run. I check mulch thickness with a finger, tuck straw back over a bare patch, and pinch off one lower leaf that has yellowed so air moves. I count fruits, not because I need to, but because that small inventory tells me if watering has slipped — fewer new marble fruits this week than last usually means I let soil swing dry. Those five minutes, repeated every three days, have given me more peppers than any fertilizer ever did.
Your ritual may be evening with a hose, or a timer that clicks at dawn while you sleep. The time matters less than the regularity and the low, slow delivery at the base. Keep it quiet, keep it deep, keep it morning when you can, and peppers respond like they have finally been heard.
Common Questions I Hear at the Garden Gate
New gardeners often ask, ‘Do I water leaves to cool them?’ No — cooling leaves with overhead water on a scorching afternoon scorches them more as droplets act like lenses and invites bacteria. Cool roots with mulch and deep base water instead.
‘Can I use a sprinkler?’ Only if it is at dawn and leaves dry by 10 a.m., but even then peppers prefer soaker or drip. Sprinklers lose half to evaporation and wet foliage you want dry.
‘Should peppers be watered like tomatoes?’ Close, but peppers want a touch less, more even, less flood. Think pepper as tomato’s leaner cousin.
If you answer those three, you have answered 80 percent of pepper watering confusion.
Frequently Asked Questions
Q: What is the best fertilizer for peppers?
A: A balanced 5-10-10 or 5-5-10 at planting plus a low-nitrogen, higher phosphorus and potassium bloom fertilizer like 3-4-6, fish bone meal, or kelp at flowering gives the best yield. Start with 2 to 3 inches of finished compost plus a balanced granular at half to full label rate at transplant, then side-dress with bloom nutrition when first flowers open. Peppers need modest nitrogen overall; too much grows tall, leafy plants with dropped blossoms. Compost plus a bloom feed at flower is the sweet spot for most backyard soils.
Q: When should you fertilize pepper plants?
A: Fertilize three times at most: at transplant with compost and a balanced 5-10-10, again lightly at first flowers with a low-nitrogen bloom feed such as 3-4-6 or fish bone meal plus kelp at the drip line, and optionally once more when fruits are swelling if leaves are pale or growth stalls. Avoid high-nitrogen fertilizer after flowering — that pushes leaves at the expense of fruit. Always water before and after feeding so nutrients move to roots without burn, and never fertilize a dry, wilted plant at midday.
Q: Is organic fertilizer good for peppers?
A: Yes — organic feeds like compost, fish bone meal, kelp meal and blended organic tomato-pepper granules with N-P-K around 3-4-6 are ideal for peppers because they release slowly, feed soil microbes and rarely burn. Work 2 inches of compost into the bed before planting, then side-dress with an organic granular or bone plus kelp at first bloom, watering in well. You can use synthetic bloom fertilizers too for quick correction, but the steady organic base prevents the nitrogen spikes that cause blossom drop and gives thicker-walled, tastier fruit.
Q: Can you over-fertilize peppers?
A: Very easily, and peppers show it fast — tall, dark, lush foliage with yellowing, dropping flowers and few fruits, plus leaf edge burn and even blossom end rot from salt stress. Over-fertilizing often comes from weekly feeds or high-nitrogen like 10-10-10 at bloom. Use half to full label rates only 2 to 3 times per season, always at the drip line and watered in on moist soil. If plants are already deep green and dropping blossoms, stop nitrogen, keep water even and let the plant rebalance; new flowers will hold.
Related Articles
- How to Grow Peppers
- How Often to Water Pepper Plants
- Vegetable Garden Fertilizer Guide
- How to Prepare Soil for Planting
- Best Companion Plants for Peppers
- How to Grow Tomatoes
Sources & References
- University of Minnesota Extension - https://extension.umn.edu/vegetables/fertilizing-vegetables
- Cornell University Vegetable MD Online - https://www.vegetables.cornell.edu/
- North Carolina State Extension - https://content.ces.ncsu.edu/pepper-production
- Iowa State University Extension Horticulture - https://hortnews.extension.iastate.edu/
- Utah State University Extension - https://extension.usu.edu/vegetableguide/
