Learning how to dry herbs at home is one of the most rewarding skills for any gardener or home cook. Drying herbs preserves their flavor for months, saves money on store-bought spices, and ensures you always have fresh-tasting herbs on hand even in the dead of winter. This guide covers five proven methods for drying herbs, from traditional air drying to quick microwave techniques.
Quick Answer: To dry herbs at home, harvest stems in the morning after dew dries, remove lower leaves, and hang bundles upside down in a warm, dark, well-ventilated area for 1 to 2 weeks. For faster results, use a dehydrator at 95 to 115 degrees Fahrenheit or an oven at its lowest setting with the door slightly open.
When to Harvest Herbs for Drying
Timing matters when it comes to drying herbs. The moment you cut your herbs determines how much flavor they retain once dried. Harvest at the wrong time, and you will end up with tasteless, brown leaves.
The ideal harvest window:
- Time of day: Harvest in the mid-morning after dew has evaporated but before the midday sun heats the plants. This is when essential oil concentration peaks.
- Stage of growth: Cut stems just before the plant flowers. Once herbs bolt and produce flowers, the leaves lose flavor as the plant shifts energy to seed production.
- Plant health: Only harvest from healthy, disease-free plants. Avoid herbs that show signs of pest damage, yellowing, or wilting.
Herbs to harvest at specific times:
- Basil: Harvest before flower buds open; pinching flowers extends the harvest window
- Oregano and thyme: Cut when plants are about 6 inches tall and before flowering
- Rosemary: Harvest anytime during active growth; flavor is strongest in spring
- Sage: Cut stems just before flowering for maximum aroma
- Mint: Harvest before flowers appear; flavor is strongest in the first year
For tips on growing these herbs at home, see our guides on how to grow basil at home and how to grow oregano from seed.
Method 1: Air Drying Herbs (Best for Flavor)
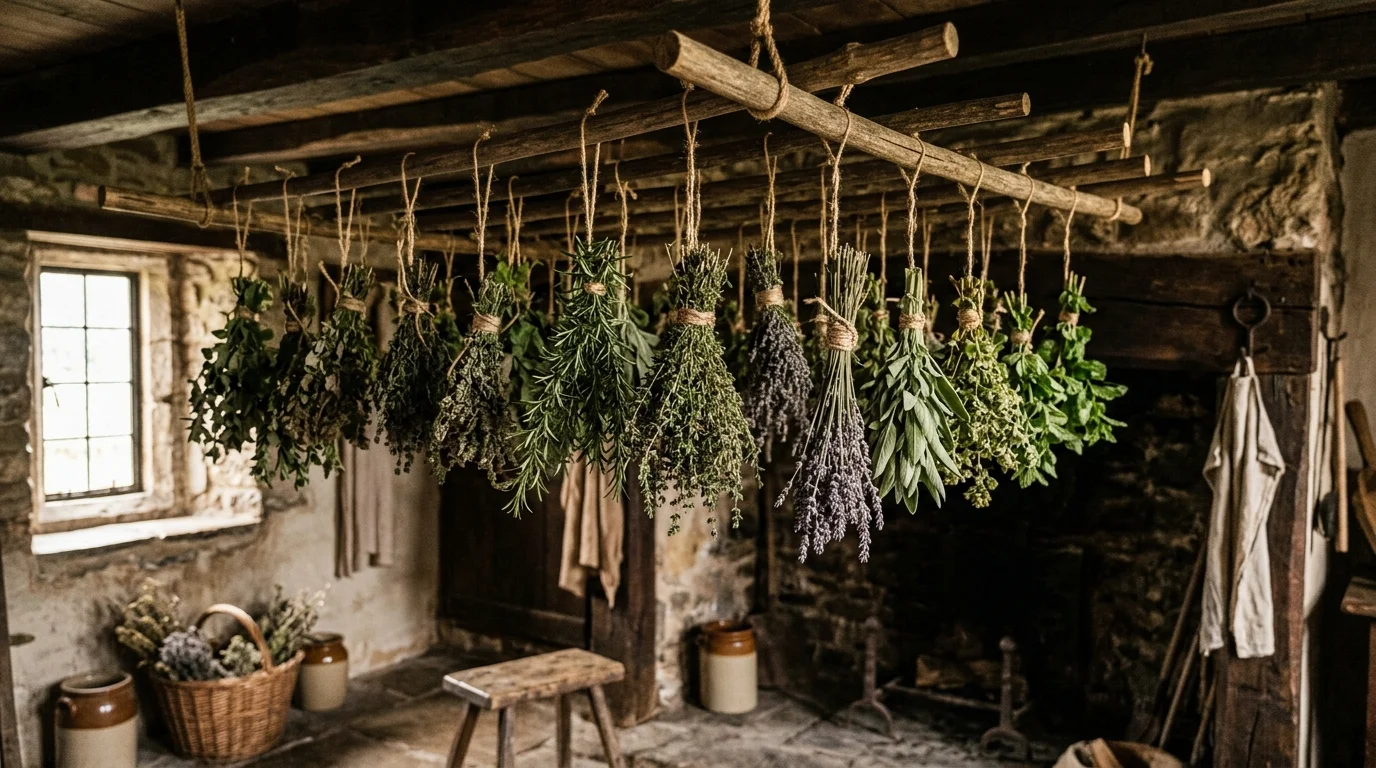
Air drying is the oldest and most popular method for drying herbs. It requires no special equipment and preserves the most flavor because herbs dry slowly at room temperature.
Step-by-step air drying process:
- Harvest stems in the morning when essential oils are at their peak.
- Rinse gently under cool water and pat completely dry with a clean towel.
- Remove lower leaves from the bottom 2 inches of each stem.
- Bundle 4 to 6 stems together and secure with a rubber band or twine.
- Hang bundles upside down in a warm, dark, well-ventilated area.
- Wait 1 to 2 weeks until leaves crumble easily when pressed.
- Strip leaves from stems and store in airtight containers.
Best conditions for air drying:
- Temperature: 70 to 80 degrees Fahrenheit
- Humidity: Below 60 percent
- Location: Dark closet, attic, or covered porch
- Airflow: Good ventilation prevents mold
Which herbs air dry best: Oregano, thyme, rosemary, sage, bay leaf, dill, and marjoram. These low-moisture herbs dry quickly and retain excellent flavor.
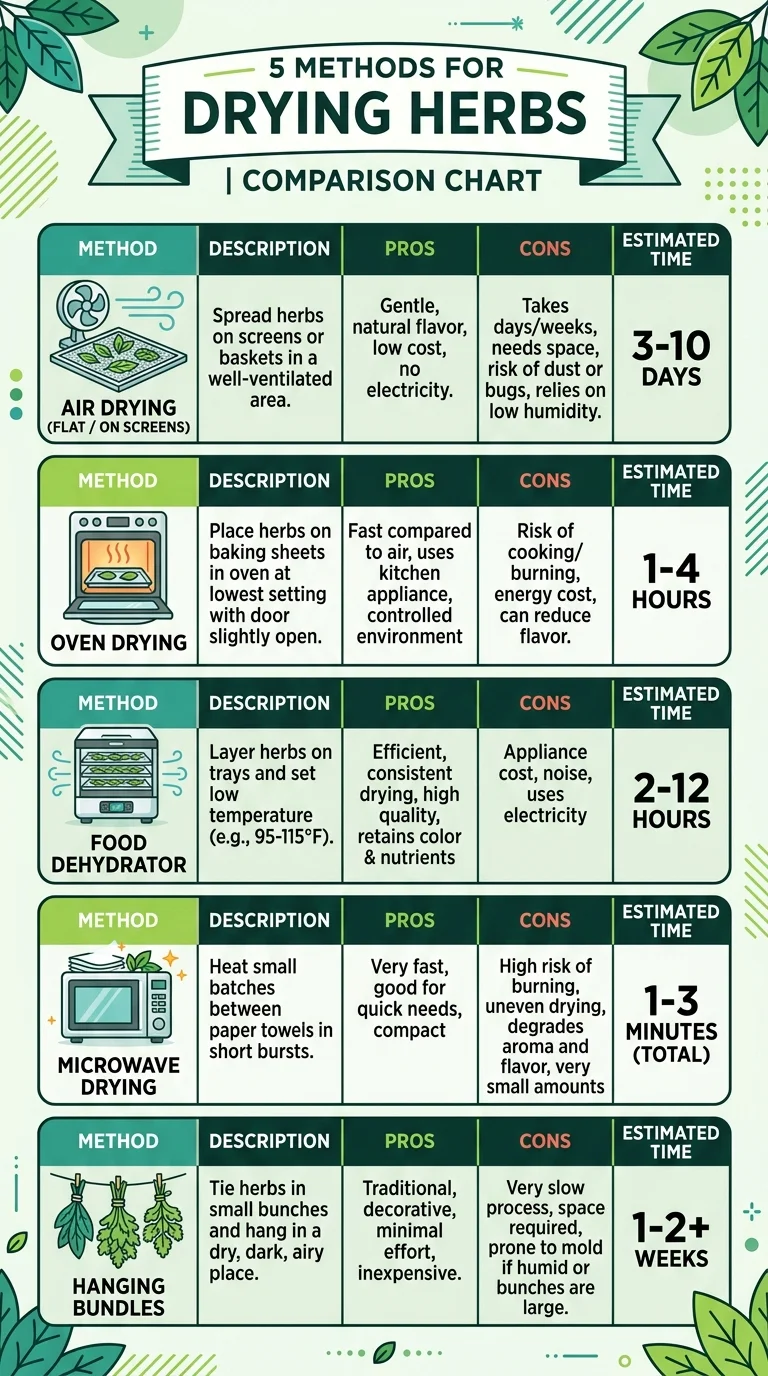
Method 2: Oven Drying Herbs (Quick Results)
Oven drying is faster than air drying and works well when you need dried herbs quickly. The key is using the lowest possible temperature to avoid cooking the herbs and destroying their essential oils.
Step-by-step oven drying process:
- Preheat oven to its lowest setting, typically 150 to 170 degrees Fahrenheit.
- Prepare herbs by washing, drying, and removing leaves from stems.
- Spread herbs in a single layer on a parchment-lined baking sheet.
- Place in oven with the door slightly cracked open to allow moisture to escape.
- Check every 15 to 20 minutes and flip herbs gently for even drying.
- Remove when crispy - this usually takes 1 to 2 hours depending on the herb.
- Cool completely before storing in airtight containers.
Important oven drying tips:
- Never exceed 180 degrees Fahrenheit; higher heat destroys volatile oils
- Keep the oven door ajar to release steam
- Do not walk away; herbs can go from dry to burned in minutes
- Thicker leaves like sage and rosemary take longer than delicate herbs like thyme
Oven drying works best for: thyme, oregano, rosemary, sage, and bay leaf. Delicate herbs like basil and parsley are better dried using other methods.
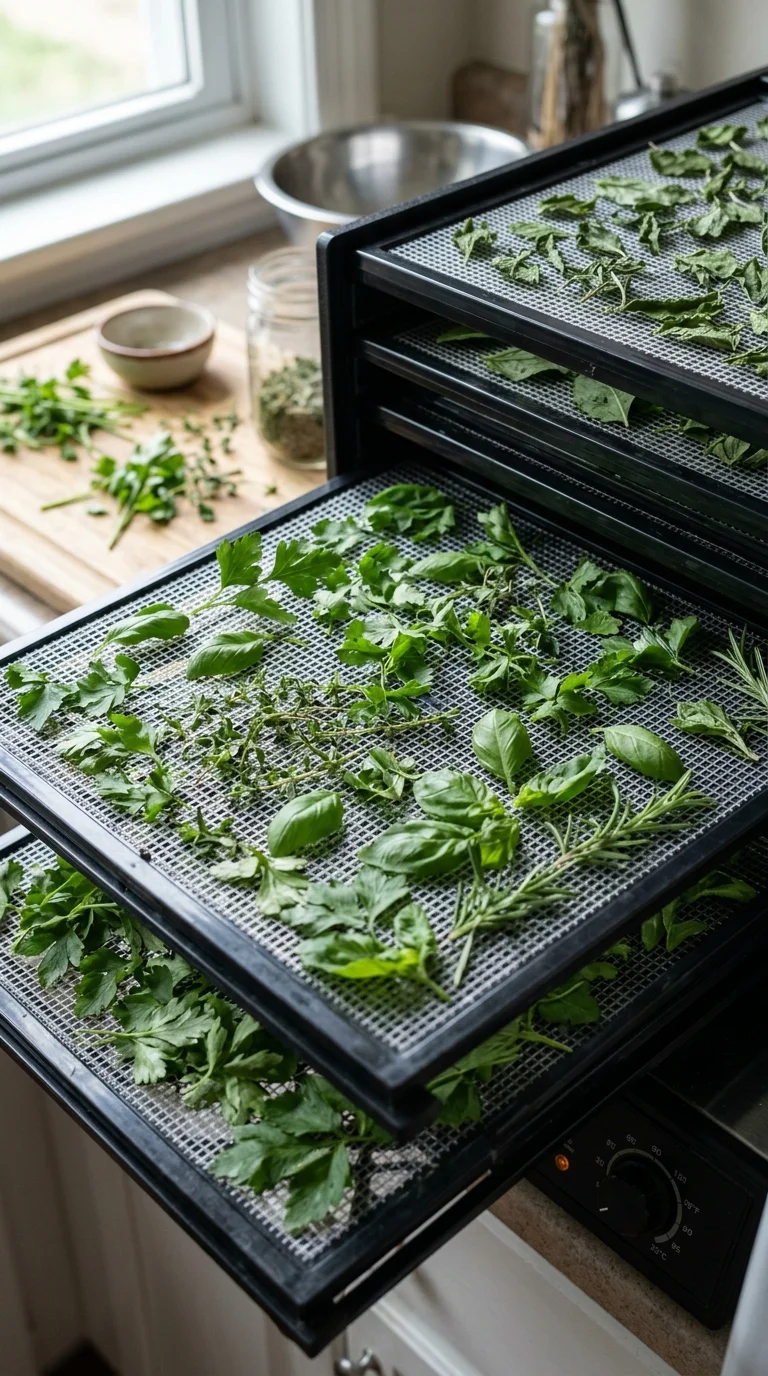
Method 3: Dehydrator Drying Herbs (Most Consistent)
A food dehydrator provides the most controlled and consistent results for drying herbs. The temperature and airflow are regulated, reducing the risk of over-drying or burning.
Step-by-step dehydrator drying process:
- Prepare herbs by washing and patting completely dry.
- Remove leaves from stems or leave small herbs like thyme on stems.
- Arrange in single layers on dehydrator trays without overlapping.
- Set temperature to 95 to 115 degrees Fahrenheit.
- Dry for 2 to 4 hours, checking periodically.
- Test for doneness by crushing a leaf; it should crumble easily.
- Cool and store in airtight containers away from light and heat.
Dehydrator advantages:
- Consistent temperature prevents flavor loss
- No need to rotate trays
- Can dry large batches at once
- Works in any weather or humidity level
- Preserves color better than other methods
If you do not own a dehydrator, the oven method or air drying produces excellent results for most herbs. Dehydrators are worth the investment if you dry herbs frequently or in large quantities.
Method 4: Microwave Drying Herbs (Fastest Method)
Microwave drying is the fastest way to dry herbs, taking only minutes instead of days. This method works best for small quantities and delicate herbs that might lose flavor in longer drying processes.
Step-by-step microwave drying process:
- Wash and dry herb leaves thoroughly.
- Place leaves between two paper towels on a microwave-safe plate.
- Microwave on medium power for 30 seconds at a time.
- Check after each interval and flip leaves if needed.
- Continue in 30-second bursts until leaves are dry and crumbly.
- Cool completely before storing.
Microwave drying tips:
- Use medium or low power; high heat cooks the herbs
- Work in small batches of 10 to 15 leaves at a time
- Total time is usually 2 to 4 minutes depending on the microwave
- Watch carefully - herbs can burn in seconds
- This method is best for small amounts you plan to use quickly
Microwave-dried herbs may not retain flavor as long as air-dried or dehydrator-dried herbs, so use them within a few months for the best taste.
Method 5: Hanging Bundles (Traditional Technique)
Hanging bundles is a variation of air drying that uses the whole stem. This traditional method is decorative and functional, creating a beautiful display while preserving your harvest.
Step-by-step hanging bundle process:
- Cut stems when herbs are at their peak flavor.
- Remove lower leaves from the bottom 3 inches of each stem.
- Gather 5 to 10 stems into a bundle.
- Wrap twine or rubber band tightly around the base of the stems.
- Hang bundles upside down from hooks, a drying rack, or a clothes hanger.
- Place in a dark, dry area with good air circulation.
- Wait 2 to 3 weeks until completely dry.
Best herbs for hanging bundles: Rosemary, thyme, oregano, sage, lavender, and bay leaf. These sturdy herbs hold their shape well when hung.
The hanging method is also visually appealing. Many gardeners hang dried herb bundles in their kitchen as both decoration and a ready supply of flavor. For a complete guide to growing these herbs, see our article on how to grow herbs at home.
Which Herbs Dry Best vs. Which Are Better Fresh
Not all herbs are created equal when it comes to drying. Some herbs retain their flavor beautifully when dried, while others lose their character and are better used fresh or frozen.
Herbs that dry exceptionally well:
- Oregano - flavor intensifies when dried
- Thyme - retains strong aroma for years
- Rosemary - holds flavor and texture
- Sage - earthy notes concentrate during drying
- Bay leaf - actually improves with drying
- Dill - seeds and leaves both dry well
- Marjoram - similar to oregano, dries beautifully
Herbs better used fresh or frozen:
- Basil - turns brown and loses sweetness; freeze in olive oil instead
- Parsley - flavor fades quickly; freeze chopped in ice cube trays
- Chives - lose texture when dried; freeze or use fresh
- Mint - better frozen for teas and cocktails
- Cilantro - does not survive drying well at all
- Tarragon - delicate flavor does not preserve through drying
For herbs you want to preserve but cannot dry well, consider freezing. Chop fresh herbs and freeze them in olive oil using ice cube trays. Drop a cube directly into soups, sauces, or pasta for instant flavor.
How to Store Dried Herbs for Maximum Shelf Life
Proper storage is essential for maintaining the flavor of your dried herbs. Light, heat, and air are the enemies of dried herb potency.
Storage best practices:
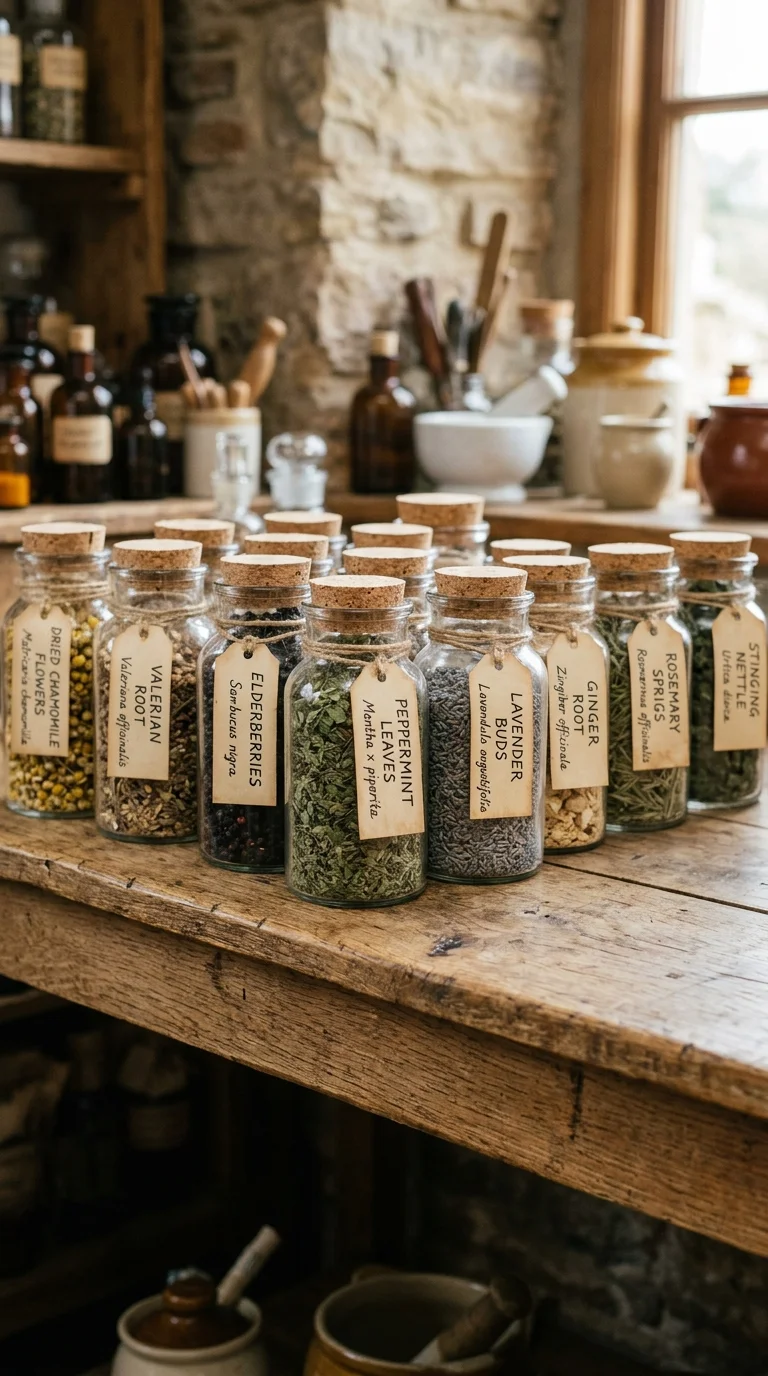
- Use airtight glass jars with tight-fitting lids
- Store in a cool, dark place away from the stove or dishwasher
- Label every jar with the herb name and date dried
- Keep whole leaves until ready to use; crush just before adding to recipes
- Avoid storing near the stove, as heat degrades flavor
Shelf life of dried herbs:
- Whole dried leaves: 1 to 3 years
- Crushed or ground herbs: 6 months to 1 year
- Dried herb blends: 6 months to 1 year
Test potency by crushing a leaf between your fingers. If it still smells fragrant and strong, it is good to use. If the scent is faint or absent, the herb has lost its flavor and should be replaced.
For tips on growing the herbs you plan to dry, visit our guides on how to grow thyme indoors and how to grow rosemary from cuttings.
Frequently Asked Questions
Q: What is the best way to dry herbs at home?
A: Air drying is the best method for most herbs. Bundle 4 to 6 stems together, hang them upside down in a warm, dark, well-ventilated area for 1 to 2 weeks until crispy. This preserves the most flavor.
Q: How long do dried herbs last?
A: Dried herbs stored in airtight containers in a cool, dark place retain good flavor for 1 to 3 years. Label jars with the date. Crush leaves between your fingers to check potency before using.
Q: Which herbs are best for drying?
A: Herbs with low moisture content dry best: oregano, thyme, rosemary, sage, dill, and bay leaf. High-moisture herbs like basil, parsley, and mint are better frozen or used fresh.
Q: Can you dry herbs in the oven?
A: Yes. Spread herbs on a baking sheet and dry at the lowest oven setting, typically 150 to 170 degrees Fahrenheit, with the door slightly open. Check every 15 to 20 minutes to prevent burning.
Q: When should you harvest herbs for drying?
A: Harvest herbs in the morning after dew has dried but before the sun is hot. This is when essential oil concentration is highest. Cut stems just before the plant flowers for the strongest flavor.
Q: How do you know when herbs are fully dried?
A: Herbs are fully dry when leaves crumble easily between your fingers and stems snap instead of bending. If they still feel soft or pliable, they need more drying time.
