

Do you dream of having a huge, fragrant rosemary bush in your yard without spending a fortune at the garden center? Many gardeners try to grow this wonderful herb from seeds, only to find that the seeds take forever to sprout and often fail. Don’t worry, because learning how to grow rosemary from cuttings is the absolute easiest way to get free, healthy new plants for your home.
Quick Answer: To grow rosemary from cuttings, snip a 4-to-6-inch stem of new growth, strip the lower leaves, and place it in a gritty, well-draining soil mix. Keep the cutting warm, humid, and out of direct sunlight until roots form in a few weeks. This simple propagation method is the fastest way to expand your herb garden.
Your Complete Guide to Rosemary Plant Care Outdoor
Taking care of your rosemary plants outside is a wonderful way to enjoy their fresh scent every time you walk by. Rosemary is a tough, woody herb that originally comes from the warm, sunny Mediterranean region. Because of this, your plants will thrive when you give them conditions that mimic their natural seaside home.
In most cases, the secret to successful outdoor care is choosing the sunniest spot in your yard. Rosemary plants need at least six to eight hours of direct sunlight every single day to stay strong and healthy. If they get too much shade, their stems can become weak, floppy, and lose their beautiful aroma.
When you think about rosemary plant care outdoor, you must also think about the wind and the winter weather. Rosemary leaves are like pine needles, designed to hold onto moisture, but cold winter winds can dry them out quickly. If you live in a place with very cold winters, planting your rosemary near a brick wall or a fence can help block these harsh winds.
The brick wall also acts like a natural heater, soaking up the sun’s warmth during the day and radiating it back to the plant at night. Many gardeners find that this simple trick helps their rosemary survive chilly weather much better than plants left out in the open.
Outdoor Care Checklist:
- Sunlight: 6 to 8 hours of direct sun daily
- Location: Sheltered from harsh, freezing winds
- Spacing: 2 to 3 feet apart for good air flow
- Watering: Soak-and-dry method (let soil dry completely)
Watering your outdoor rosemary is another area where less is almost always more. These plants are highly drought-tolerant once they establish their root systems in your garden. You should generally use the “soak and dry” method, which means you water the soil deeply and then wait for it to dry out completely before watering again.
If you water too often, the roots will sit in soggy soil, which can cause them to rot and die. In the hot summer months, you might only need to water your established plants once every week or two. If it rains regularly in your area, you may not need to water your outdoor rosemary plants at all.
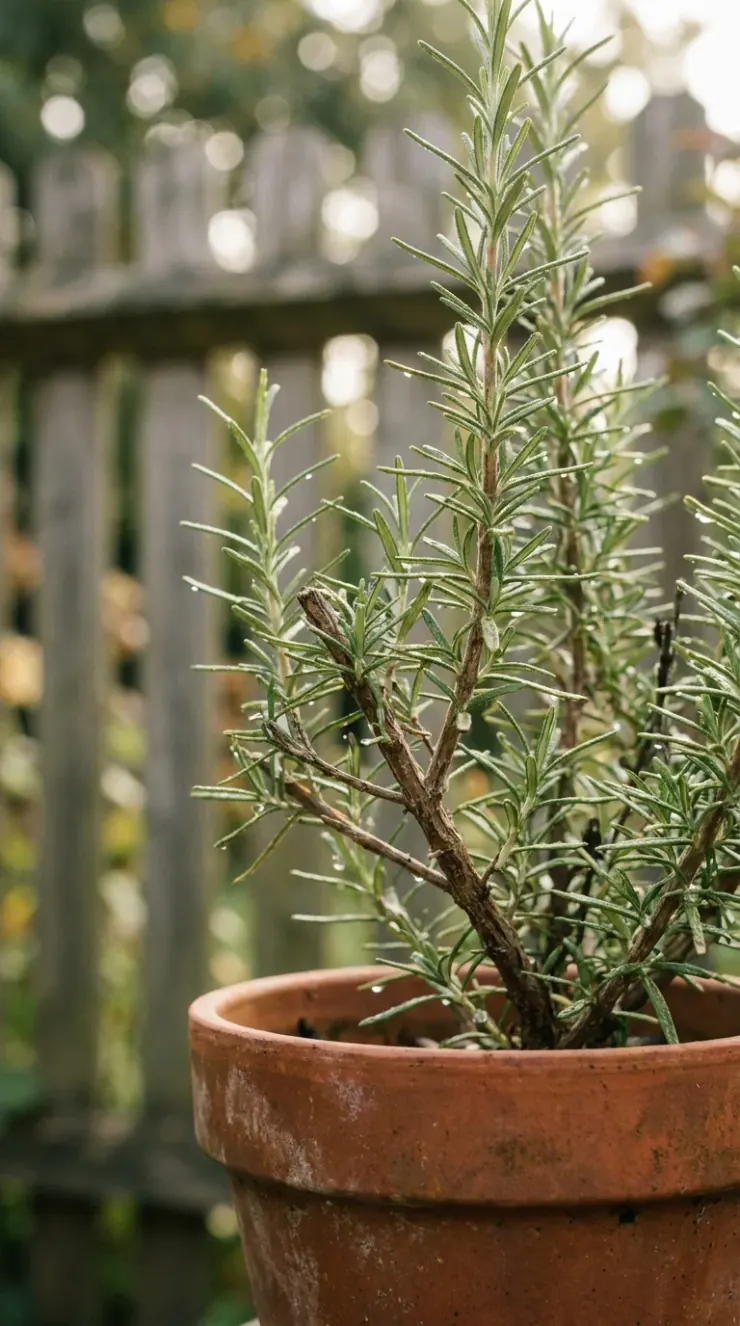
Master the Art of Pruning Rosemary for Growth
To keep your rosemary looking beautiful and producing plenty of tasty leaves, you need to make pruning a regular habit. Many beginners are afraid to trim their plants because they worry they might hurt them. However, pruning rosemary for growth is actually one of the best things you can do to keep your herb bush healthy and productive.
When you prune your rosemary, you are encouraging the plant to grow new, tender stems instead of becoming woody and bare at the bottom. This process works because cutting the tips of the branches releases hormones that tell the lower buds to start growing.
The best time to prune your rosemary is in the spring or early summer, right after the plant finishes showing off its beautiful blue flowers. You should avoid pruning late in the autumn, as this can encourage new, tender growth that will easily get damaged by the winter frost.
When you get ready to prune, always make sure your garden shears are very clean and sharp. Dirty tools can spread diseases from plant to plant, and dull blades can crush the stems instead of making clean cuts. A clean cut heals much faster and keeps your plant safe from pests and fungal infections.
Pruning Golden Rules:
1. Always use clean, sharp shears to prevent disease.
2. Never cut back into the bare, woody part of the stem.
3. Trim just above a set of leaves to encourage branching.
4. Keep your trims to no more than one-third of the plant at a time.
When you are trimming, look for the soft, green stems at the outer edges of the plant. You can safely cut these back by a few inches, making sure to leave some green leaves on the stem. Never cut back into the old, brown, woody parts of the plant that do not have any leaves.
If you cut into this bare wood, the branch will generally not grow back, and you will be left with an unsightly bald spot. If your rosemary has grown too large, it is best to trim it back gradually over a couple of years rather than doing one massive cut all at once.
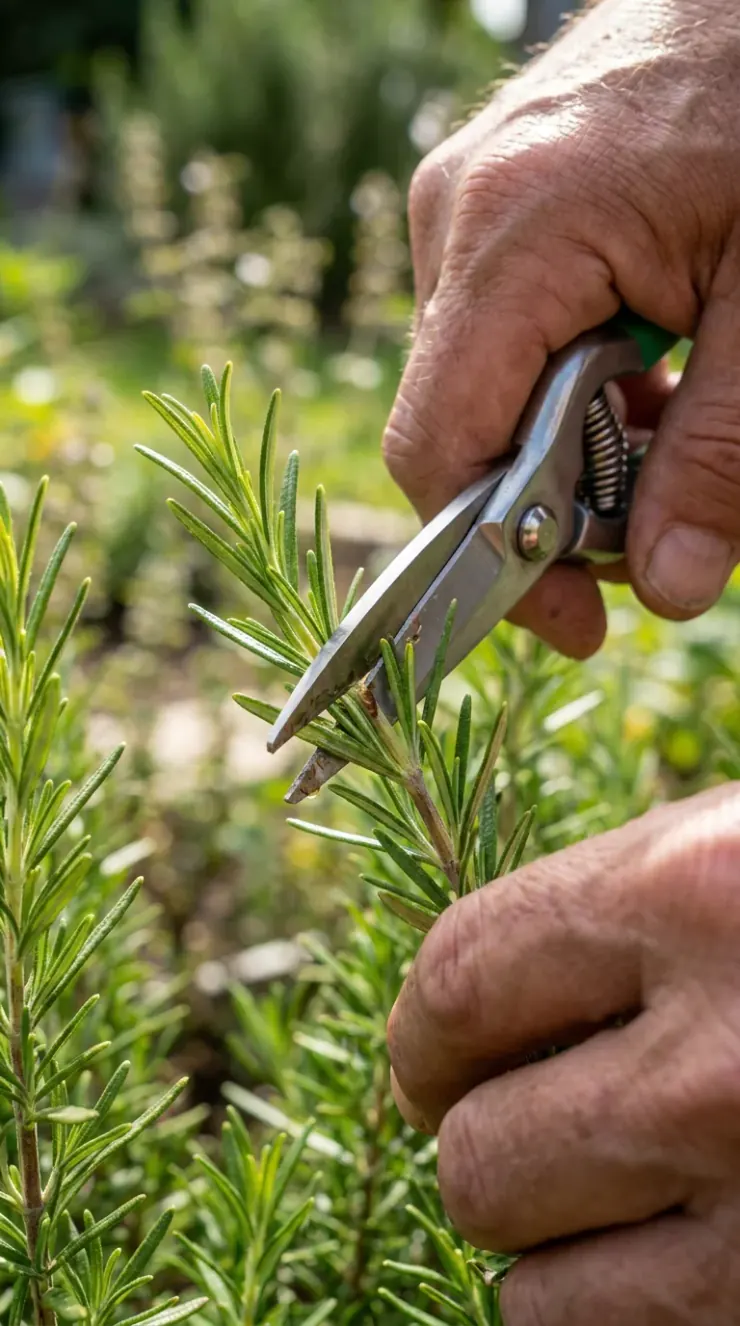
Step-by-Step Guide and Creative Uses for Fresh Rosemary
Taking cuttings is a wonderful, hands-on project that connects you directly with the life cycle of your garden. Here is a simple, step-by-step guide to taking your cuttings and finding wonderful uses for fresh rosemary around your home.
First, you want to choose a healthy parent plant that is growing strongly. It is best to take your cuttings early in the morning when the plant is fully hydrated from the night air. Look for healthy, green stems that do not have any flowers on them, as flowering stems put their energy into blooms instead of growing new roots.
How to Prepare and Root Your Rosemary Cuttings
- Step 1: Use your sharp shears to snip a stem that is about four to six inches long. Make your cut at a 45-degree angle right below a leaf node, which is the spot where leaves grow out of the stem.
- Step 2: Gently strip away the leaves from the bottom two inches of your cutting. You want to leave a bare stem that can go into the soil, while keeping the top leaves to catch sunlight.
- Step 3: Dip the bare end of the stem into clean water, and then dip it into a small amount of rooting hormone powder. While this step is optional, many gardeners find it helps the roots grow much faster.
- Step 4: Poke a small hole in your potting mix with a pencil, and gently insert the bare stem. Firm the soil around the stem so it stands up straight and has good contact with the dirt.
- Step 5: Cover the pot with a clear plastic bag to create a mini greenhouse. Place it in a warm spot with bright, indirect light, and mist the soil occasionally to keep it lightly damp.

Once your cuttings grow strong roots and turn into big, beautiful plants, you will have an abundance of fresh herbs to enjoy. There are so many amazing ways to use this herb in your daily life.
In the kitchen, fresh rosemary is a classic companion for roasted potatoes, warm breads, and savory vegetable dishes. You can also slide the leaves off the woody stems and use the tough stems as natural, aromatic skewers for your summer barbecues.
Beyond cooking, rosemary makes a wonderful addition to your home care and wellness routines. You can simmer fresh rosemary sprigs in a pot of water on your stove to fill your entire house with a clean, woodsy scent.
Some gardeners like to tie a bundle of fresh rosemary branches together and hang them in the shower. The warm steam releases the essential oils in the leaves, creating a relaxing, spa-like experience right in your own bathroom.
Choosing and Mixing the Best Soil for Rosemary
If you want your rosemary to live a long and happy life, you must start with the foundation: the soil. Rosemary plants are very particular about their roots, and they absolutely hate being wet for too long.
Finding or mixing the best soil for rosemary is the most important step in preventing root rot, which is the number one cause of death for this herb. In nature, rosemary grows in sandy, rocky soils near the sea, where rainwater drains away instantly.
To recreate this perfect environment at home, you should avoid using standard, heavy potting soil straight out of the bag. Standard potting soils are designed to hold onto water, which will quickly drown your rosemary’s delicate roots.
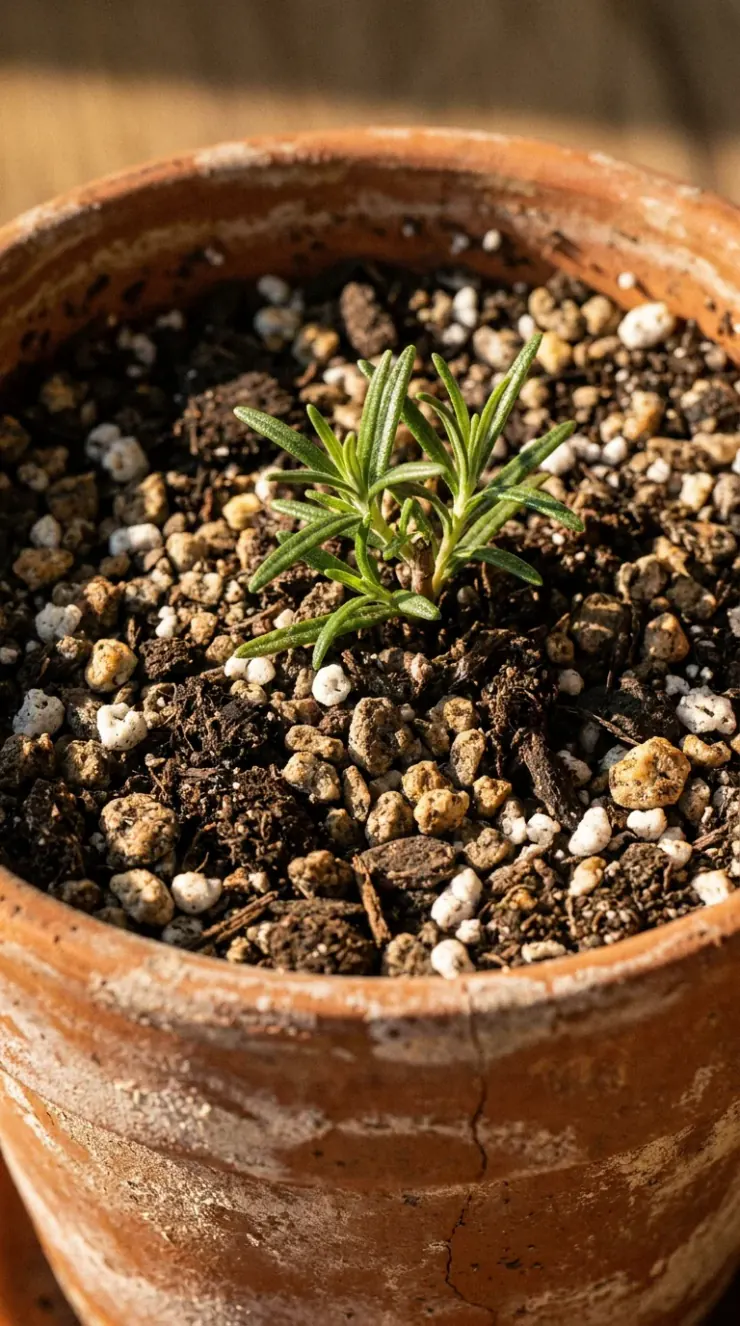
Instead, you can easily mix your own perfect soil blend by combining equal parts of regular potting soil and coarse horticultural grit, perlite, or sharp sand. This gritty mix creates lots of tiny air pockets in the soil, allowing water to flow through quickly and letting the roots breathe.
The Perfect Rosemary Soil Recipe:
- 50% High-Quality Organic Potting Soil (for basic nutrients)
- 30% Coarse Horticultural Grit or Sharp Sand (for rapid drainage)
- 20% Perlite or Vermiculite (for aeration and root breathability)
If you are planting your rosemary in the ground, you should check your garden’s soil type first. If you have heavy clay soil, it will trap water and make it very difficult for your rosemary to survive the winter.
You can improve clay soil by digging in lots of organic compost and coarse sand to break up the heavy clumps. Alternatively, many gardeners find that planting rosemary in raised beds or terracotta pots is the easiest way to control the soil quality and ensure perfect drainage.
Another detail to keep in mind is the soil’s pH level, which measures how acidic or alkaline your soil is. Rosemary prefers a neutral to slightly alkaline soil, with a pH level between 6.0 and 7.0.
If your soil is too acidic, you can add a small amount of garden lime to bring the pH up to a comfortable level. You do not need to worry too much about adding lots of rich fertilizers, as rosemary actually prefers soil that is relatively low in nutrients.
Strategic Garden Layout & Spacing Canvas
When you are planning your garden layout, it is highly beneficial to think about how your plants interact with each other and their environment. In permaculture, which is a way of designing gardens that copy natural ecosystems, we often use clever layouts like keyhole gardens or spiral herb beds.
These layouts are designed to maximize your space, save water, and make it easy to reach all your plants without stepping on the soil. Placing your rosemary in the right spot within these layouts will help it grow much better.
Because rosemary grows into a large, evergreen shrub over time, it makes a wonderful structural plant for the back of your herb beds. You can plant it in a sunny spot where it can act as a natural windbreak for more delicate herbs like basil or cilantro.
Giving your rosemary plenty of space is also crucial for its health. You should generally space your outdoor rosemary plants about two to three feet apart to ensure they get plenty of fresh air circulating through their leaves.

Companion planting tip: Plant your tomatoes near aromatic basil and golden marigolds to deter pests naturally and enhance yields!
Good air circulation is incredibly important for rosemary because it helps dry out the leaves after a heavy rain or a morning dew. If your plants are crowded too close together, the air can become stagnant, creating a perfect home for powdery mildew and other fungal diseases.
By using a thoughtful spacing layout, you can enjoy a beautiful, low-maintenance garden where every plant has the room it needs to shine.
Nutrient Optimization & Organic Feeding Guide
While rosemary is a very light feeder that thrives in poor soils, it still needs the right mix of organic nutrients to grow its best. In a natural garden ecosystem, we try to feed the soil rather than feeding the plant directly.
This approach is based on the soil food web, which is the beautiful community of earthworms, beneficial fungi, and tiny microbes that live underground. When you take care of these soil helpers, they will naturally break down nutrients and feed them to your rosemary in a gentle, steady way.
To keep your soil healthy, you should avoid using harsh chemical fertilizers, which can actually harm the beneficial microbes in your garden. Instead, a simple top-dressing of organic compost or slow-release worm castings in the spring is usually all your rosemary needs for the entire year.
Worm castings are incredibly rich in gentle nutrients and helpful microbes that improve the soil structure. Simply scatter a handful of compost around the base of your plant and gently scratch it into the top inch of soil.
Organic Feeding Schedule:
- Early Spring: Add a thin layer of organic compost or worm castings around the base.
- Late Spring: Apply a diluted seaweed liquid fertilizer to encourage strong root growth.
- Summer & Autumn: No fertilizer needed; let the plant harden off naturally.
If you want to give your young rosemary plants an extra boost during the growing season, you can use a liquid seaweed fertilizer. Seaweed fertilizer is packed with trace minerals and natural growth hormones that help plants build strong roots and resist stress from heat or drought.
You can dilute the seaweed extract in your watering can and apply it to the soil once every four to six weeks during the spring and summer. This gentle, organic approach will help your rosemary grow strong, aromatic leaves without making the stems weak or watery.

Ultimate Harvesting & Seasonal Blooms Rewards
One of the greatest joys of growing rosemary is the wonderful harvest you get to enjoy throughout the year. Because rosemary is an evergreen plant, you can technically harvest fresh leaves even in the middle of winter.
However, the leaves are generally packed with the most flavor and aromatic oils in the spring and summer, right before the plant begins to bloom. During this time, the warm sunshine coaxes the plant into producing high levels of essential oils, making the flavor incredibly rich and delicious.
When you harvest your rosemary, always use clean scissors and try to take just a few inches from the tips of the branches. This method acts like a mini-pruning session, encouraging the plant to grow even bushier.
You should try to avoid harvesting more than one-third of the plant at any one time, as taking too much can stress the herb and slow down its growth. If you want to dry your rosemary for long-term storage, you can tie the stems in small bundles with kitchen twine and hang them upside down in a warm, dry room.
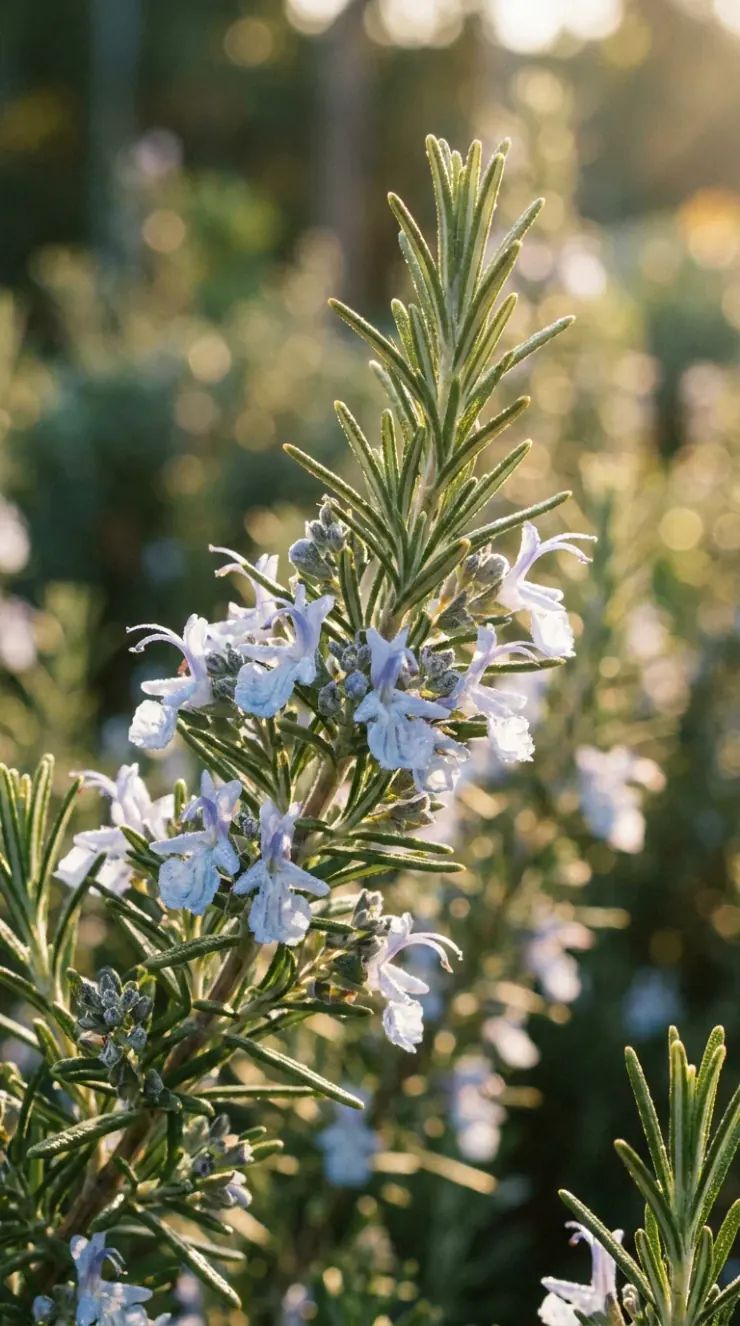
In the spring, your rosemary will reward you with a beautiful display of tiny, delicate flowers that range in color from pale blue to deep purple. These flowers are not only beautiful to look at, but they are also a lifesaving food source for local bees and other helpful pollinators.
Watching the busy bees visit your blooming rosemary on a warm spring morning is one of the most peaceful and rewarding experiences you can have in your backyard. By growing rosemary, you are creating a beautiful, fragrant sanctuary for both yourself and the wonderful creatures that share your garden.
Frequently Asked Questions
Q: Can you grow rosemary in water?
A: Yes, many gardeners find that you can root rosemary cuttings in a glass of clean water. You simply need to strip the lower leaves, place the bare stem in water, and change the water every few days until roots appear. However, transitioning water-rooted cuttings to soil can sometimes be tricky for beginners.
Q: How long does it take for rosemary cuttings to root?
A: In most cases, it takes about three to six weeks for rosemary cuttings to develop a strong root system. It often depends on the temperature of your room and how much humidity you can provide. Gentle bottom heat from a propagation mat can sometimes speed up the process.
Q: Why are my rosemary cuttings turning black?
A: If your cuttings are turning black and soft, it is usually a sign of too much moisture and poor drainage. This rot happens when the soil is kept soggy or if there is not enough fresh air circulating around the stems. To prevent this, make sure your soil mix has plenty of grit or perlite.
Q: Do I need rooting hormone for rosemary cuttings?
A: You do not absolutely need rooting hormone to grow rosemary from cuttings, but it can be highly helpful. Many gardeners find that using a rooting powder helps the stems grow roots much faster and more reliably. If you do not have any, you can still succeed by keeping your cuttings warm and humid.
Q: Can you grow rosemary indoors year-round?
A: Growing rosemary indoors can be quite challenging because homes are often too dark and dry for this sun-loving herb. If you want to keep rosemary indoors, you will generally need to place it in your sunniest window or use a bright grow light. You must also be very careful not to overwater it.
Q: How often should I water my new rosemary cuttings?
A: You should water your new cuttings just enough to keep the soil lightly damp, but never soggy. Before they have roots, the cuttings cannot absorb much water from the soil, so they rely on high humidity to stay hydrated. Mist the leaves with water and keep the soil barely moist to the touch.
