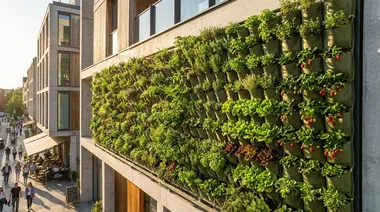
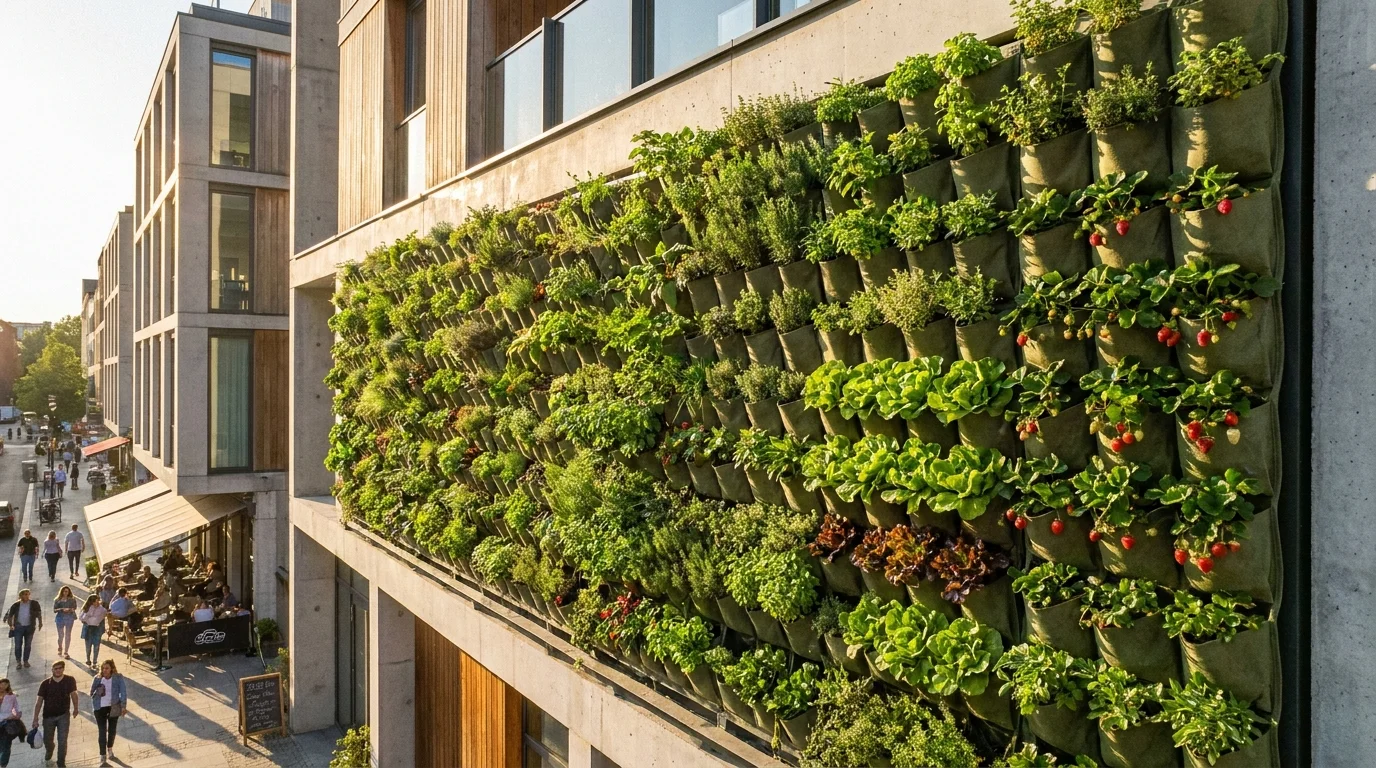
I built my first vertical garden because I ran out of floor space. It was that simple. My apartment balcony had every surface claimed — railing planters, tiered shelves, hanging baskets — and I still had six herb starts with nowhere to go. A friend handed me a piece of wooden pallet and said, put them on the wall. I did, and something changed. The wall went from blank to alive in two weeks, and I realized I had been thinking about garden space all wrong. I had been measuring in square feet when I should have been measuring in square feet times vertical feet.
Vertical gardening is not a trend for Instagram. It is a practical solution for anyone who wants more food from less ground space. A four-by-eight-foot wall can hold the same number of plants as a four-by-eight-foot garden bed — but it takes up zero floor space. For apartment dwellers, balcony gardeners, and anyone with limited yard, vertical gardens transform unused walls into productive growing surfaces.
This guide covers every vertical garden system available, from simple DIY pallet gardens to sophisticated living wall panels. You will learn which vegetables and herbs thrive vertically, how to build and install each system, and the watering, feeding, and maintenance routines that keep a vertical garden producing for years.
Quick Answer: To set up a vertical garden, choose a wall or fence that receives at least 4 to 6 hours of sun (or install grow lights), select a system based on your budget and skill level — wall pockets for beginners, trellises for climbers, or modular panels for a polished look — use lightweight potting mix in every container, install drip irrigation or water from the top daily in summer, and plant with compact, lightweight crops like lettuce, herbs, strawberries, and pole beans. Anchor all systems securely to wall studs or masonry to support the weight of wet soil.
At a Glance
| Fact | Details |
|---|---|
| Sun needed | 4 to 6 hours minimum, 6 to 8 for fruiting crops |
| Wall type | Sturdy drywall with studs, brick, masonry, or fence |
| Weight capacity | Must support 5 to 15 lbs per square foot when wet |
| Soil | Lightweight potting mix only — never garden soil |
| Watering | Top-down daily in summer, drip irrigation preferred |
| Best crops | Lettuce, herbs, strawberries, pole beans, compact peppers |
| Cost range | $20 DIY to $1,000 commercial systems |
| Difficulty | Beginner to intermediate depending on system |
Understanding Vertical Garden Systems
Vertical gardens fall into three categories: climbing systems where plants grow upward on supports, pocket and container systems where plants grow in wall-mounted receptacles, and modular panel systems that create a living wall. Each serves different needs, budgets, and aesthetic preferences.
Climbing Systems (Trellises, Arbors, and Netting)
The simplest vertical garden is a support structure that lets vining plants climb naturally. A trellis against a wall, an arbor over a doorway, or netting stretched between posts gives peas, beans, cucumbers, and small squash something to grab. The plants do the work — you just provide the scaffold.
Trellises work best outdoors against sunny walls or fences. They are inexpensive (bamboo and twine cost almost nothing), easy to install, and produce impressive yields in narrow spaces. A four-foot-wide trellis of pole beans can produce 5 to 8 pounds of beans per season from a footprint smaller than a doormat.
Pocket and Container Systems (Wall Planters, Pouches, and Pallets)
Pocket systems mount on walls and hold individual plants in fabric pockets, plastic containers, or repurposed materials. They create a dense, colorful display and work well for herbs, lettuce, strawberries, and small flowers. The key challenge is watering — top pockets dry faster than bottom ones, so even moisture distribution requires attention or drip irrigation.
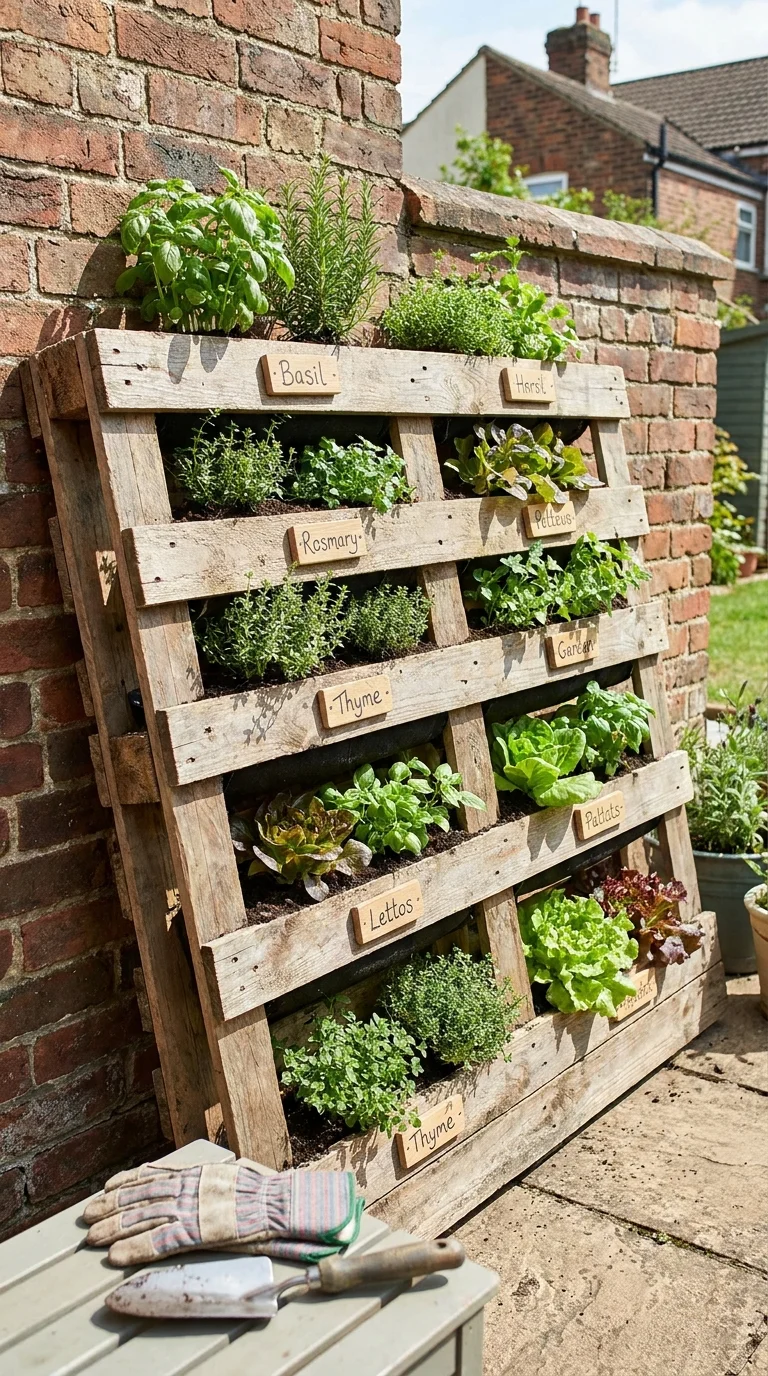
DIY pallet gardens are the most popular budget option. A wooden pallet stood on its end, lined with landscape fabric, and filled with potting mix creates dozens of planting pockets between the slats. They look rustic and charming, cost almost nothing, and produce abundantly when properly watered.
Modular Panel Systems (Living Walls)
Commercial living wall systems use interlocking panels with built-in planting cells and irrigation channels. They create a polished, professional look and automate much of the watering. Prices range from a few hundred dollars for a small panel to thousands for a full wall. These systems are the best investment for permanent installations on home exterior walls, garage walls, or fence panels.
Building a Vertical Garden — Step by Step
Step 1: Choose Your Location and Assess Sun
Vertical gardens need light just like ground gardens. South-facing walls get the most direct sun — ideal for tomatoes, peppers, and herbs. East-facing walls get gentle morning light suitable for lettuce and greens. North-facing walls work for shade-tolerant plants but not for sun-hungry crops.
Measure the wall space you intend to use. Mark stud locations if mounting on drywall — every anchor must hit a stud or masonry to support the weight of wet soil. A four-by-four-foot section is a good starting size. You can always expand later.
Track sun exposure for a full day before choosing your system. Mark the hours of direct sun on a piece of tape on the wall. Four hours is the minimum for most vegetables. Six to eight hours is ideal.
Step 2: Select Your System
For beginners, I recommend starting with a wall-mounted pocket planter or a simple trellis. Both are forgiving, inexpensive, and produce results quickly. If you want a permanent, polished installation, invest in a modular panel system with built-in irrigation.
Budget under $50: DIY pallet garden, fabric pocket planters, or bamboo trellis with netting.
Budget $50 to $200: Metal wall-mounted planter boxes, tiered pocket systems, or a sturdy wooden trellis with drip irrigation.
Budget $200 to $500: Modular panel systems with integrated irrigation, or a custom-built wooden frame with individual pot holders.
Budget $500+: Professional living wall systems with automated watering, or a large trellis structure with comprehensive drip irrigation.
Step 3: Prepare the Wall
Protect your wall before installing anything. Moisture from watering damages drywall, paint, and wood over time. Attach a moisture barrier — heavy-duty plastic sheeting or waterproof membrane — behind the garden area. For exterior walls, ensure the barrier does not trap moisture against the wall surface; leave ventilation gaps.
For trellises, attach eye hooks or mounting brackets to studs at the top and bottom of the trellis area. For pocket planters, use wall anchors rated for the weight of wet soil — at least 50 pounds per anchor point. For pallet gardens, lean the pallet against the wall at a slight angle or mount it with heavy-duty brackets, and secure the base to prevent tipping.
Step 4: Fill with Lightweight Potting Mix
Never use garden soil in a vertical garden. It compacts, drains poorly, and becomes impossibly heavy when wet. Use a lightweight potting mix containing peat moss or coco coir, perlite, and vermiculite. This combination holds moisture while remaining light enough for wall mounting.
For extra nutrition, mix in worm castings or compost at a ratio of one part amendments to four parts potting mix. This provides slow-release feeding without adding significant weight. Fill each pocket or container to within one inch of the rim — soil settles and expands when watered.
Step 5: Plant Strategically
Place sun-loving plants at the top of the vertical garden where they get the most light. Put shade-tolerant plants at the bottom where they receive less direct sun. This mimics natural forest layering and gives each plant the conditions it needs.
Plant densely in pockets — leafy greens and herbs look better and produce more when planted closely. Leave climbing plants room to grab supports. Stagger planting times so you have continuous harvests rather than everything maturing at once.
For companion planting guidance, see my companion planting chart for which plants grow well together.
Step 6: Install Irrigation
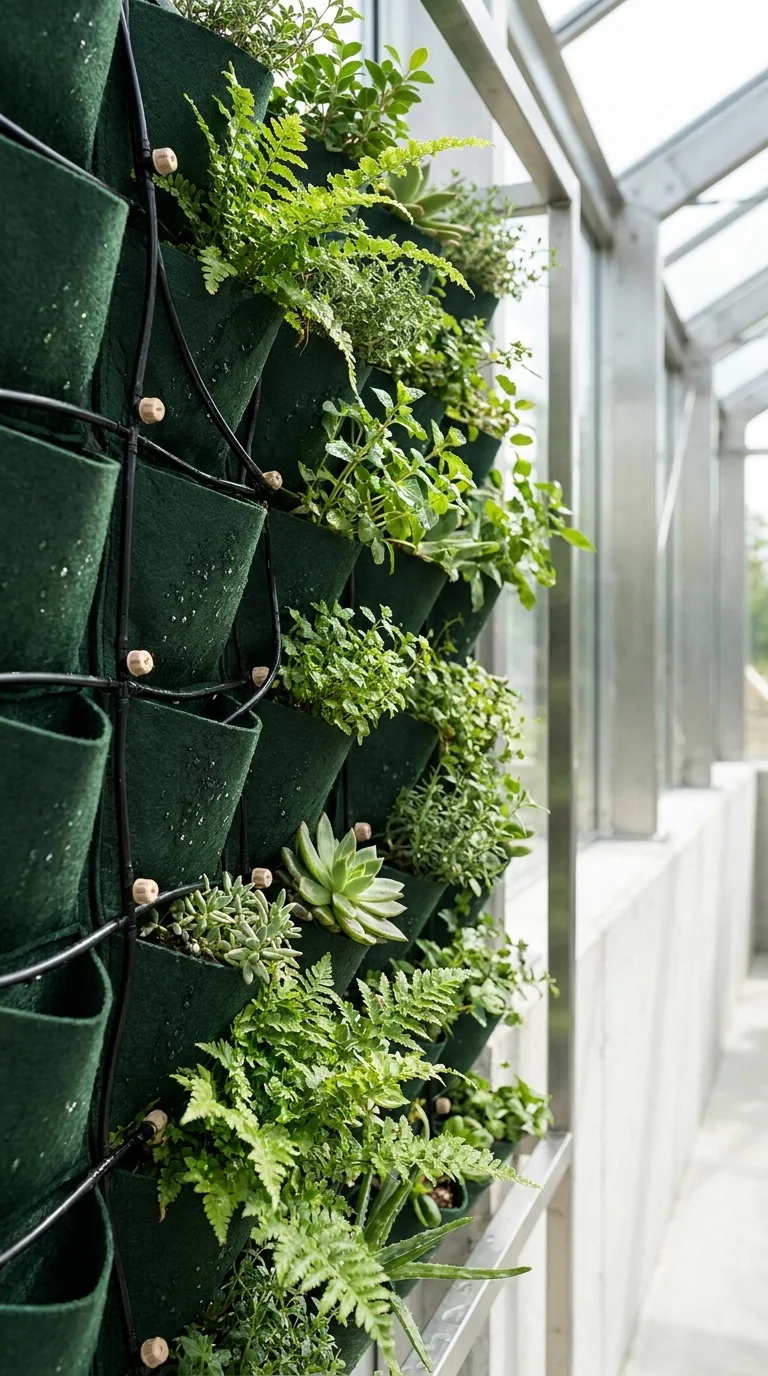
Watering is the biggest challenge in vertical gardens. Water poured at the top runs down and pools at the bottom, leaving top pockets dry and bottom pockets soggy. Drip irrigation solves this problem by delivering measured amounts of water to each level.
Run a main irrigation line vertically along the side of the garden with individual drip emitters or micro-sprayers at each pocket or container. Connect to a battery-operated timer for automated watering — set it for early morning, 5 to 10 minutes per level depending on container size.
For simpler setups, water each pocket individually with a watering can, starting from the bottom and working up. This takes more time but gives you direct control over moisture at each level. Check soil moisture at multiple heights daily — the top dries fastest.
Step 7: Maintain and Harvest
Vertical gardens need the same care as container gardens: regular watering, monthly feeding with diluted fertilizer, pest monitoring, and prompt harvesting. Harvest outer leaves of lettuce and herbs to keep plants producing. Pinch basil flowers to delay bolting. Remove dead or yellowed leaves promptly to prevent disease in the dense planting.
Feed with half-strength liquid fertilizer every 2 to 4 weeks during active growth. Vertical containers hold less soil than ground beds, so nutrients deplete faster. Refresh potting mix annually — remove plants, discard old mix, refill with fresh potting mix, and replant.
Best Vegetables and Herbs for Vertical Gardens
Top Performers in Pocket Systems
Lettuce is the undisputed king of vertical pocket gardens. Loose-leaf varieties grow beautifully in 6-inch pockets, produce continuously when harvested with the cut-and-come-again method, and tolerate the partial shade that lower pockets receive. Plant seeds directly in pockets and thin to 3 to 4 inches apart.
Herbs thrive in vertical pockets. Basil, parsley, cilantro, chives, thyme, and oregano all grow well in 6-inch containers. Plant basil at the top where it gets the most sun, and mint at the bottom where it can spread without invading other plants’ space.
Strawberries cascade beautifully from vertical pockets and produce fruit for years from the same plants. Alpine strawberries are compact and productive. Plant runners in pockets and let them trail downward for a dramatic, delicious display.
Radishes grow in just 4 to 6 inches of soil depth, making them perfect for shallow pockets. Plant seeds directly, thin to 2 inches apart, and harvest in 25 to 30 days. Succession-sow every two weeks for continuous supply.
Green onions regrow from scraps and produce in minimal soil depth. Plant sets 1 inch apart in pockets and harvest when tops reach 6 to 8 inches. They regrow from the same base repeatedly.
Top Performers on Trellises
Pole beans are the most productive vertical garden crop. One trellised row of pole beans produces two to three times the yield of bush beans in the same space. Plant seeds at the base of the trellis, thin to 6 inches apart, and harvest by snapping pods when they are 6 to 8 inches long.
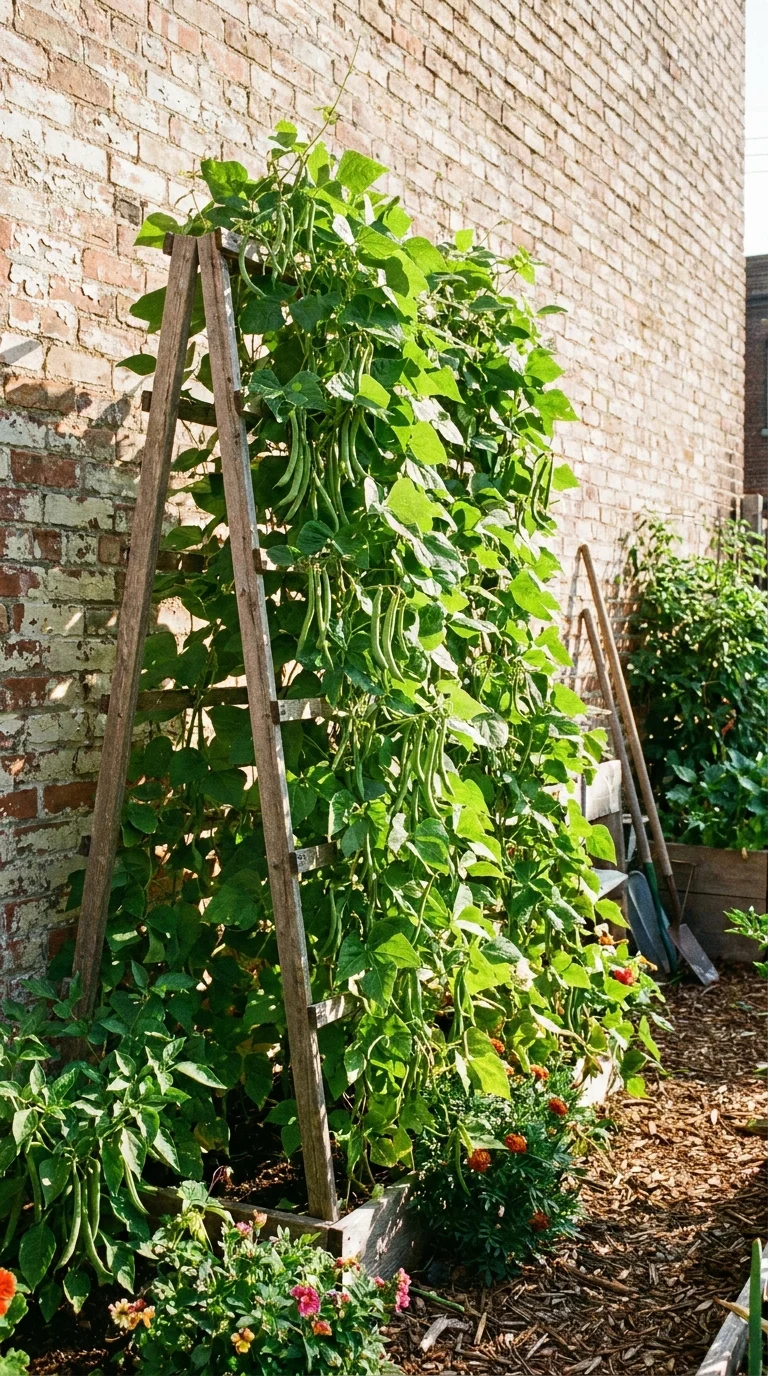
Peas climb eagerly on any support. Plant in early spring and fall when temperatures are cool — peas bolt in summer heat. Sugar snap and snow pea varieties produce edible pods that taste best picked fresh from the vine.
Small cucumbers like ‘Patio Snacker’ or ‘Spacemaster’ grow on compact vines suited to trellises. They need warm soil and consistent moisture. Harvest at 4 to 6 inches for the best flavor and texture.
Morning glories and nasturtiums climb readily and produce edible flowers. They add color and pollinator attraction to a vegetable vertical garden without competing for space with food crops.
DIY Vertical Garden Projects
The Pallet Garden
Find a heat-treated pallet (marked “HT” — avoid chemically treated pallets marked “MB”). Line the back and sides with landscape fabric, stapling securely. Stand the pallet on its end against a wall. Fill the gaps between slats with potting mix through the top openings. Plant herbs and lettuce in each gap. Water from the top and let gravity distribute moisture downward. This project costs under $20 and takes about two hours.
The Gutter Garden
Mount old rain gutters horizontally on a wall at staggered heights, 8 to 12 inches apart. Drill drainage holes every 6 inches along the bottom. Fill with potting mix and plant lettuce, herbs, or strawberries. Connect gutters with a vertical downspout section to channel excess water from upper gutters to lower ones. This system looks clean, modern, and produces impressive yields.
The Trellis Wall
Attach a wire mesh panel or wooden lattice to a wall with mounting brackets. Train climbing plants upward with soft ties. Add small pots at the base for herbs that benefit from the trellis’s shade. This creates a layered, living wall effect with minimal cost and maximum visual impact.
The Pocket Planter
Sew or buy fabric pockets from landscape fabric. Attach them to a plywood backing with staples or screws. Mount the backing on a wall with heavy-duty brackets. Fill each pocket with potting mix and plant individual herbs or small vegetables. The fabric breathes and drains naturally, preventing root rot.
For DIY building techniques, see my garden tools for beginners for the basic tools you will need.
Troubleshooting Vertical Garden Problems
Uneven Watering
Top pockets dry while bottom pockets stay soggy. Fix this by installing drip irrigation with individual emitters at each level. If using manual watering, water bottom pockets first, then work upward, giving each level a measured amount. Add water-retaining crystals to upper pockets to extend moisture between waterings.
Nutrient Deficiency
Vertical containers hold small volumes of soil that deplete quickly. Symptoms include pale leaves, slow growth, and poor fruiting. Feed with diluted liquid fertilizer every 2 to 4 weeks during active growth. Refresh potting mix annually to replenish nutrients and structure.
Weight and Structural Concerns
Wet soil is heavy. A pocket planter wall measuring four by four feet can weigh 100 to 200 pounds when saturated. Ensure wall anchors hit studs or masonry. For exterior walls, use lag bolts and mounting brackets rated for the load. If in doubt, consult a structural engineer before installing a large system.
Pest Pressure
Vertical gardens concentrate plants in a small area, which can spread pests quickly. Inspect plants weekly, especially leaf undersides. Remove affected leaves immediately. Encourage beneficial insects like ladybugs by planting flowers among vegetables. Use insecticidal soap for aphids and neem oil for fungal issues.
For detailed pest identification, see my garden pest identification guide for solutions.
Maintaining Your Vertical Garden Through the Seasons
Spring
Refresh potting mix, replant annuals, and prune perennial herbs back to encourage new growth. Check irrigation systems for clogs or leaks from winter. Start seeds indoors for warm-season crops that will transplant to the vertical garden after last frost.
Summer
Water daily or install drip irrigation on a timer. Harvest frequently to encourage continued production. Feed monthly with diluted fertilizer. Monitor for pests and disease in the dense planting. Replace spent lettuce plants with fresh transplants for continuous harvest.
Fall
Remove summer annuals and replace with cool-season crops like lettuce, spinach, and kale. Cut back perennial herbs and mulch the base of the vertical garden to protect roots over winter. Drain and store irrigation systems before freezing temperatures arrive.
Winter
In cold climates, vertical gardens on exterior walls go dormant. Protect perennial herbs with burlap wrapping or move container systems to a sheltered location. Indoor vertical gardens continue producing year-round with supplemental lighting. Use winter to plan next season’s planting and make any needed repairs or upgrades to the system.
Related Articles
- Indoor Vegetable Gardening
- Balcony Garden Ideas
- Vegetables to Grow in Containers
- How to Grow Lettuce
- How to Grow Basil at Home
- Best Garden Tools for Beginners
- Garden Pest Control for Beginners
Sources & References
- University of California Agriculture and Natural Resources — Vertical Gardening — https://anr.ucanr.edu/
- Missouri Botanical Garden — Living Walls — https://www.missouribotanicalgarden.org/
- Penn State Extension — Vertical Vegetable Gardening — https://extension.psu.edu/
- Iowa State University Extension — trellising Vegetables — https://hortnews.extension.iastate.edu/
- Royal Horticultural Society — Wall Training — https://www.rhs.org.uk/
