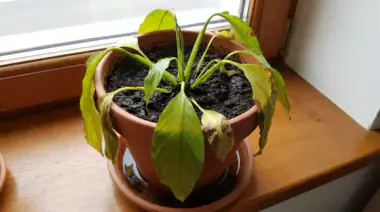
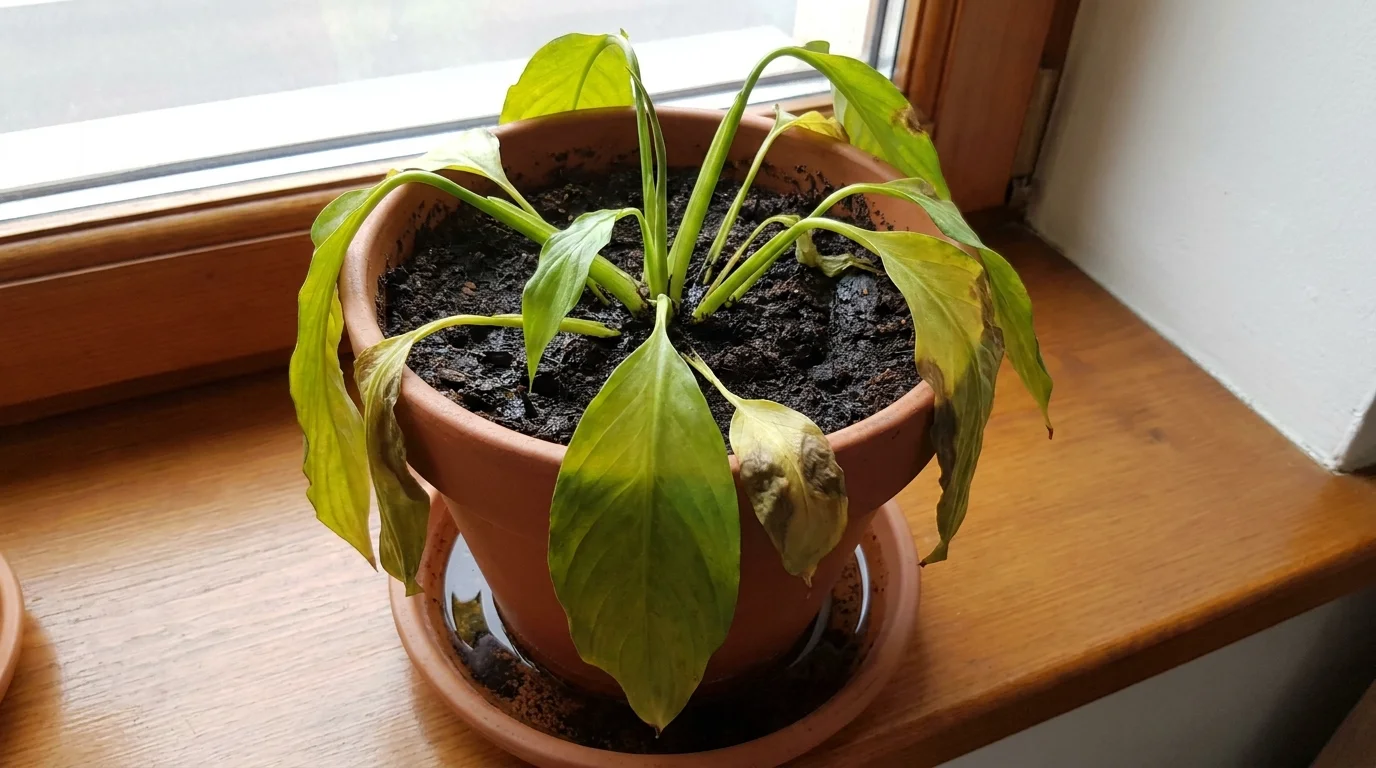
Overwatering kills more houseplants than any other mistake in plant care. It feels natural to show love with water, but plant roots need air every bit as much as they need moisture. When the soil stays soggy, the air in the root zone disappears, roots suffocate, rot sets in, and the plant slowly drowns - all while the leaves look like they are dying of thirst.
The good news is that most overwatered plants can be saved. The window of opportunity lasts from weeks to a couple of months, depending on the plant, and the rescue plan is a simple sequence you can do today with things you already own. This guide walks you through diagnosing overwatering, stabilizing your plant, rescuing roots, and building watering habits that prevent it from ever happening again.
Quick Answer: Act fast when you notice overwatering. Stop watering immediately, move the plant to bright indirect light, and let the soil dry out completely. For advanced cases, remove the plant, trim all black mushy roots, and repot in fresh well-draining soil. Then switch to the finger-test watering method - only water when the top inch or two of soil is dry.
Overwatering vs. Underwatering: Never Mix Them Up
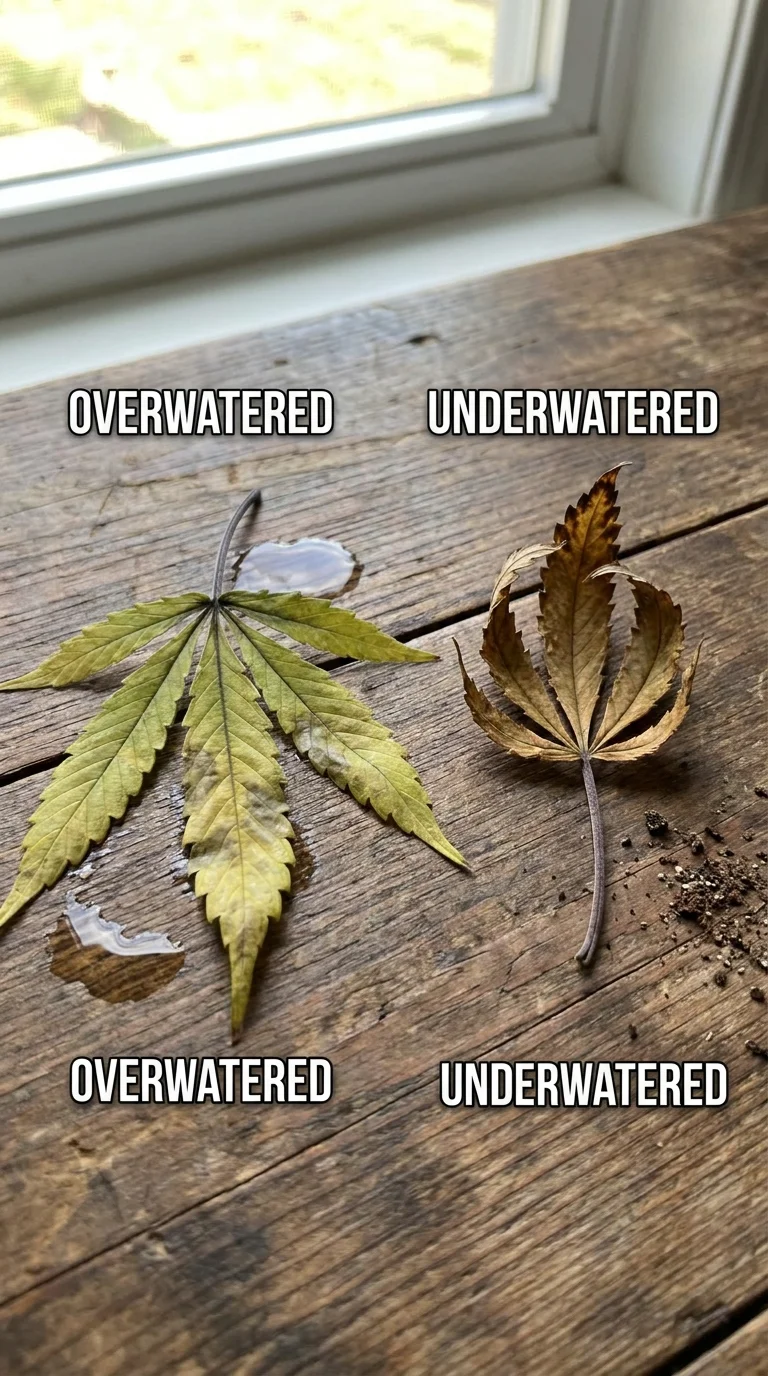
The first and most important diagnostic step is telling the two watering mistakes apart, because their fixes are exact opposites. Mistaking them is the fastest way to actually kill a plant that would otherwise survive.
| Symptom | Overwatered | Underwatered |
|---|---|---|
| Leaf texture | Soft, mushy, limp, droopy | Dry, crisp, papery |
| Leaf color | Pale yellow or light green, sometimes with brown spots | Brown edges, brown tips |
| Leaf curl | Leaves curl downward, look heavy | Leaves curl upward, look thirsty |
| Soil | Damp, soggy, mossy smell; may have mold | Dry, cracked, pulls away from pot walls |
| Pot weight | Heavy | Light |
| Stems | Mushy near the base, weak | Firm but wilted |
| New growth | Stunted or blackening | Slow but usually present |
The fastest check is the weight test: lift the pot. A saturated pot weighs noticeably more than a dry one. Combine it with the finger test - push your finger two inches into the soil. Wet and cold soil means overwatering. Dry, loose crumbles mean you are dealing with the opposite problem.
The 8 Most Common Causes of Overwatering
Overwatering is rarely a single careless pour. It is almost always a combination of habits and potting-details that trap water around the roots. If you understand the causes, you can fix the root of the problem - not just this incident.
1. Watering on a Fixed Schedule
Watering the same day every week regardless of what the plant needs is the number one cause of overwatering. Plant water demand changes with the season, temperature, light, growth rate, and pot size. A schedule that works in June drowns the same plant in December. Water by soil condition, never by calendar - more on this in our guide to watering houseplants.
2. Pots Without Drainage Holes
A decorative pot with no drainage makes every watering a lottery. Without holes, excess water has nowhere to go and sits on the roots indefinitely. If your pot has no holes, double-pot it: grow the plant in a plain nursery pot with drainage holes, and drop that pot inside the decorative one. Empty the outer pot after watering.
3. Heavy Soil That Holds Too Much Water
Garden soil and cheap dense potting mixes compact into a brick when wet, starving the roots of air. Good potting mix must drain freely - peat or coir for moisture, perlite and coarse grit for aeration. Replanting in the right mix (covered in our potting mix vs garden soil guide) resolves a surprising number of “unfixable” plants.
4. Too-Big Pots
A pot much larger than the root ball holds far more soil than the roots can dry out, keeping the root zone soggy for weeks. The general rule: upgrade only one to two inches larger in diameter at a time, and leave it there until roots reach the pot walls.
5. Stale Water in the Catch Tray
Leaving the saucer permanently full keeps the bottom of the pot wet forever. After watering, wait twenty minutes and empty any standing water in the tray. For outdoor plants, confirm the garden bed drains - our soil preparation guide covers drainage fixes for beds.
6. Low Light and Cool Temperatures
A plant in a dark corner drinks much less. Light drives photosynthesis, which drives water uptake. Low light plus generous watering equals soggy soil that never dries, which is why so many plants struggle in dark rooms. Match watering to the light the plant actually receives.
7. Seasonal Overwatering
Plants grow slowly or not at all in winter and use a fraction of the water they need in summer. Watering summer-style in winter is a classic way to drown a plant. Reduce frequency, and always check soil before watering during the cold months.
8. Overwatering “Helpers”
Misting leaves, ice cube watering gimmicks, and automatic watering bulbs often add moisture faster than plants use it. They are not substitutes for checking the soil. If you use any watering gadget, verify moisture by hand first.
What Actually Happens When Roots Drown - The Root Rot Chain
Understanding what happens underground turns confusion into action. When soil stays saturated for days, the sequence is predictable:
- Air disappears. Water fills every pore between soil particles. Roots need oxygen for the cellular processes that absorb nutrients and grow.
- Roots suffocate. Oxygen-starved roots stop absorbing water and nutrients properly, then begin to die from the tips.
- Rot organisms move in. Dead tissue invites fungi and bacteria - the organisms behind root rot. They spread up the root system, converting healthy white roots to brown-black mush.
- The plant dehydrates. Ironically, a drowning plant looks like a thirsty one. Damaged roots cannot deliver water to the leaves, so leaves wilt, yellow, and curl even while the pot is full of water.
- Toxins build up. Rotting roots produce gases and compounds that further poison the soil. By this stage the pot often smells sour or swampy.
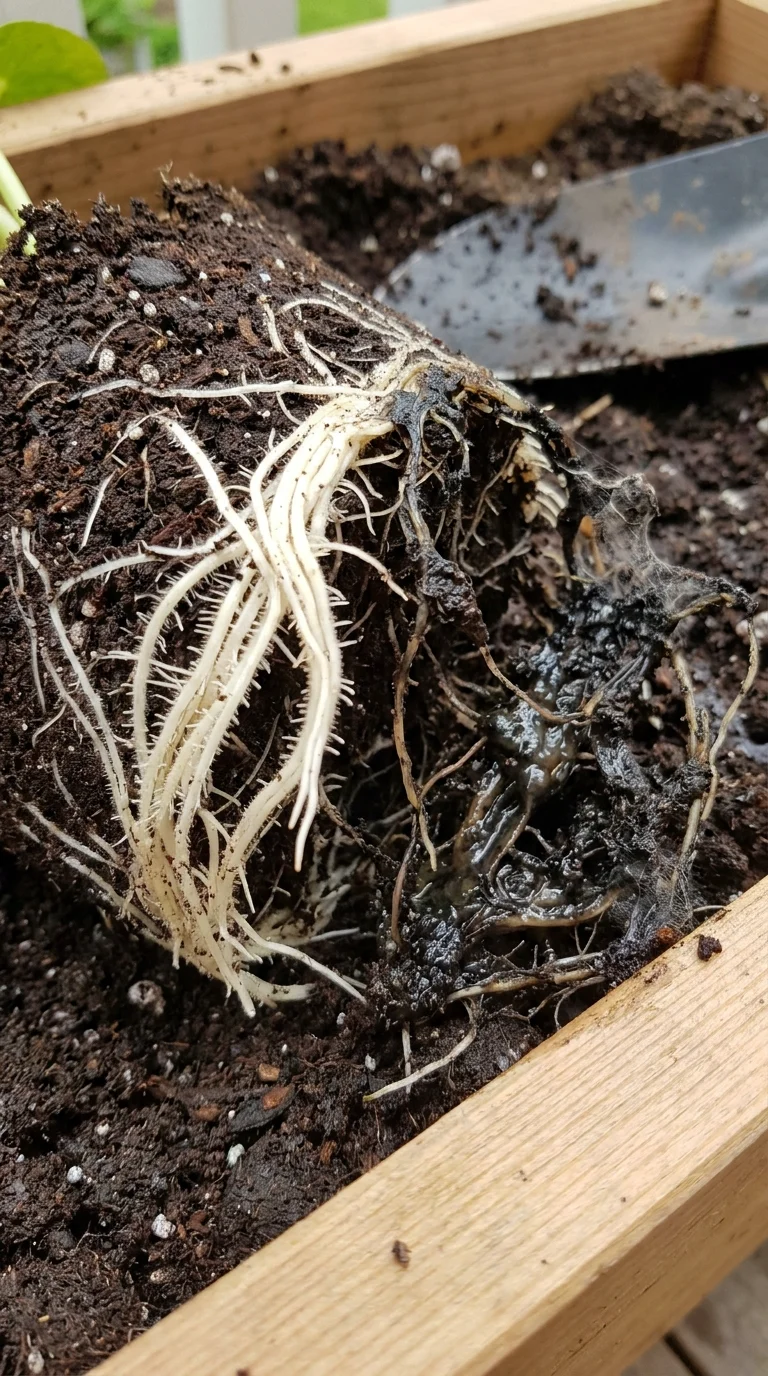
This chain explains why an overwatered plant’s leaves wilt “even though it has plenty of water” - the plumbing is broken, not the supply. It also explains the rescue priorities: restore air, remove rot, fix the drainage.
Step 1 - Diagnose the Damage Severity
Before rescuing, determine how far along the problem is. This decides whether you can simply dry the plant out or whether you need surgery.
Mild case (can usually recover with drying):
- Soil wet but not swampy; only lower leaves yellow.
- Plant still shows some firm leaves and one or two healthy roots if you probe.
- No foul smell from the pot.
Moderate case (drying may still work; stay alert):
- Several leaves yellow or soft, visible wilting despite wet soil.
- Top inch of soil dry but two inches down is cold and soggy.
- Some leaves have dark water-soaked patches.
Severe case (repotting required):
- Stems mushy at the base, leaves collapsing, mold on the soil surface.
- Pot smells rotten or swampy.
- Many leaves fall off at a light touch.
If you are dealing with the severe case, skip the drying-out phase and go straight to Step 3’s repotting surgery. Any delay multiplies the rot.
Step 2 - The Drying-Out Rescue (Mild to Moderate Cases)
For mild and moderate overwatering, the goal is simple: return oxygen to the root zone as gently and quickly as possible, without the shock of repotting.
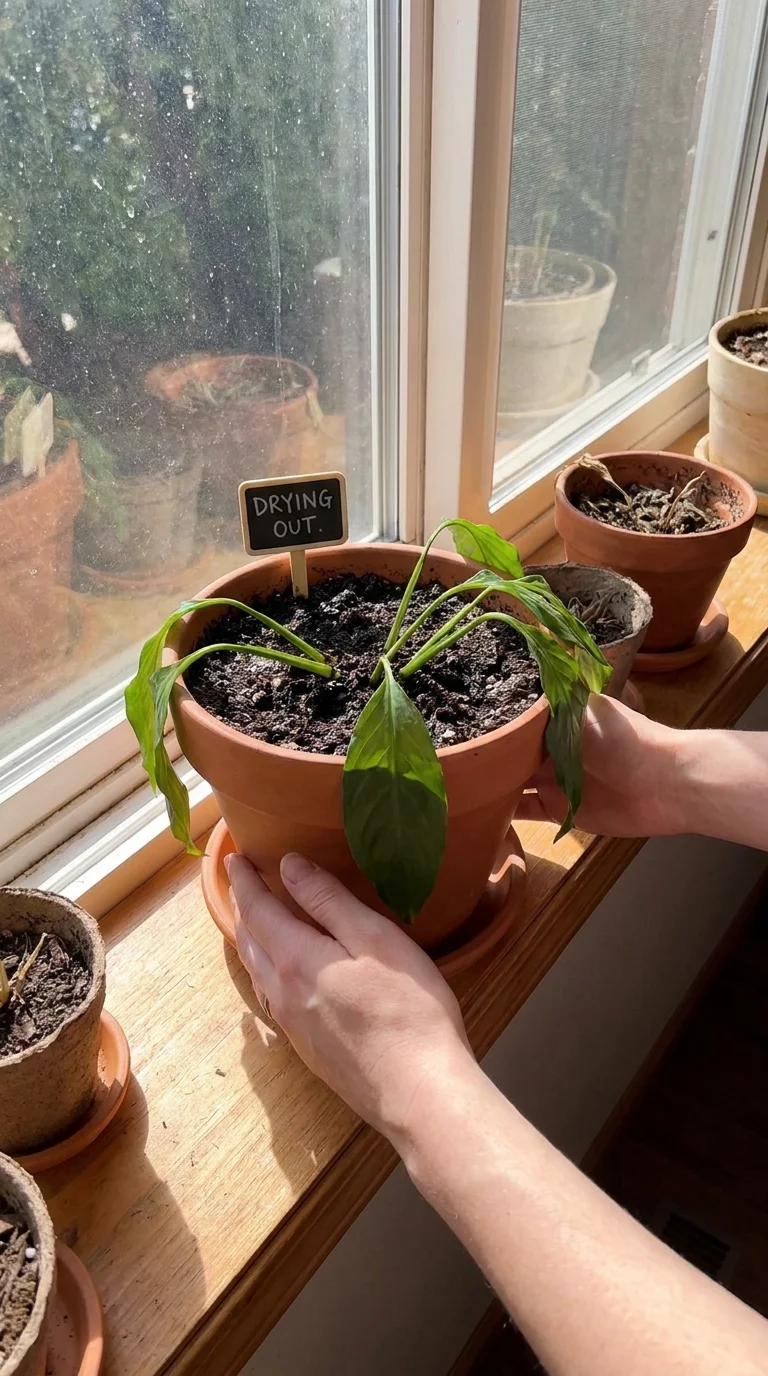
- Stop watering immediately. Do not water again until the soil is dry at least two inches down - this can take one to three weeks. Resist the urge to “help” with a splash; it resets the clock.
- Move the plant to brighter indirect light. More light increases transpiration, pulling water out of the soil through the leaves. Avoid hot direct sun on a stressed plant.
- Improve airflow. Place the pot near a fan on low or a window with a breeze. Moving air dries the soil surface and discourages mold.
- Increase temperature slightly if possible. A warmer room (without cooking the plant) speeds drying.
- Break up compacted topsoil. Gently scratch the surface inch of soil with a fork to let air reach the roots. Do not dig deeper - you can damage young roots.
- Remove the worst leaves. Snip off fully yellow or mushy leaves near the stem. Every dead leaf wastes plant energy. Leave slightly yellow leaves - they are still contributing.
- Empty the catch tray now and forever. Any standing water must go.
- Poke holes with a chopstick. Gently work holes down into the soil along the pot’s inner edge to create air channels. Do this only when the soil has partly dried to avoid damaging wet roots.
During the drying period, monitor twice a week: check soil moisture, sniff for rot, and watch for new growth as the true sign of recovery.
Step 3 - The Repotting Rescue (Moderate to Severe Cases)
When roots are actively rotting, drying alone will not save the plant - the rot organisms need to be physically removed. Repotting is stressful, but it is the only way to stop the decay.
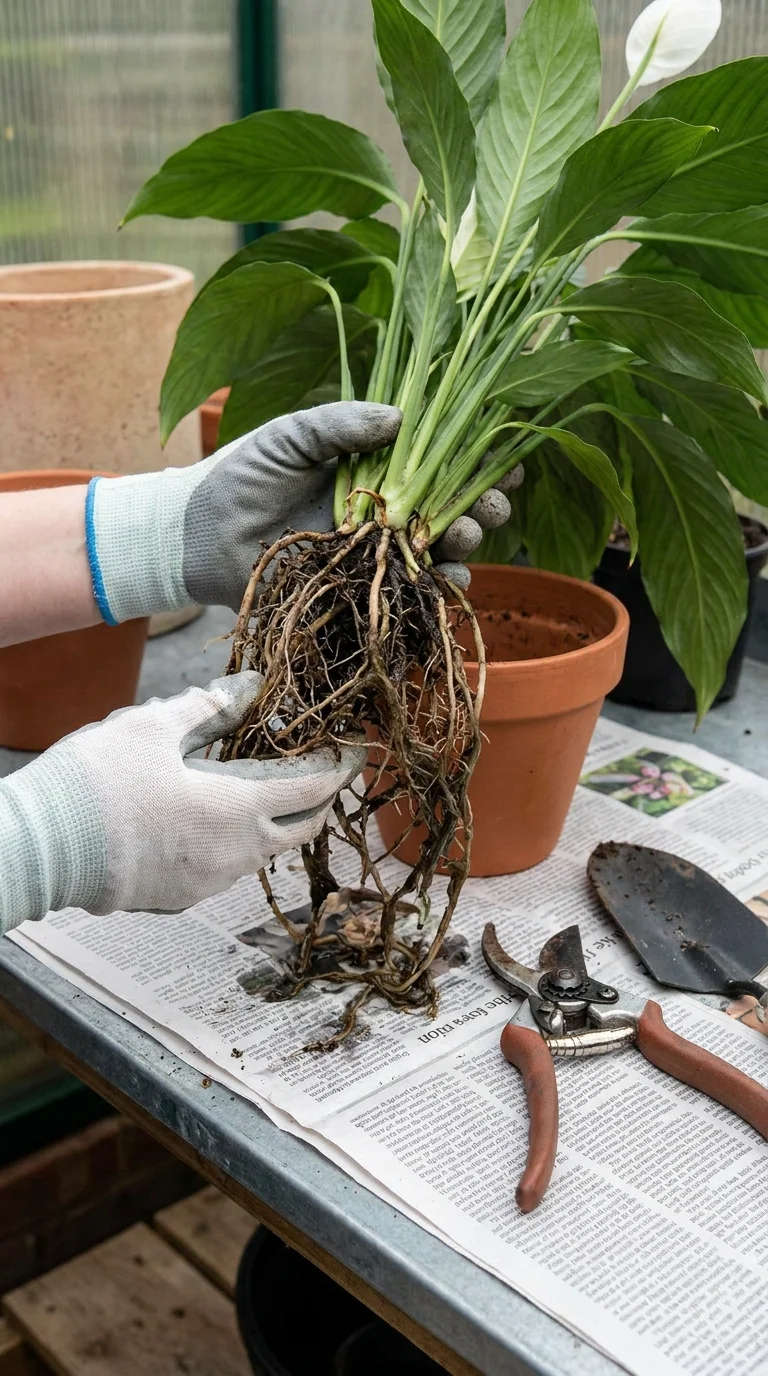
What You Need
- Fresh, well-draining potting mix (add extra perlite for this plant).
- A clean pot with drainage holes, roughly the same size as the current one - a smaller pot is better than a bigger one now.
- Clean, sharp scissors or pruning shears, sterilized with rubbing alcohol.
- Rubber gloves, and a work area you can rinse.
The Surgery Steps
- Slide the plant out of its pot. Gently tip the pot and ease the root ball out. If it resists, don’t yank - run a knife around the inside edge first.
- Shake away all old soil. Remove as much saturated mix from the roots as possible under running water or by gentle shaking. The old soil is infected, so do not compost it.
- Inspect the roots. Healthy roots are firm, white or cream. Rotten roots are dark, mushy, slimy, and pull apart easily.
- Trim the rot. With sterilized scissors, cut away every soft, black, or brown root back to clean tissue. When in doubt, cut it out - a smaller healthy root system beats a large rotting one. Rinse the scissors between cuts.
- Rinse the survivors. Wash the remaining roots with cool water to remove any lingering rot particles and fungal spores.
- Tease the root ball open slightly if it is densely bound, to encourage new roots to spread.
- Repot in fresh mix. Add a layer of mix, position the plant at its original depth, and fill around the roots. Do not pack the soil down hard - you want air pockets, not cement.
- Wait to water. Here is the hardest part: do not water the freshly repotted plant for several days to a week. The trimmed roots cannot drink anyway, and the dry fresh mix gives them time to heal. Water only when the top two inches go dry.
- Keep the pot somewhere bright but not sun-blazing. The plant is recovering, not sunbathing.
Remember the golden rules of repotting - our guide to repotting indoor plants has the full companion details, including potting depth and drainage layering.
Step 4 - Care During the Recovery Weeks
After either rescue path, the next three to four weeks are the recovery window. Everything you do in this phase accelerates - or reverses - healing.
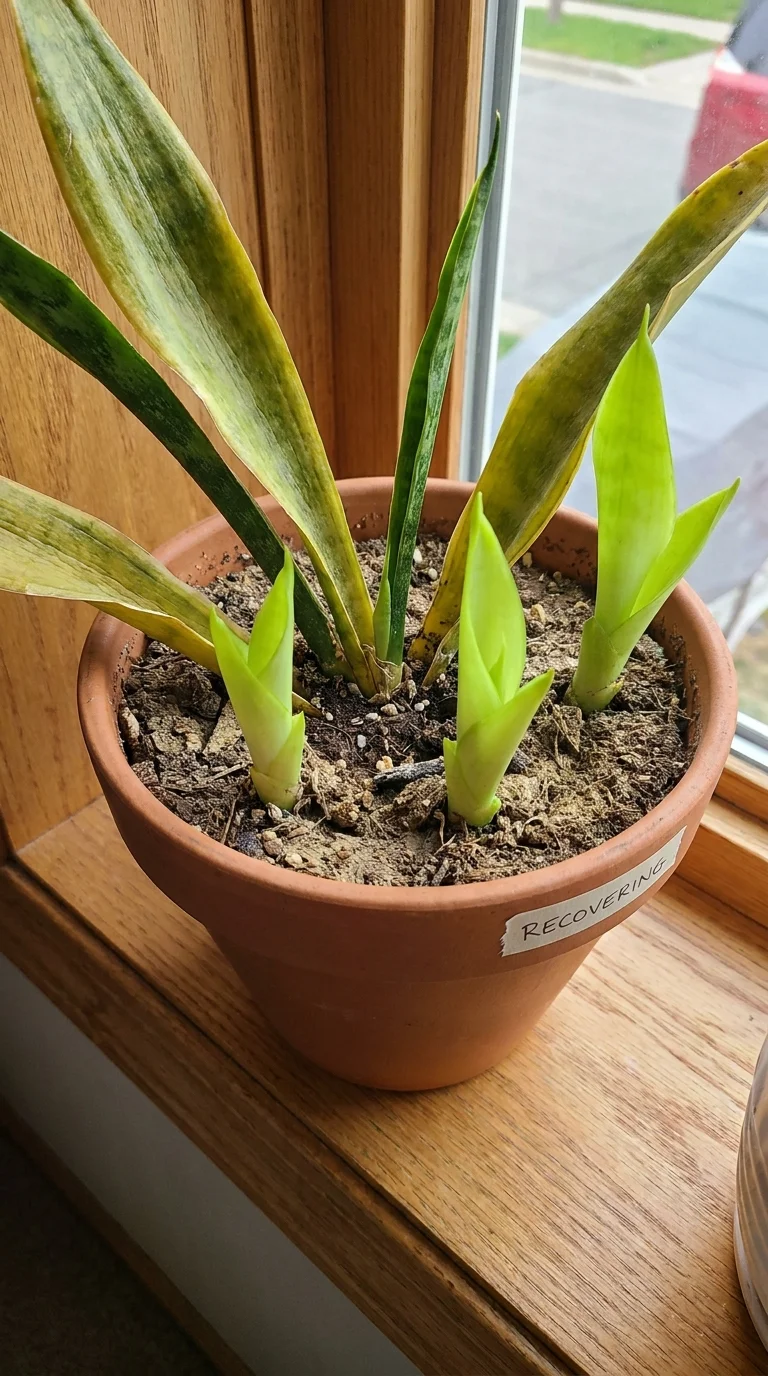
- Water only by soil check. Before any watering, verify dryness with your finger. This is the single most powerful habit you can adopt; it makes overwatering physically impossible.
- Wait for new growth before resuming fertilizer. Yellows and mush might be nutrient issues, but during recovery the plant cannot handle fertilizer salts. Wait until you see fresh green leaves, then start with half-strength feeding.
- Remove fallen and drying leaves promptly. Decaying leaves in the pot invite mold and pests.
- Watch for pests. Stressed plants attract fungus gnats (our fungus gnat guide becomes relevant) and mealybugs. Check under leaves weekly.
- Be patient with appearance. Leaves that were yellowed will not turn green again; they will drop. Do not interpret their fall as failure - new growth is the only metric that matters.
- Stake droopy stems gently. If the plant is top-heavy or stems flop, insert a slim stake to keep leaves in light.
Your plant is recovering when you see: firm new leaves unfurling, roots peeking from drainage holes in healthy white, no new yellowing for two weeks, and soil that dries normally between waterings.
Plants That Forgive Overwatering - and Plants That Do Not
Recovery odds depend heavily on the species. Some plants shrug off soggy spells; others die within days of wet feet.
| Plant type | Tolerance | Typical recovery time |
|---|---|---|
| Peace lily, pothos, spider plant | High | 1–2 weeks with drying |
| Snake plant, ZZ plant, succulents | Low (rot fast) | Rarely survive advanced rot |
| Monstera, philodendron | Medium | 2–3 weeks |
| Ferns (Boston, maidenhair) | Medium-low | Sensitive to root loss |
| Herbs in pots (basil, mint) | Low | Reseed if rotted |
| Seedlings and young transplants | Very low | Usually beyond saving |
For succulents and snake plants, rot spreads at alarming speed - treat them with the aggressive repotting path at the first sign of mushy stems. For the forgiving houseplants listed first, the gentle drying path usually works, which is likely why our best low-maintenance indoor plants list is packed with drought-tolerant survivors.
The Permanent Fix: Watering Habits That End Overwatering
Rescuing a plant is a one-time battle; winning the war is about routine. These five habits make overwatering impossible without any gadgets.
Habit 1: Use the Finger Test, Always
The gold standard. Push your finger into the soil to the second knuckle (about two inches). Water only when that depth is dry. For small pots, use the weight test: the pot should feel noticeably lighter when thirsty.
Habit 2: Water Thoroughly but Infrequently
When you do water, water until it runs freely from the drainage holes - this flushes salts and wets the entire root zone. Then let the pot dry out fully before the next watering. Deep, occasional watering beats frequent, shallow watering every time.
Habit 3: Match Watering to the Season
In spring and summer, active growth means more frequent watering and occasional feeding. In fall and winter, most plants slow down and must be watered far less. When in doubt in winter, wait - under-watering in December is almost always safer than overwatering.
Habit 4: Choose the Right Pot and Soil
Drainage holes are non-negotiable, and pot size should match the root ball. Use a light, free-draining mix with perlite or coarse grit. If your current plant sits in boggy soil, the potting mix vs garden soil guide tells you exactly what to buy.
Habit 5: Diagnose Before You Water
A yellowing leaf could mean overwatering, underwatering, or nutrient issues. Before reaching for the watering can, check our guide to fixing yellow leaves and common plant problems - the diagnosis habit saves more plants than any technique.
When Is It Too Late? Honest End-of-Life Signs
Some plants simply cannot be saved, and no amount of hope changes the outcome. Learning to recognize the end saves you weeks of frustration - and possibly an unhealthy plant hanging around your other ones.
- The stem base is black and completely mushy - the rot has reached the main trunk or crown.
- All roots are dark and collapse when squeezed - with no healthy white tissue, there is nothing left to regrow from.
- The entire plant reeks of rot even after drying.
- No improvement after four to six weeks of proper rescue care.
- The leaves curl, dull, and fall in waves while the stem softens further.
If any of these apply, compost the plant, sterilize the pot with diluted bleach, and start fresh with healthy, well-draining soil. There is no shame in it - every experienced gardener has buried a few. The important thing is that your watering system changes, so the next plant thrives. Check out common plant problems for a full picture of future plant ailments before they strike.
Frequently Asked Questions
What is the fastest way to dry out an overwatered plant?
Remove it from the pot entirely if you can do so gently, lay the root ball on newspaper in a bright airy spot for a few hours, then repot in fresh dry mix. This accelerates drying dramatically compared to drying in place. For mild cases, the chopstick aeration holes plus airflow are enough.
Do yellow leaves mean too much or too little water?
Either, depending on the pattern. Overwatering produces soft, pale yellow leaves across the plant with limp stems. Underwatering causes crispy brown tips and edges, and leaves curling upward. Always feel the soil before deciding - the soil tells the truth while leaves can mislead you.
Can I save a plant with root rot using hydrogen peroxide?
Yes, as a supplementary treatment. Water the soil with a mix of one part 3% hydrogen peroxide to four parts water after repotting. It adds oxygen to the soil and helps kill lingering rot organisms on contact. Use it once or twice during recovery, but it does not replace removing the rotten roots.
My plant is wilting and the soil is wet - should I water it?
Definitely not. Wet soil plus wilting is the classic overwatering signature. The roots cannot take up water and need time to recover. Kill the urge to water and follow the drying-out steps. Watering a soggy, wilting plant is the single most common way to finish the job the overwatering started.
How often should I water indoor plants, really?
There is no universal frequency. As a starting rule: most common houseplants want water every 7–14 days in summer and every 14–21 days in winter - but only when the top two inches of soil are actually dry. Light, temperature, pot size, and plant type change everything, so the finger test always wins over any schedule.
